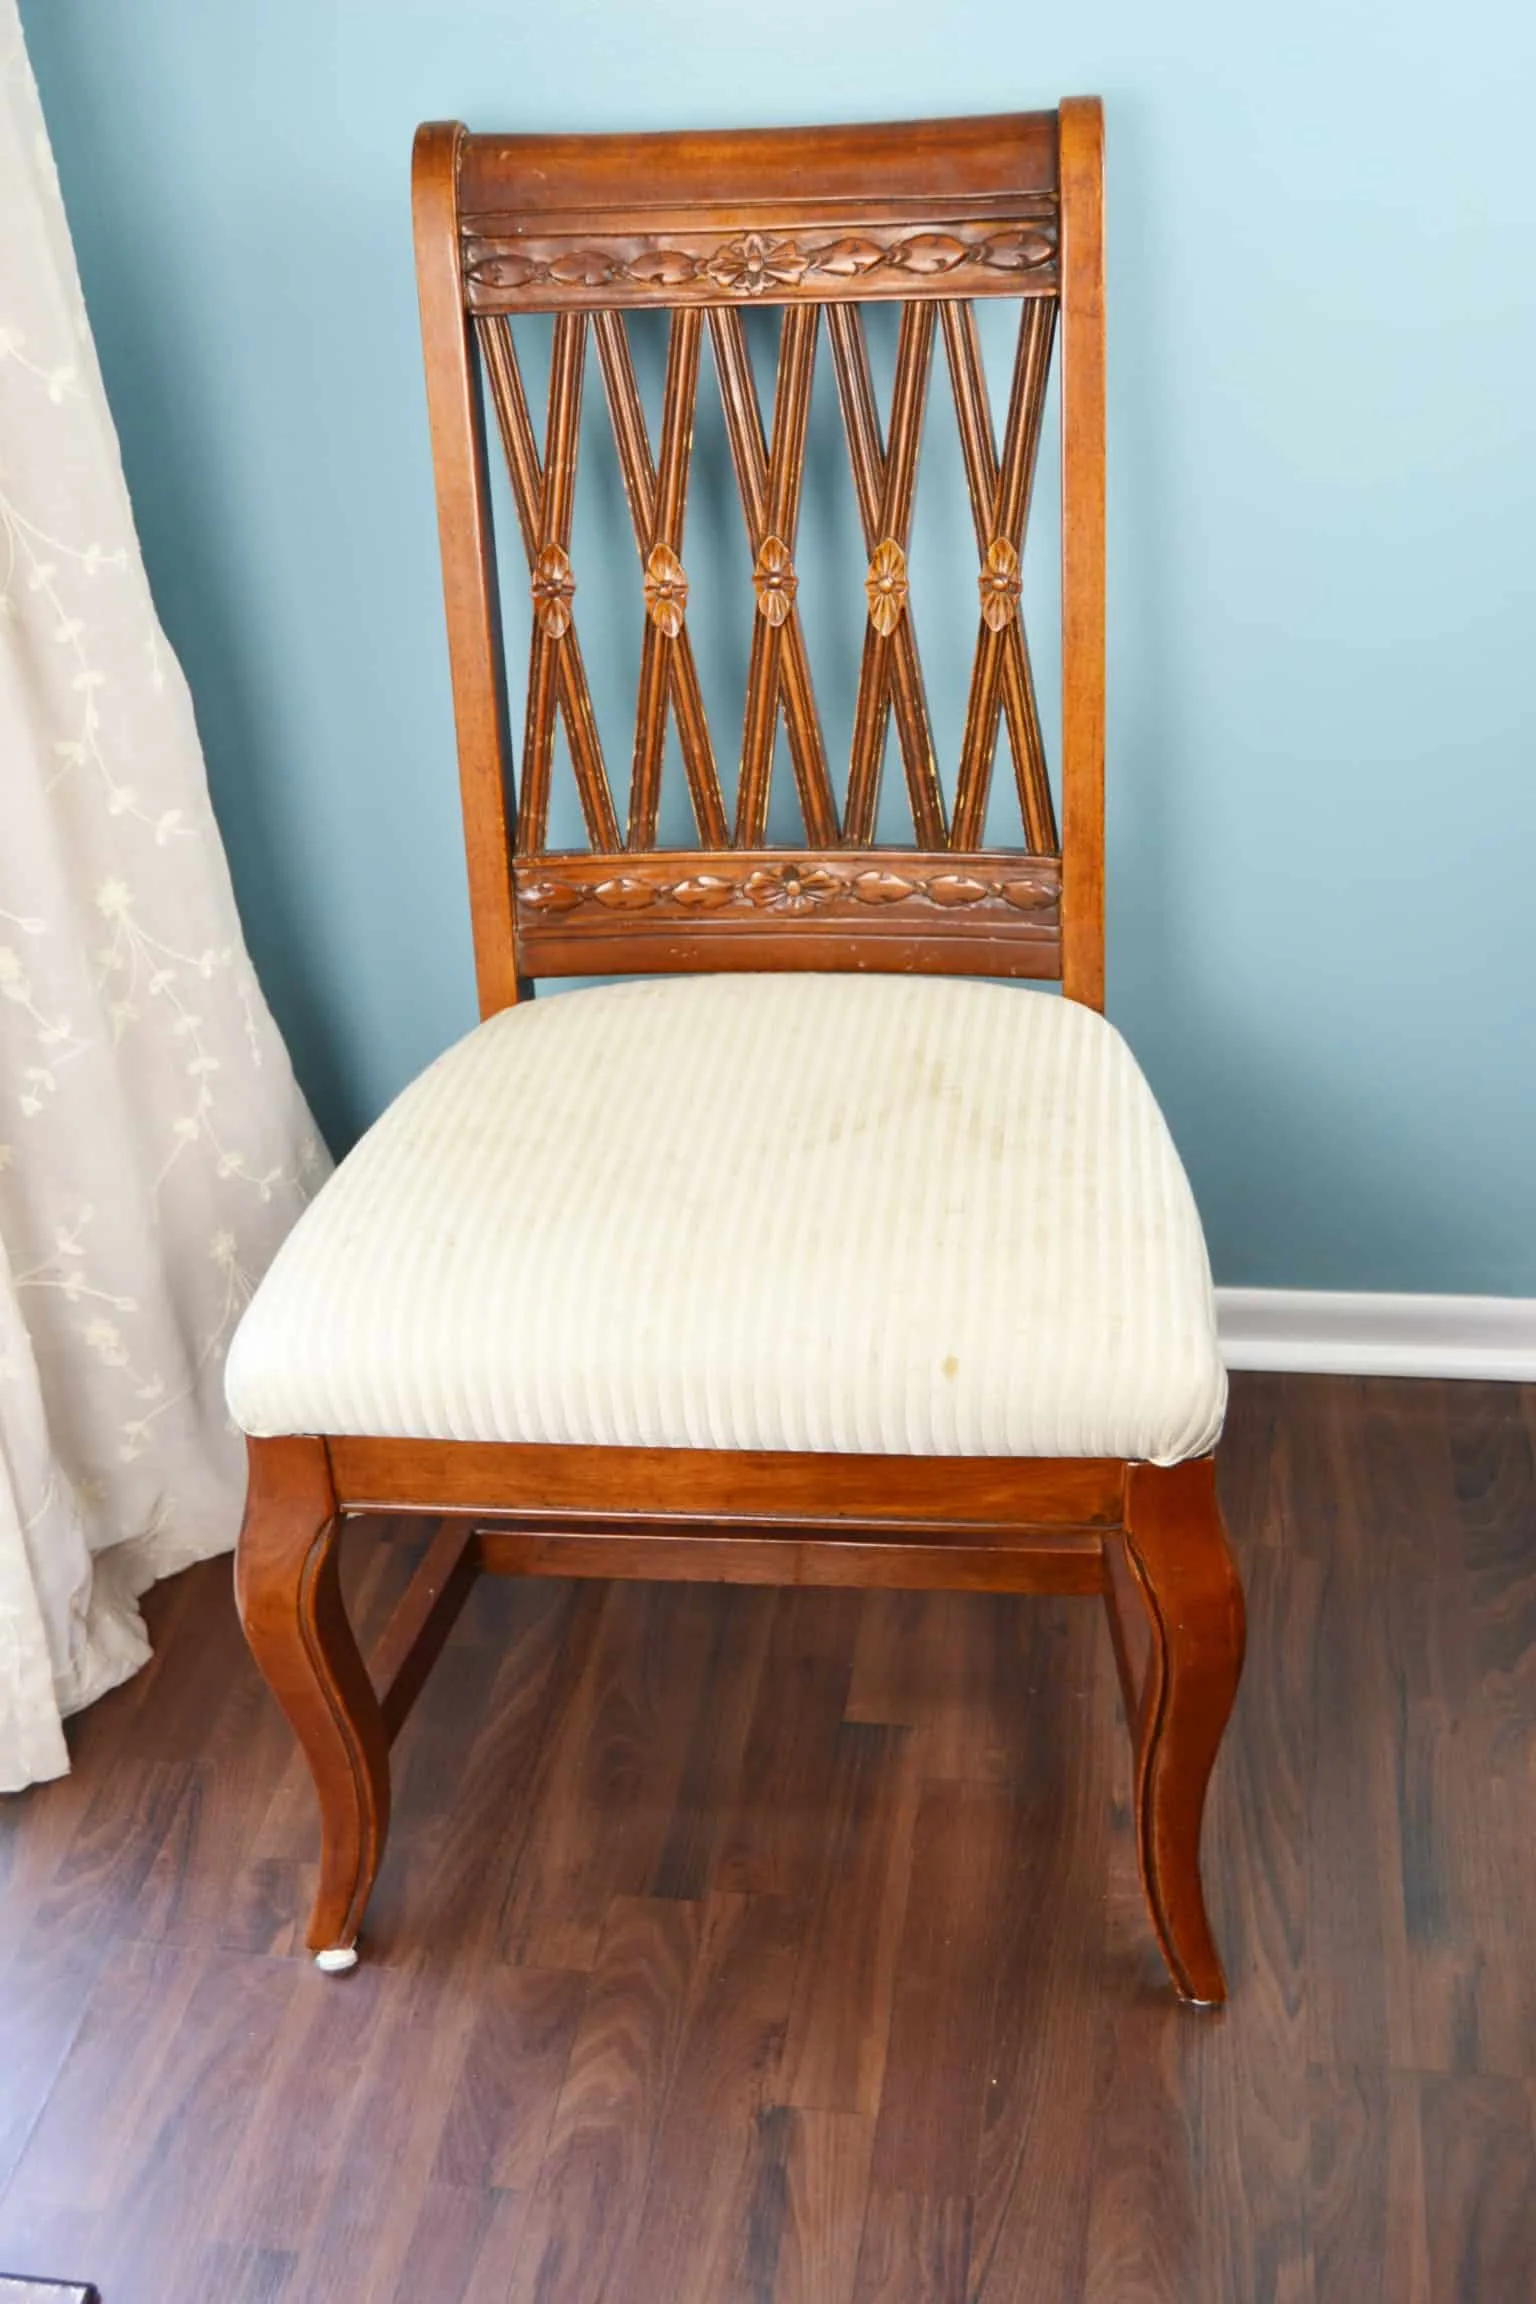
A few months ago my husband and I spotted some dinning room chairs at the curb of a house nearby. The fabric on the cushions was stained and the chairs had some scratches but overall they were really solid and there were six of them so I made the trip back and forth a few times and brought them all home. I just got around to fixing them up and today I’m sharing with you all how to reupholster a dinning room chair.


Now I’m not sure that this is the final iteration of these chairs. I’m thinking that I will eventually paint them and I may change out the fabric on the cushions again. I was initially hoping to use some fabric that was a little more gray but this blue upholstery fabric was reduced down from about $25 a yard to $5 a yard and I had a 20% off coupon on top of that so I got the 2.5 yards I needed for about $11 including tax.
The walls in my kitchen are blue so I feel like it’s a little too much blue in the kitchen but having the fabric only cost $11 for all 6 chairs means that we can go ahead and put the chairs to good use and later when I’m ready to repaint them and possibly get a new, bigger table then I will invest in a fabric that I really love and intend to stick with for the long term. So let’s get to how I made the quick makeover!
How to Reupholster a Dinning Room Chair
Supplies Needed:
- new upholstery fabric
- screwdriver
- pliers or staple remover
- staple gun and staples
- rotary cutting mat and rotary cutter (or scissors)
- fabric protector
- optional (new foam if you want to replace the old foam)


Step 1: Remove the cushion. Flip your chair over so that it’s upside down. Looking at the bottom you should see holes for the screws that attach the cushion to the chair frame. I circled mine below. Unscrew these and put them somewhere safe.
Step 2: Take this time to give the chair frame (the wooden part) a good cleaning. This would also be the time to paint it if you want to.

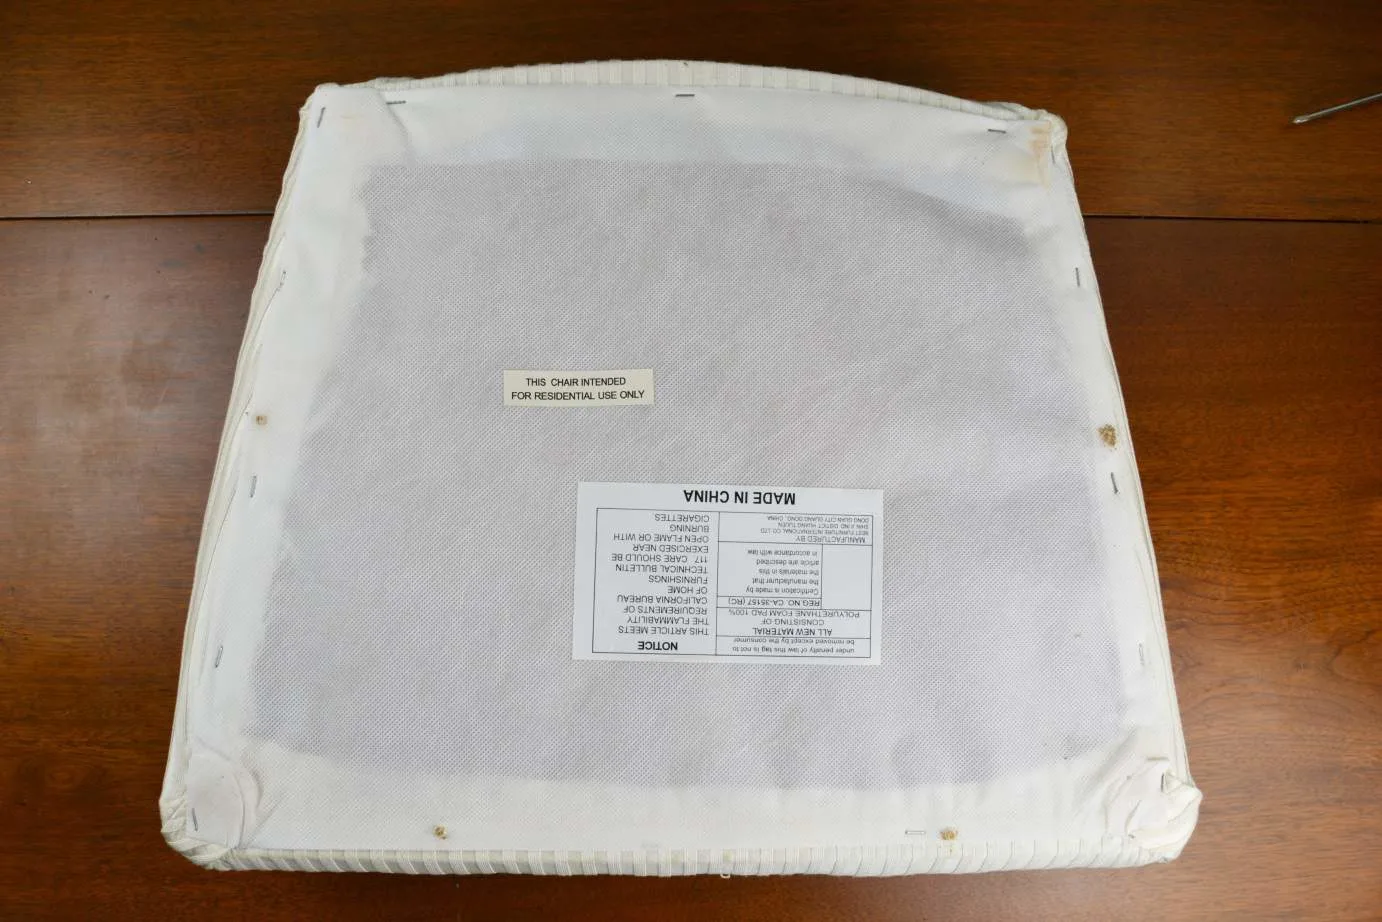
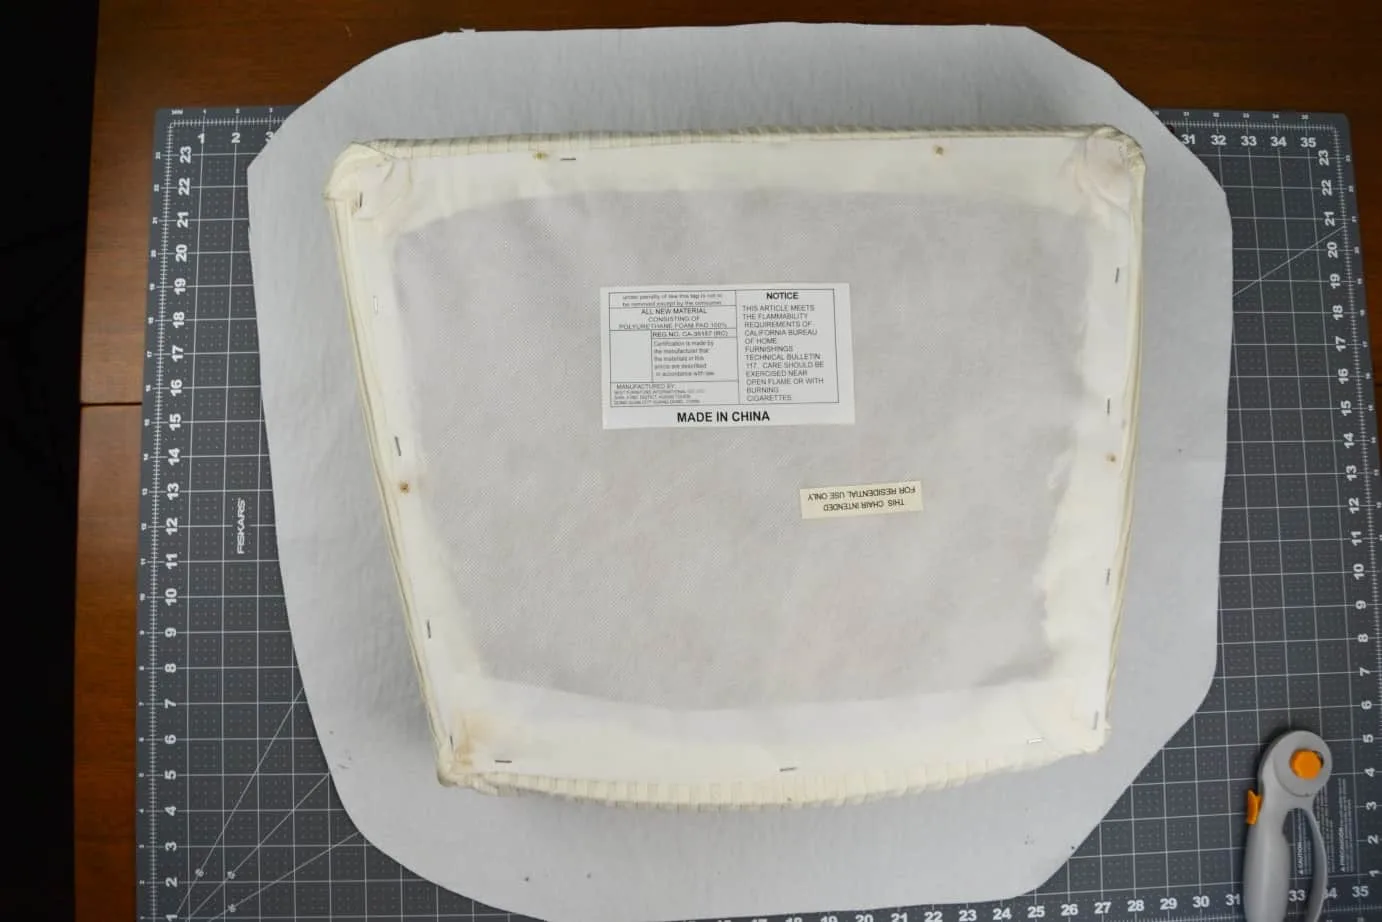
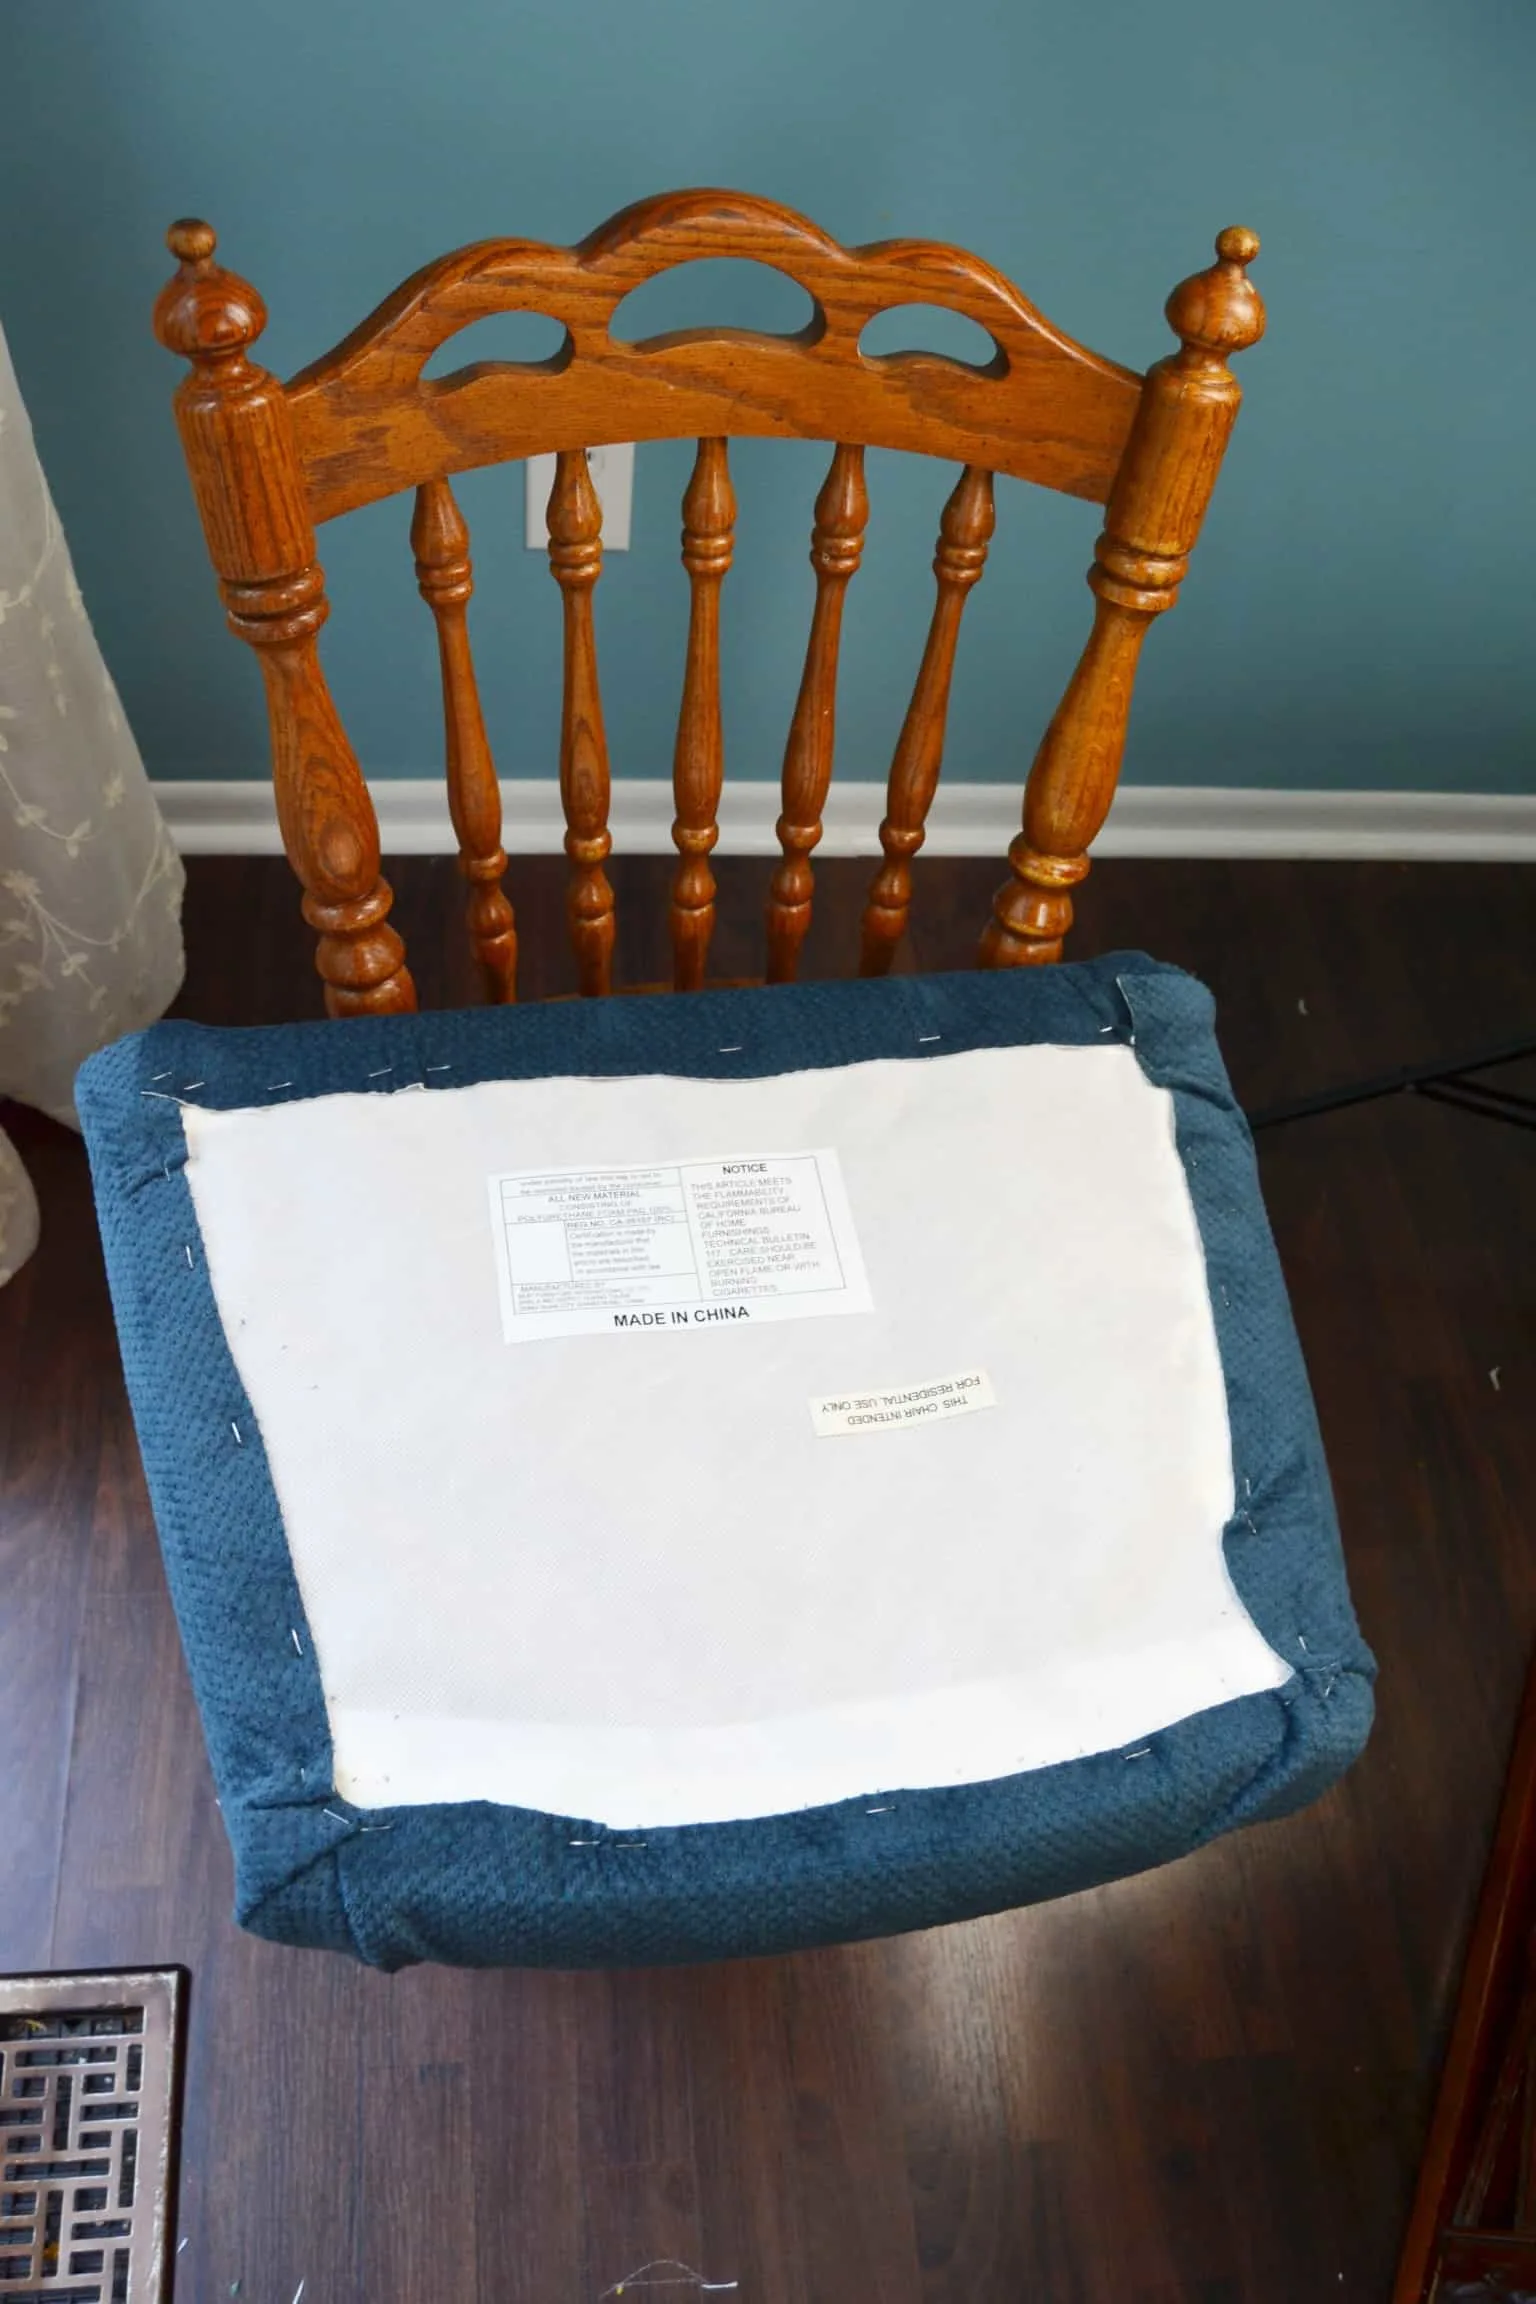
Now take your cushion at look at it from the bottom. Your chair might vary a little but typically what you’ll see will look like the first photo below. Remove the staples that attach that bottom fabric then remove the staples that attach the main fabric (what you sit on) as well.

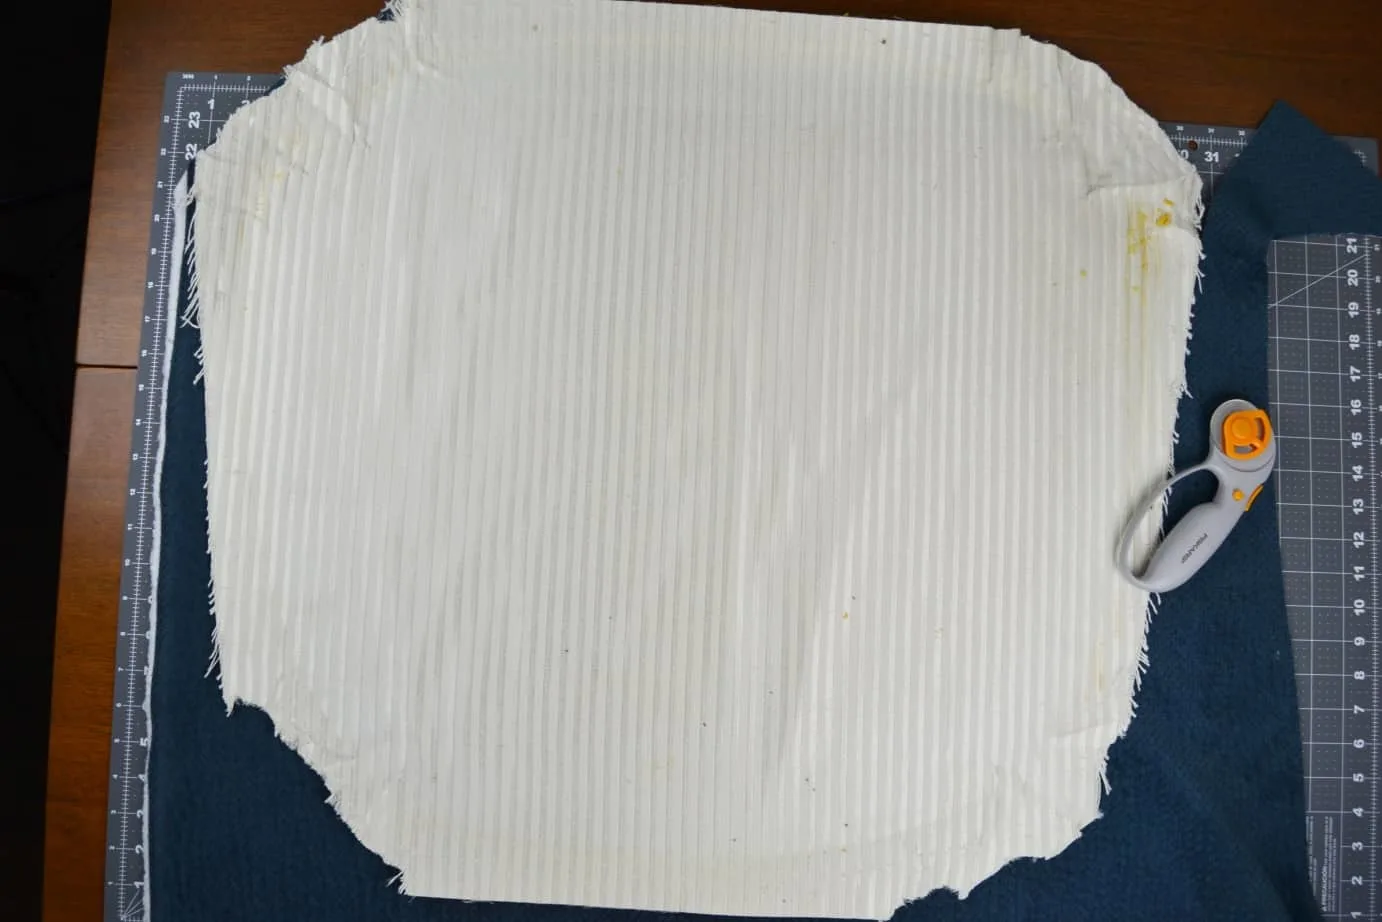


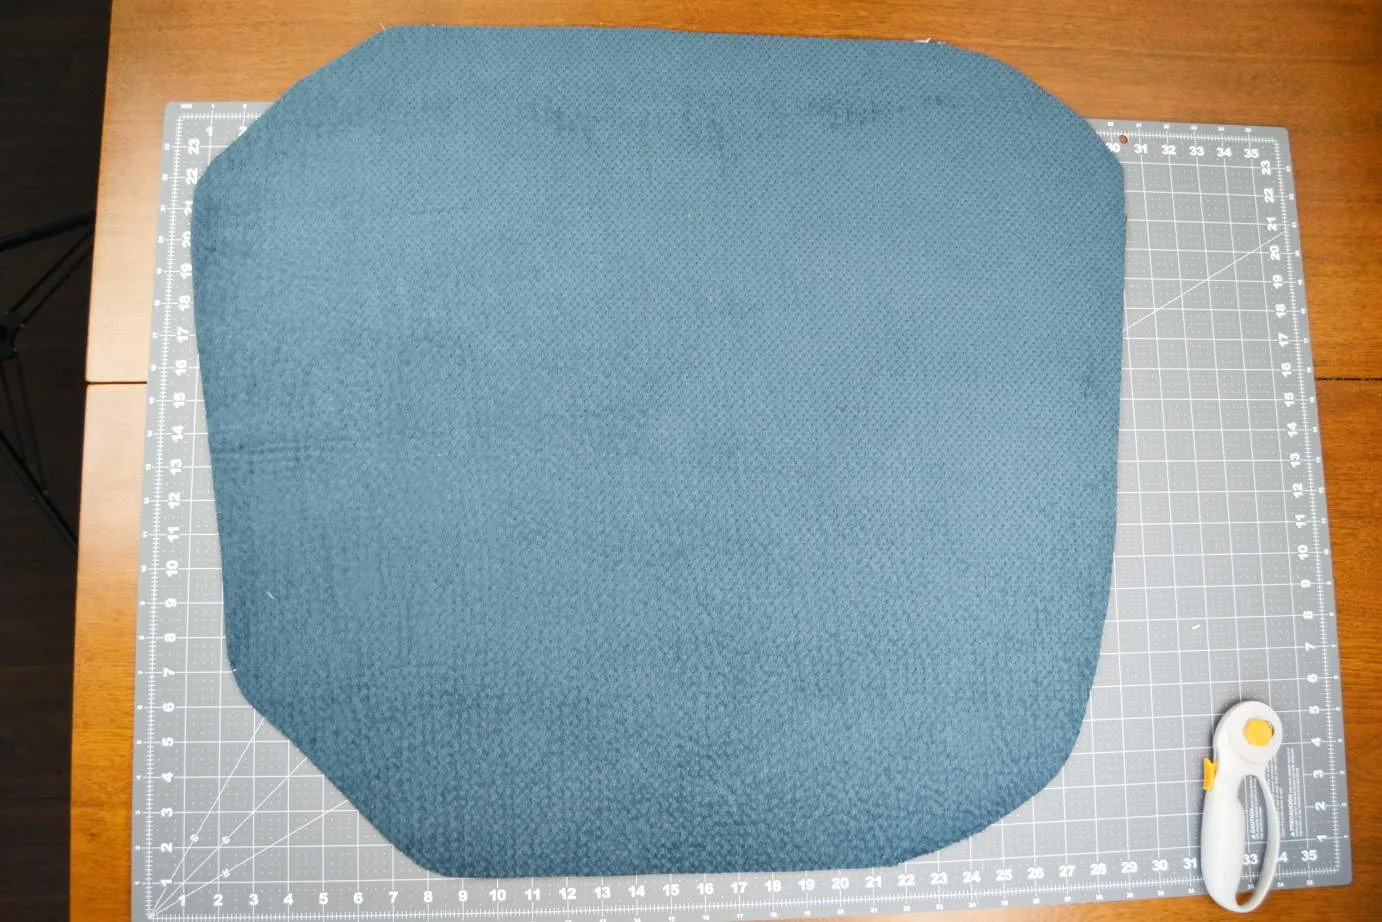
Take your top fabric off of the cushioning. Use the old fabric as a template to cut out your new fabric. I find it easiest to use my rotary cutting mat and a rotary cutter to zip through cutting out the fabric quickly.
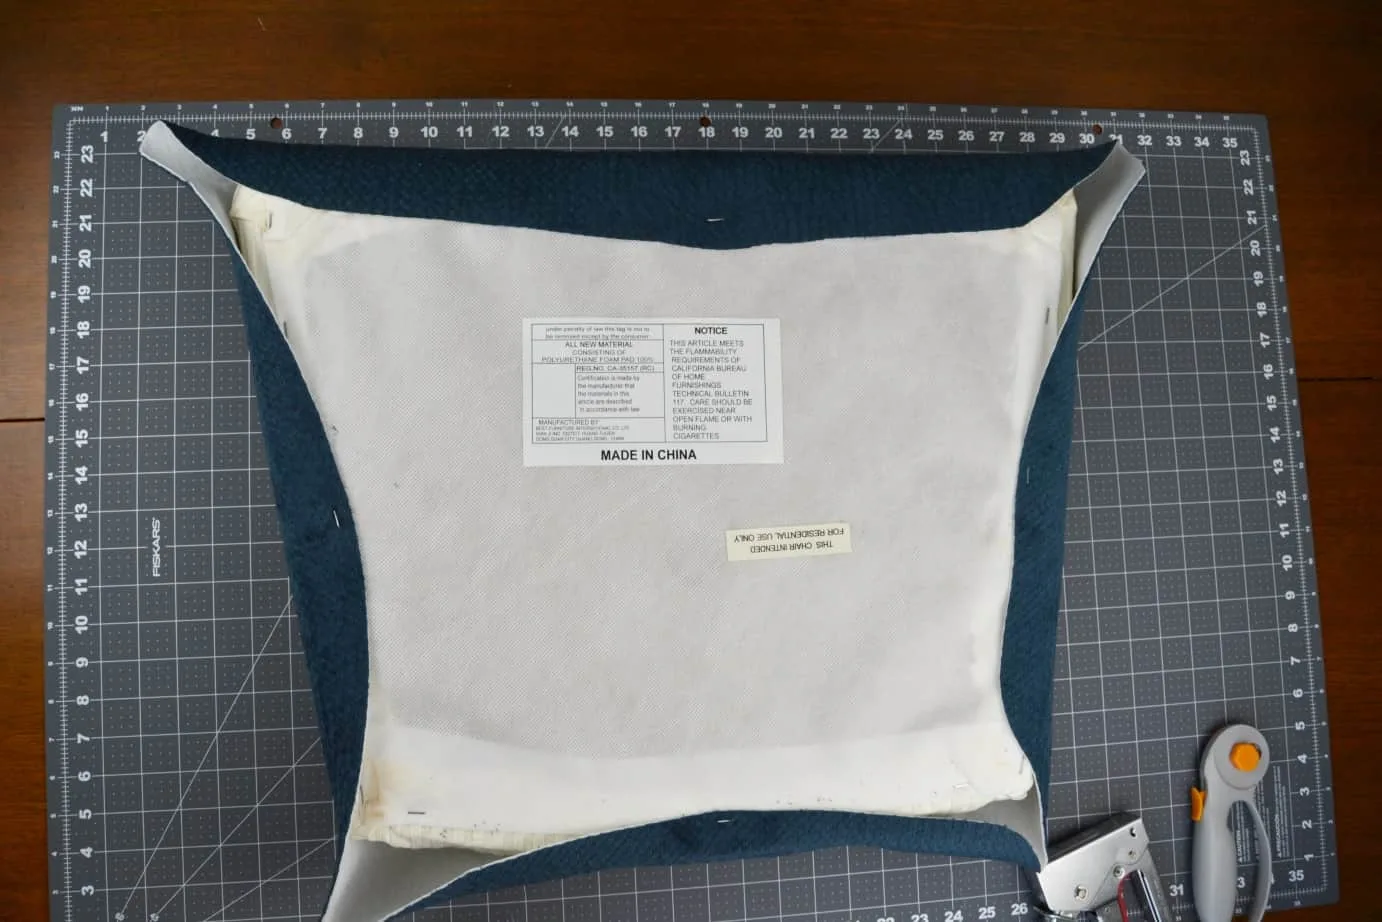
Step 3: Take your cushion and lay it down with the new fabric underneath with the right side facing down.
You’ll notice in the pictures below that I did not remove the old fabric. I removed the old fabric from the first cushion I recovered and it was a bear to get all the staples out so I decided just to put my new fabric on over the cushion for the rest of them without removing the old fabric.

I’m sure that somewhere someone is cringing since that’s not the totally proper way to do it BUT I don’t care. I did one each way and I couldn’t tell the difference between the two so I made the executive decision to save myself from what I deemed unnecessary extra work.


Step 4: Once you’ve centered your cushion in the middle of the new fabric you will fold one side over and staple it in the middle. Then pull up the opposite side (make sure it’s nice and tight) and staple it in the middle as well.

Repeat the process for the other two sides.


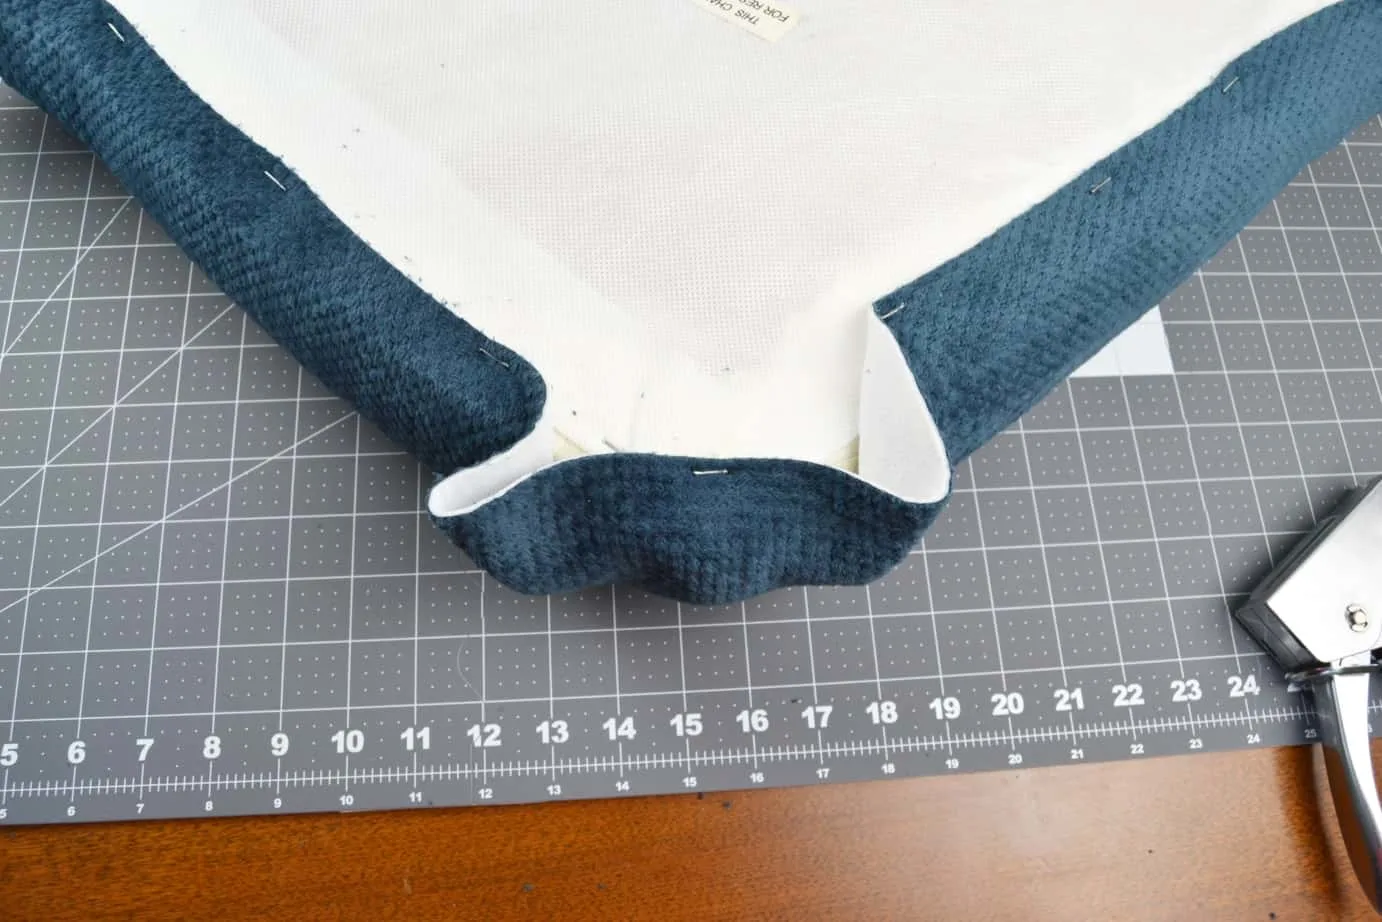
Step 5: Work your way to the outside from the middle, pulling the fabric tight and stapling it down until you get near the corners. I added a couple more staples after the picture below.Step 6: Now for the corners. Corners are a little tricky, but if you mess it up just pop out a staple or two and try again. First, pull the point at the center of the corner into the middle of the corner and staple it down.


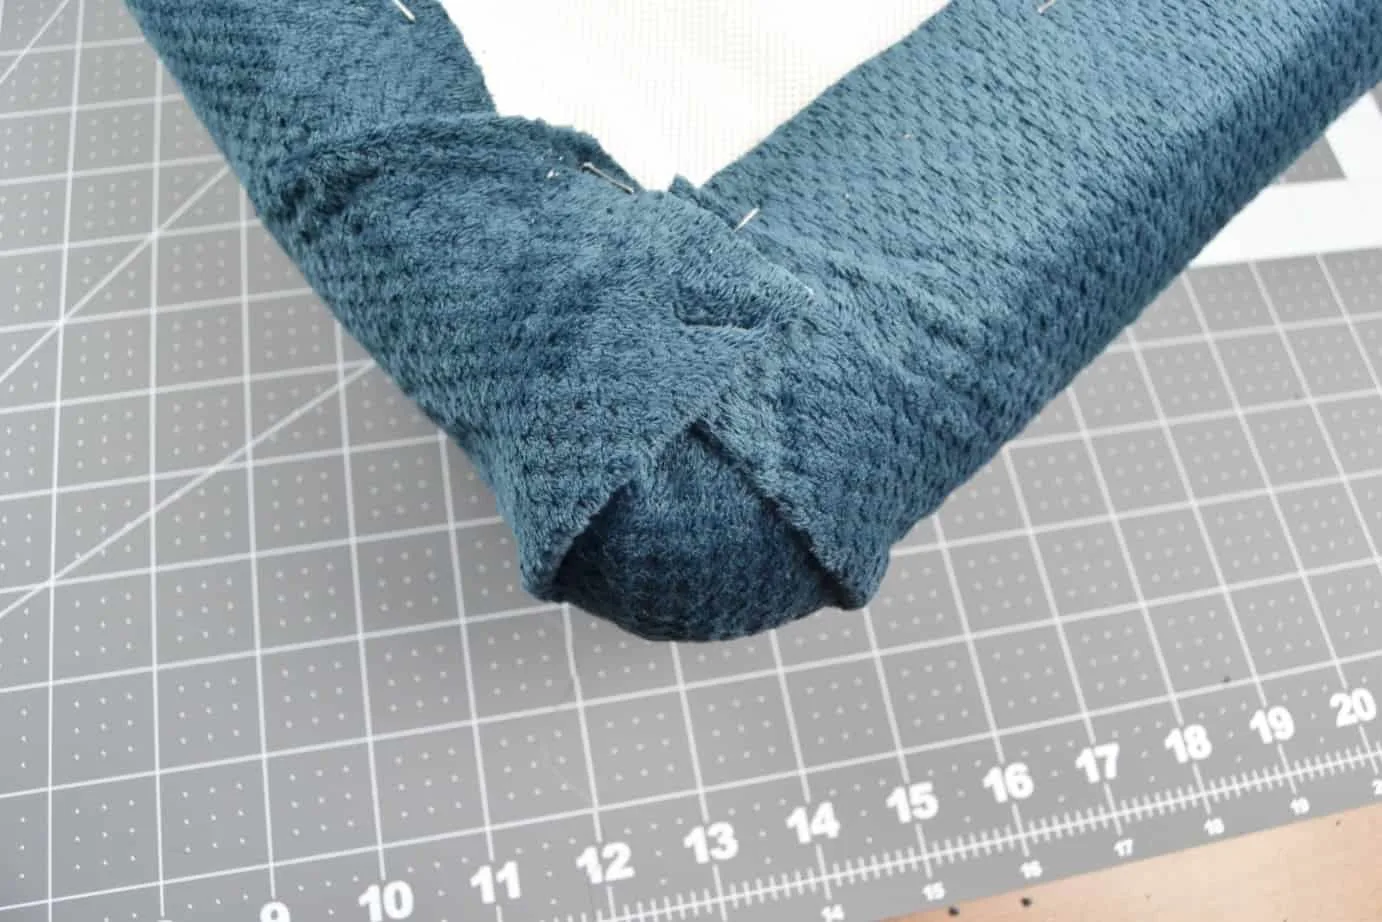
Fold over the two sides toward the middle point of the corner and staple down.


Flip it over and see if you’re happy with how it looks. If not, try again! But honestly, I don’t feel like these have to be super perfect.


Step 7: Repeat the corner folding process for all four corners and then the cushion is done! Take it outside and give it a spray with a fabric protector. Totally optional, but I’ve got kids so not so optional for me.Step 8: Place your cushion upside down on a chair or table so that you can place your chair upside down on top of it. Then you can put your screws back in. You’re going to need to apply some pressure so that your screws can get through that fabric. Now you’re done! Yay! Do a happy dance because you now know how to reupholster a dinning room chair and you’ve just brought some chairs back to life!Here are all the chairs together in our dinning room. They’re not an exact match to the table but at some point we do hope to get a bigger table to make having people over for dinner a little easier. And like I said, I’m thinking one day these chairs will get a paint job since that’s a whole lot of wood going on for me.


One day when our boys are older maybe we’ll even get a dinning room rug to break up the wood even more but let’s not go crazy now.So do you have any more questions about how to reupholster a dinning room chair? Let me know in the comments below!
Want more projects? Check these out:


How to Sew a Pillow Cover in 4 Easy Steps

Shannon
Friday 31st of August 2018
Excellent tutorial!!! I really want to do this with our dining room chairs but had no idea how to go about it! Thank you for spelling it out for me!
Cat
Saturday 1st of September 2018
It's one of the easier DIY projects that you can take on so I totally recommend anyone give it a try!