Good morning, good morning! Welcome to sewing 101 Lesson 2! Today we will talk all about sewing machines. (In case you missed lesson 1 and need to catch up check out last week’s post.)
 I think one of the number one barriers to people getting started with sewing is that the sewing machine seems complicated and scary. I hope that if fear of the machine has been holding you back that in this post I’ll be able to make your machine a little less scary.
Let’s start with the parts of the machine shall we? Now ever machine is different so your machine may not look quite like the one I’m going to use as an example but most machines share many of the same basic parts.
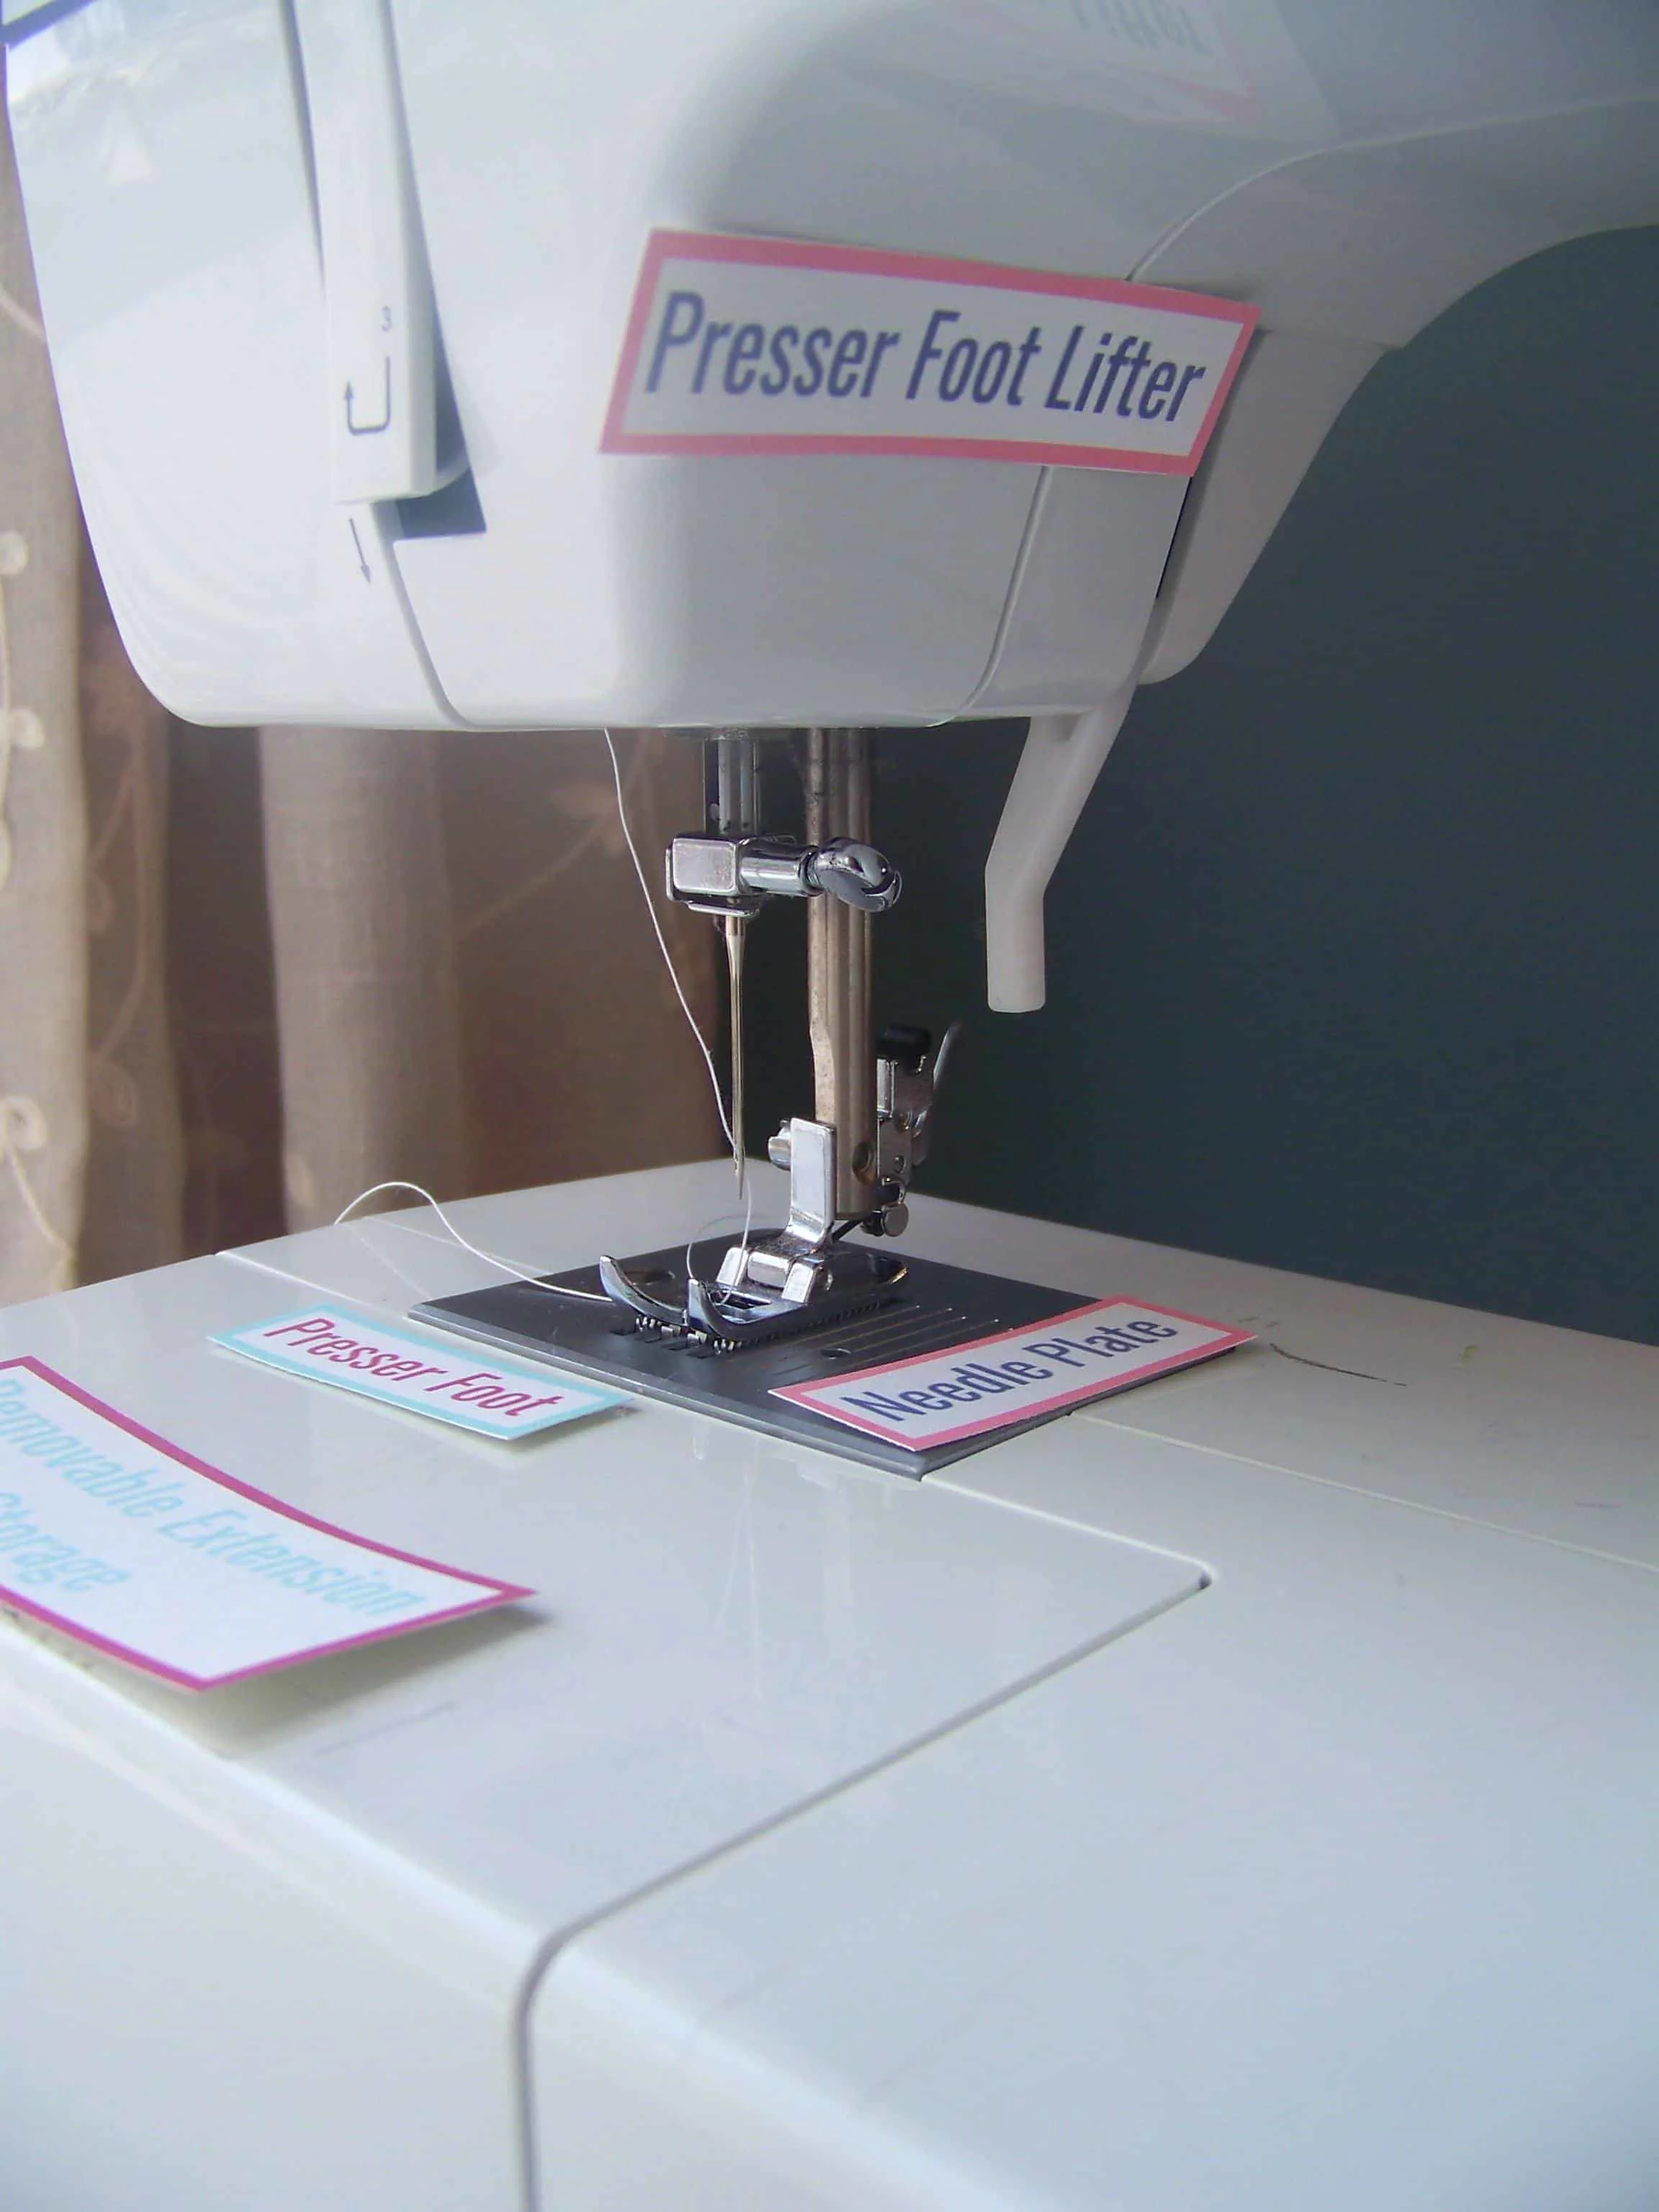
To help you out some I made some labels that you can print and tape to your sewing machine. If you go a few months between projects it can be difficult to remember what’s what so having these handy labels on the machine itself might save you a little confusion or time spent digging through your manual.
You may not need all of them (I think we all will know what the power switch is) but I thought I’d include more than you need so that you’re covered. The 2 that have caused me the most confusion in the past are the tension and stitch length dials.
 Let’s take a look at my Singer Promise with the labels attached.


Now that you know the names of the parts let’s talk about what they do. I’m not going to go item by item in list form because I’m pretty sure your eyes will glaze over by the end and I like to talk about things in context. Therefore I will talk about each as I explain the practical steps you’ll take to set your machine up for sewing.
First print out this little cheat sheet to help you get started.
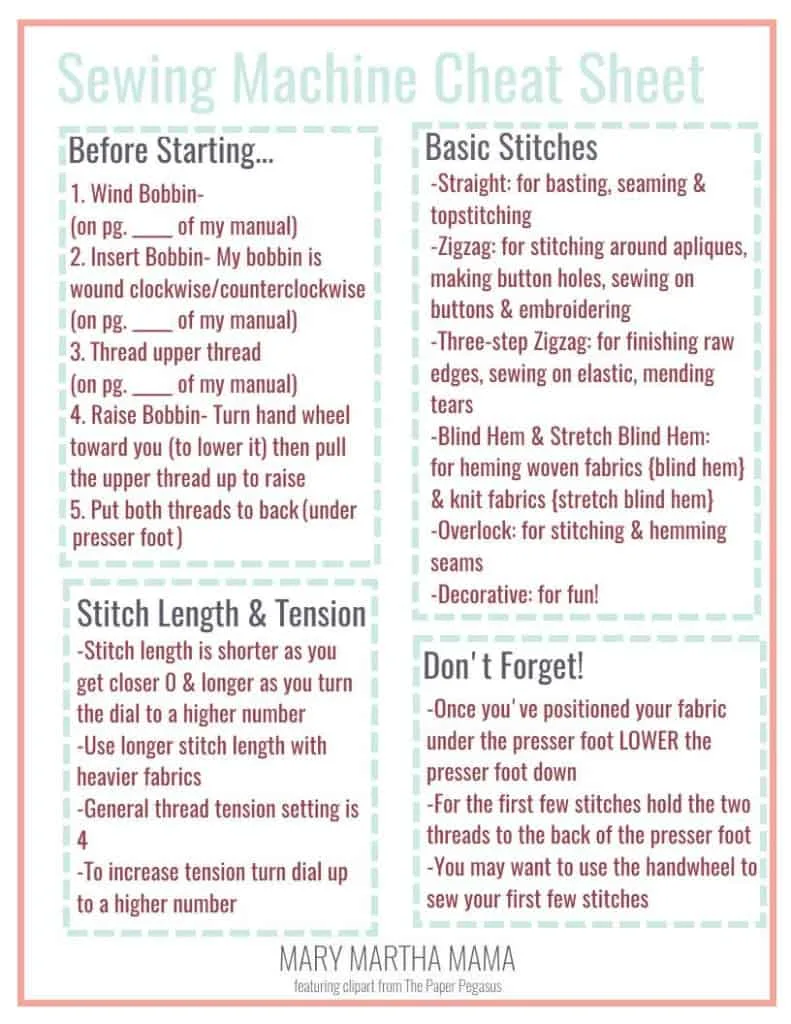 Notice that your cheat sheet has a few things for you to fill in! Take out your sewing machine’s manual and use it to fill things in. It will be helpful for you to have out anyway since your machine is likely somewhat different than mine.
Let’s get things set up now!
- Wind the bobbin(s)- When sewing with a machine your stitches are comprised of a top thread and a bottom thread. The bobbin is where your bottom thread comes from. It looks like a little mini spool. Take a look at your manual an you should see a section on how to set up your bobbin to wind. Mark the page number down on your cheat sheet. This is how I set mine up to wind:
Before pressing down on the presser foot to start winding make sure you are holding on to the tail of the string that sticks out of the top.

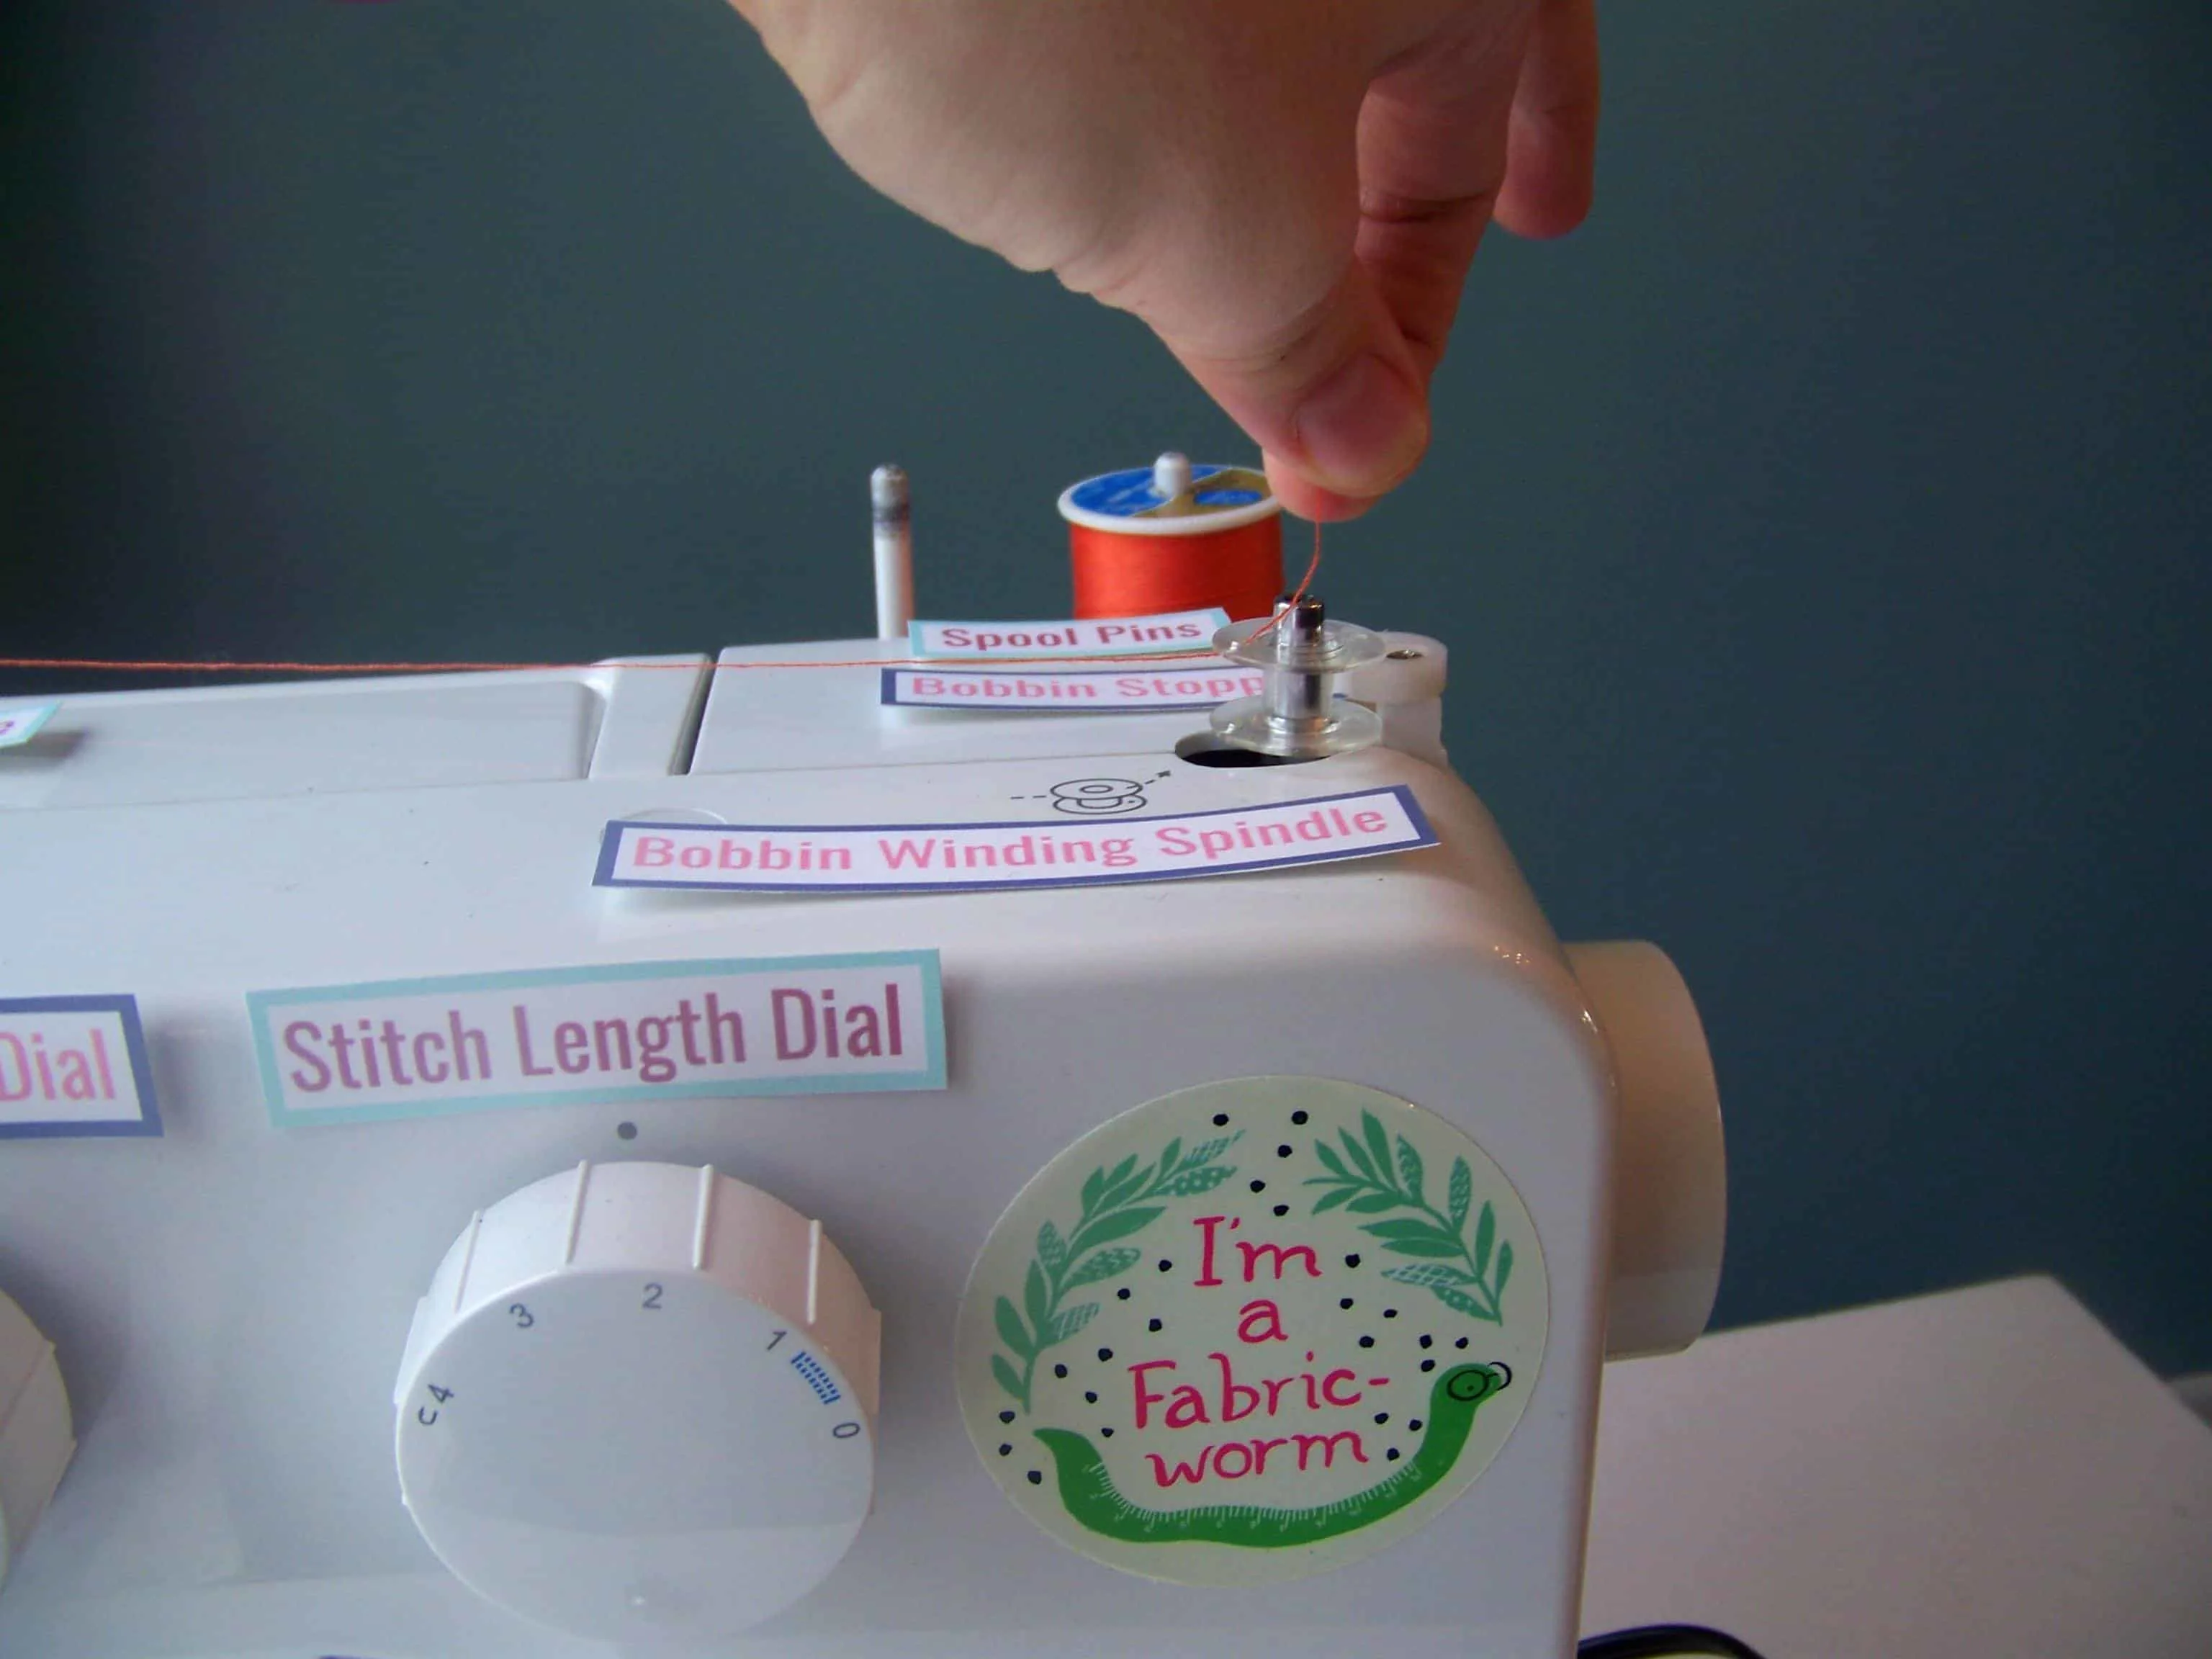


Once done winding snip that bit off and cut the other end of the thread to detach the bobbin. While you’re doing one bobbin you might as well do two. It all depends on how big of a project you’re doing but it’s always nice to have another bobbin already wound when you are in the middle of a project and your bobbin runs out on you.
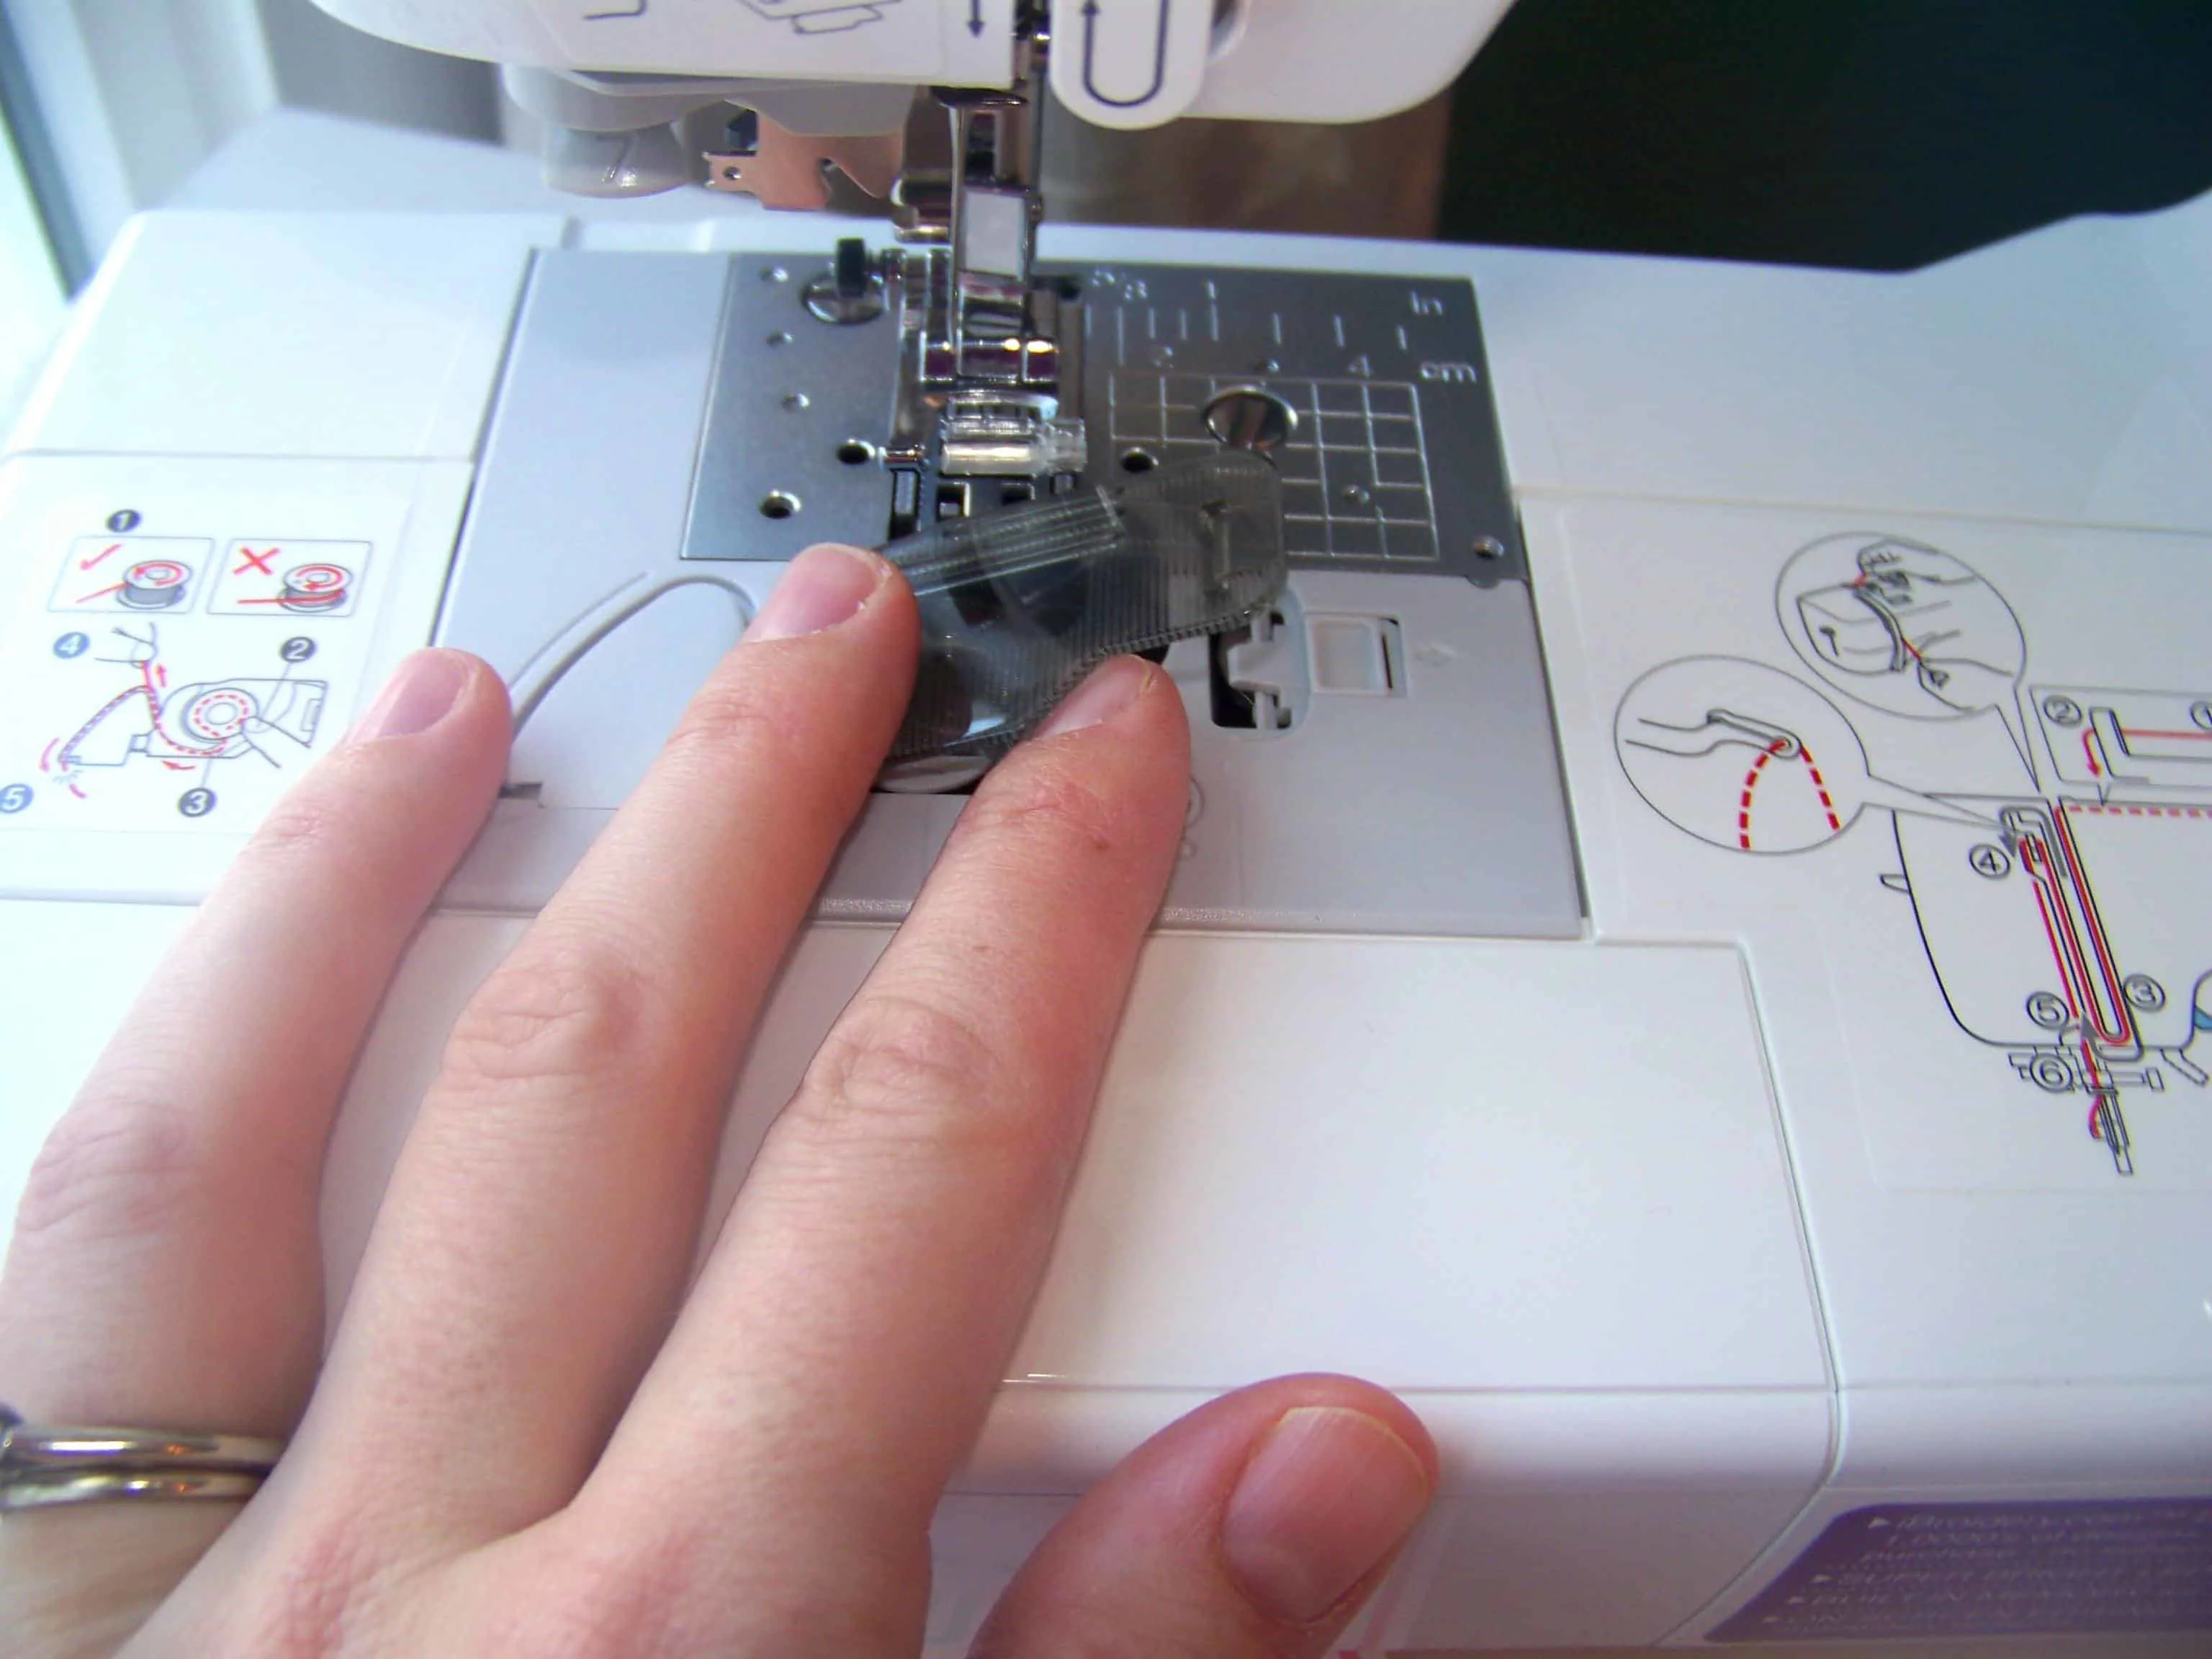
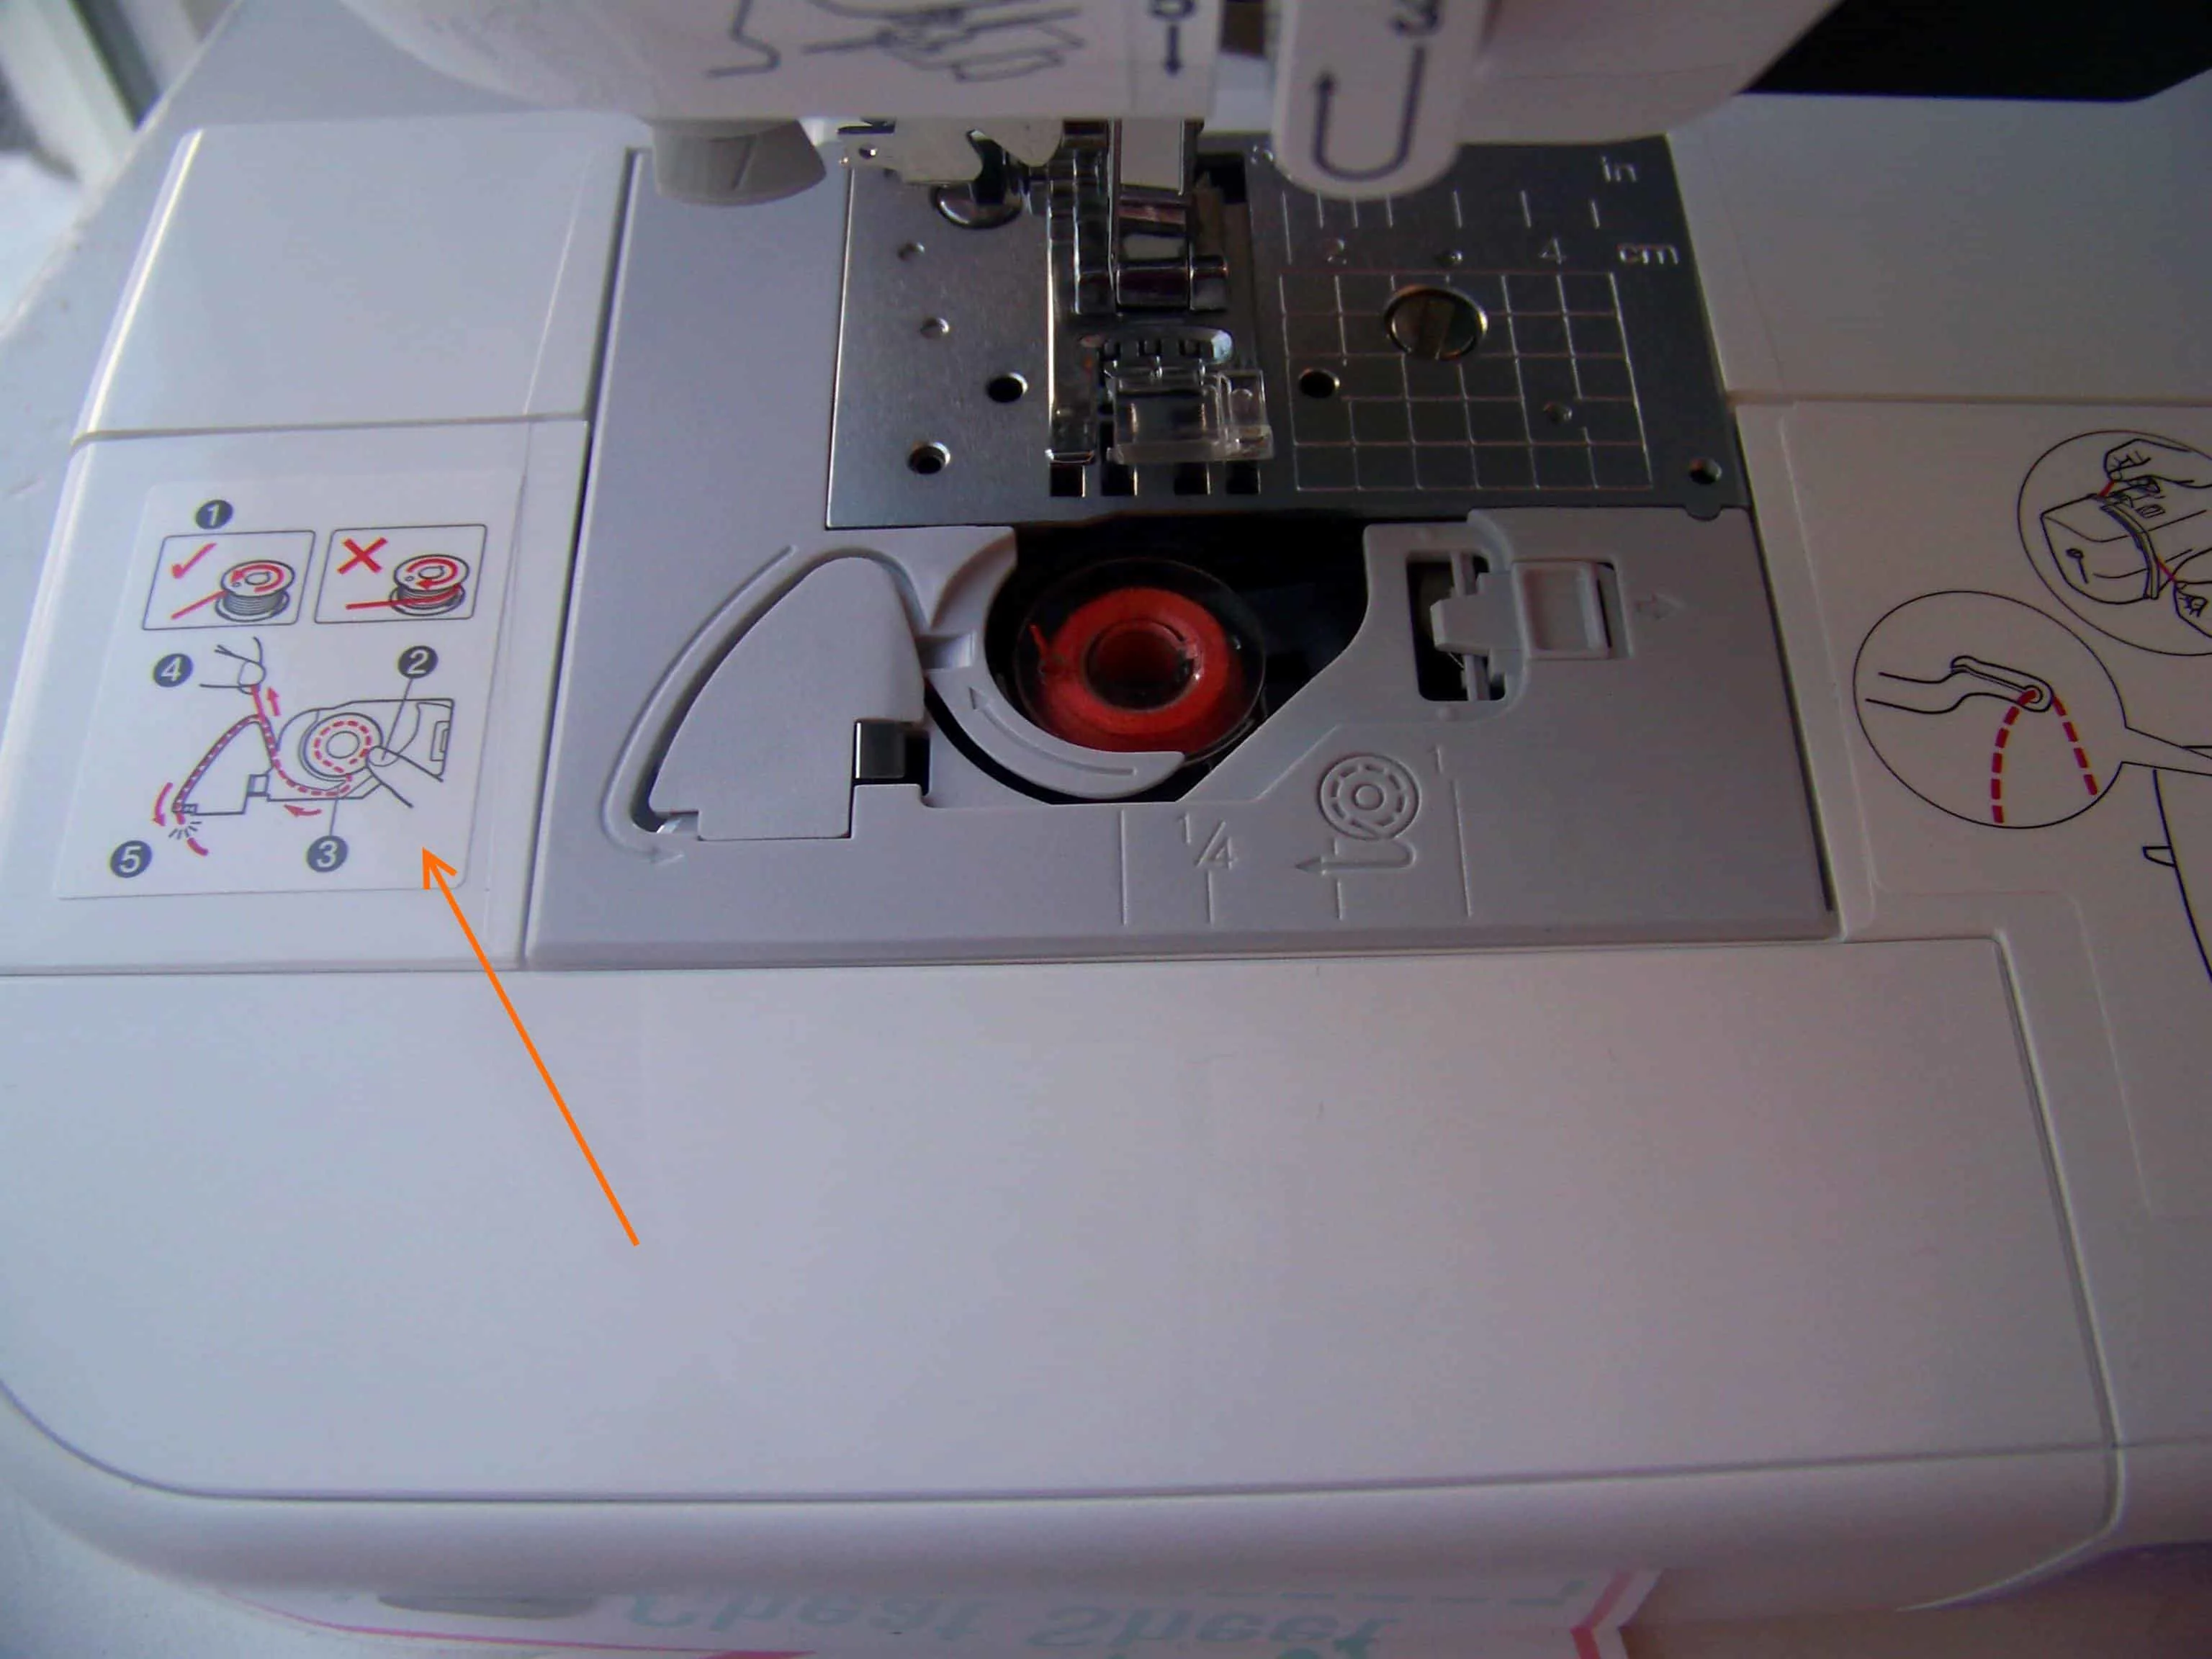
2. Insert the bobbin- There are 2 types of machines out there: Toploading & Frontloading. My Singer Promise is front-loading and my new Brother SE400 is top-loading so I will show you pictures of how each loads.
Front-loading: I take off the front of my machine and pull out the bobbin housing. It’s the round metal thing in the middle. Pull on the rectangular lever to pull it out.

You’re going to load the bobbin into this housing with the end of the thread sticking out through the channel BUT HOW YOU DO IT MATTERS.
Some machines the thread will go clockwise and for others it will go counterclockwise. Look it up in your manual and mark it down on your cheat sheet so that you won’t have to look it up each time until you’ve committed it to memory. Mine is clockwise.

One the bobbin is inserted in its housing replace the housing by hanging onto the little handle and pushing it back into place.

Top-loading: This is a feature that is new to me and I am extremely excited about it as it is much more simple. You simply drop your wound bobbin in. That’s it.

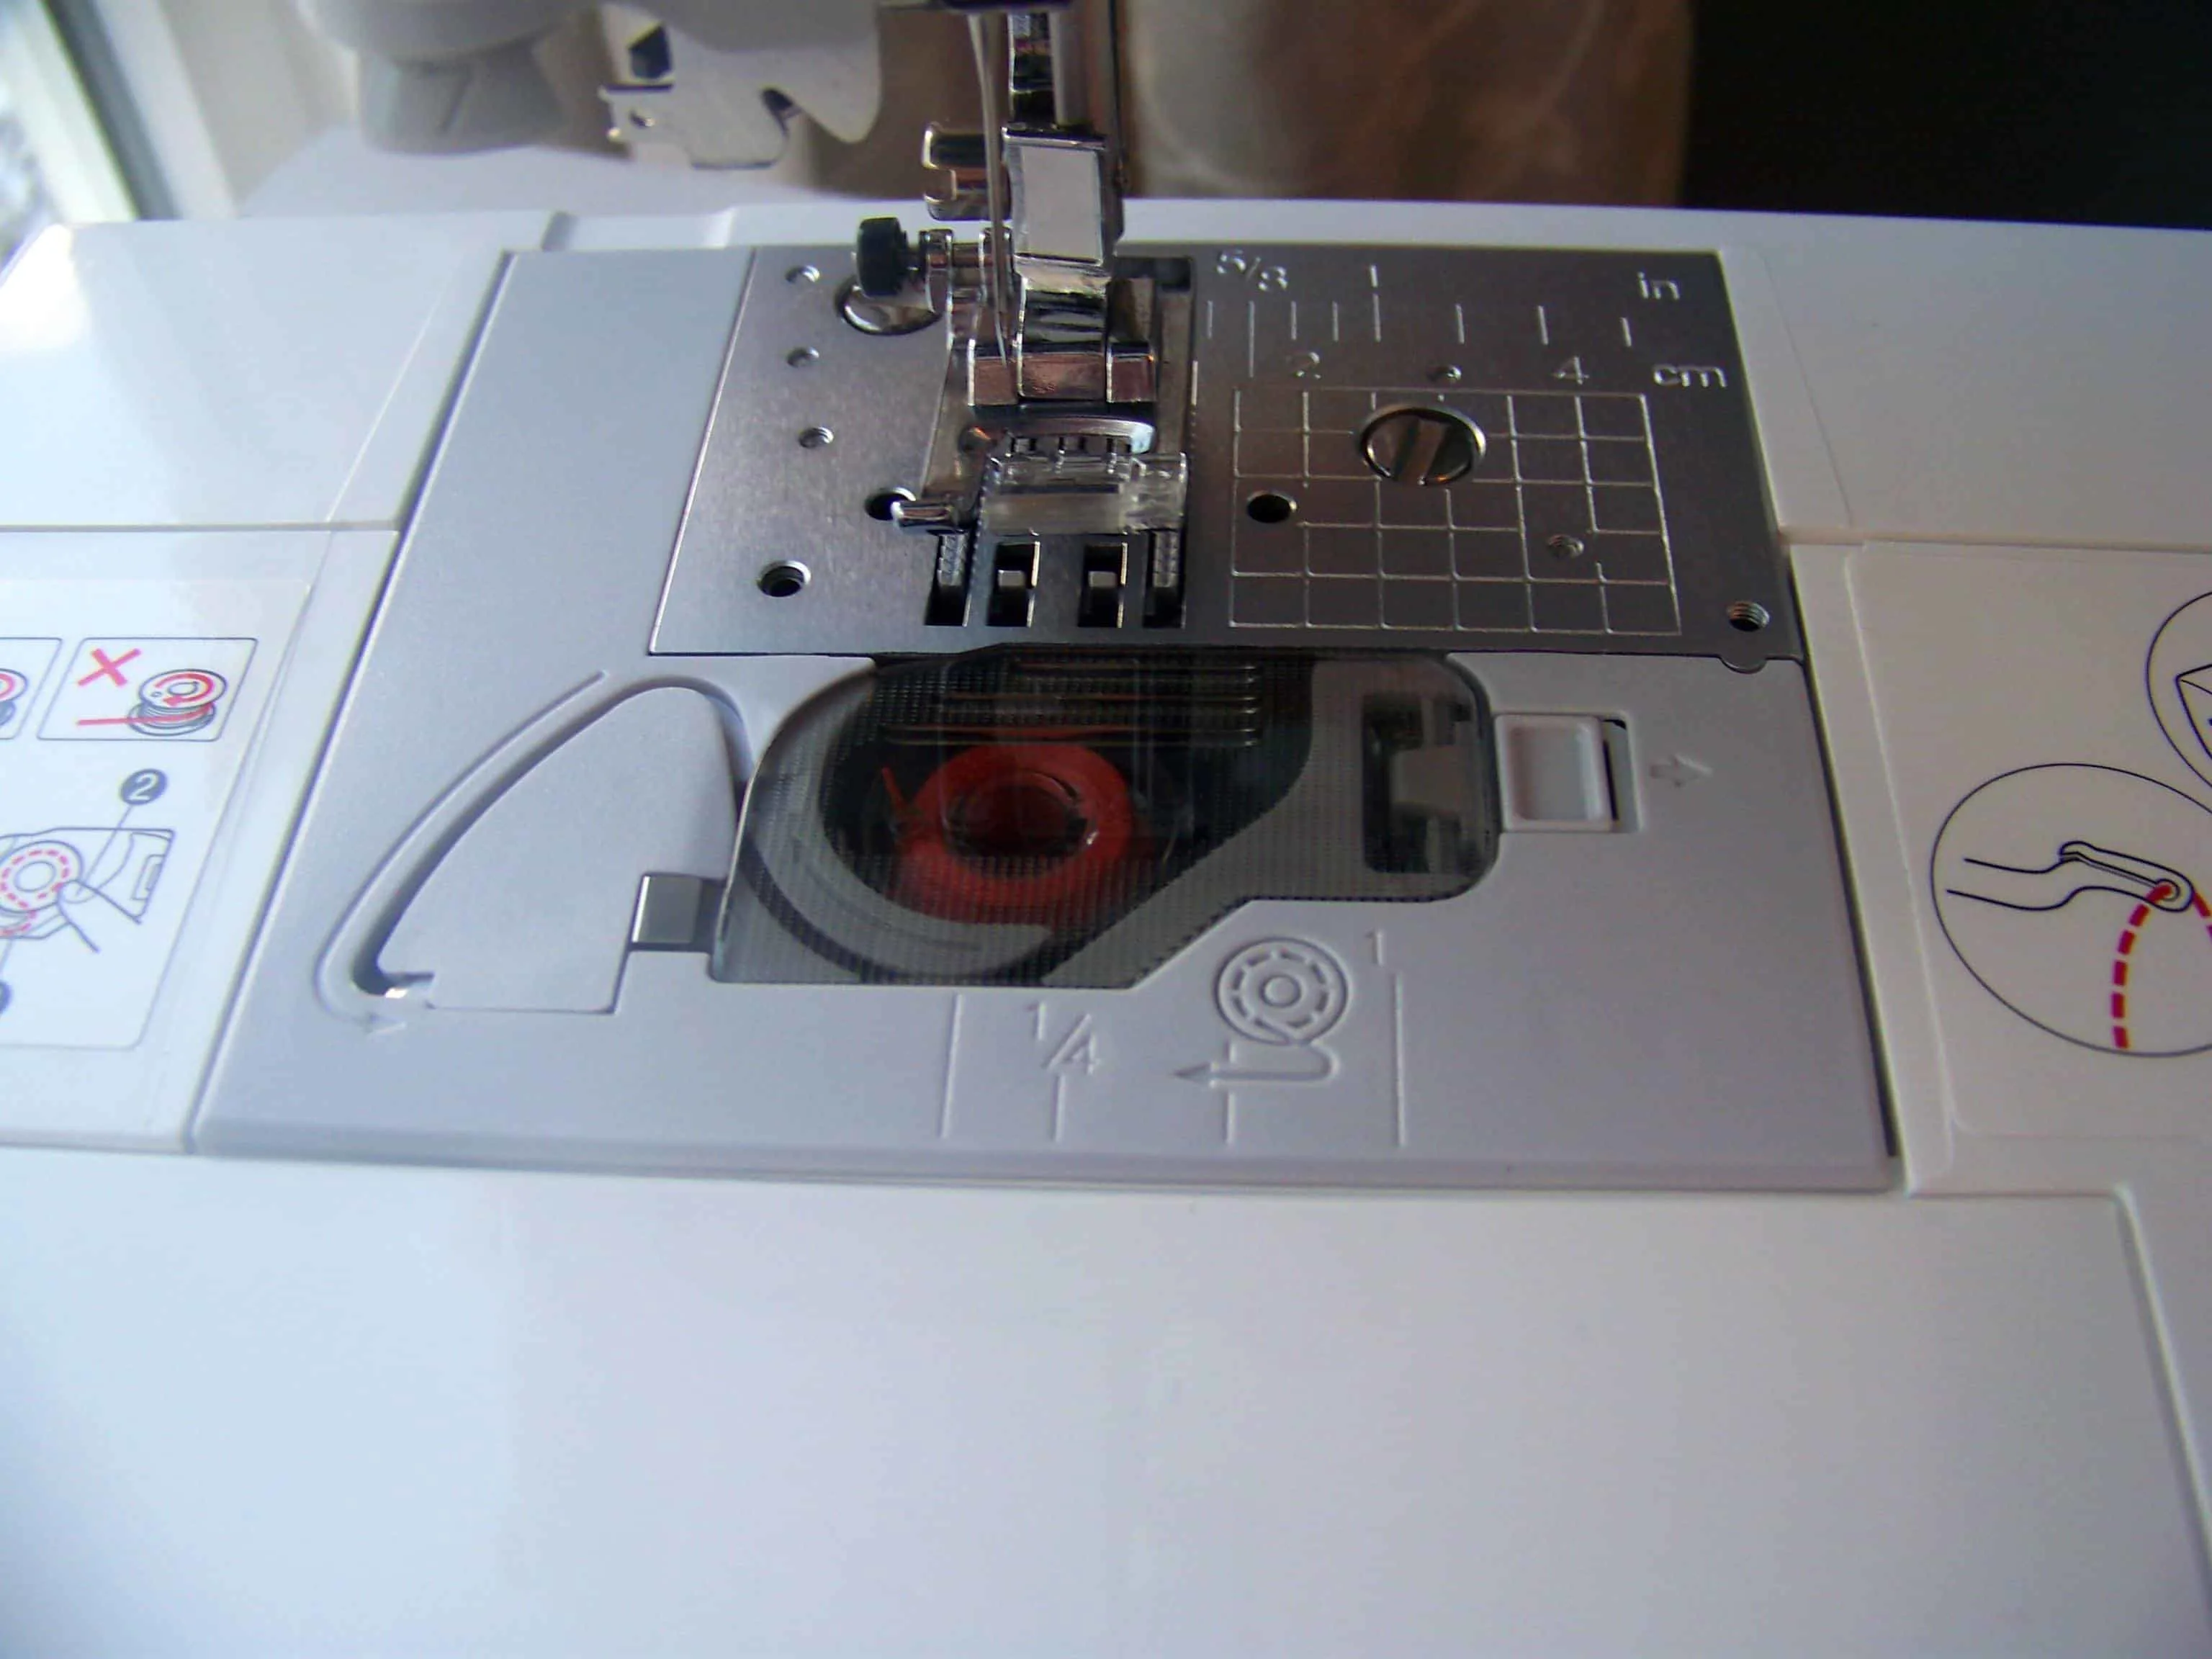
3. Thread the Upper Thread- We’ve dealt with the lower thread now let’s deal with the upper thread. Again, each machine is different so you will want to refer to your manual (and jot the page number down on your cheat sheet). Hopefully your machine itself is marked with the steps to help you out as well. Here’s what my Singer Promise’s set-up looks like:


Make sure that you thread your thread through the needle from front to back. Pull a few inches of it through and lay to the back of the needle, going under the presser foot.
If you have trouble threading a needle I find it easier to do when I cut my thread with good scissors so that the end of the thread is a nice blunt edge but if you still have trouble then you can get needle threaders to make the job easier. I used them when I was a girl and I was first learning to sew.
4. Raise the Lower Thread- Now that you have threaded the upper thread you are going to use it to raise the lower thread up. Turn your handwheel toward you in order to bring your needle down and then back up again.
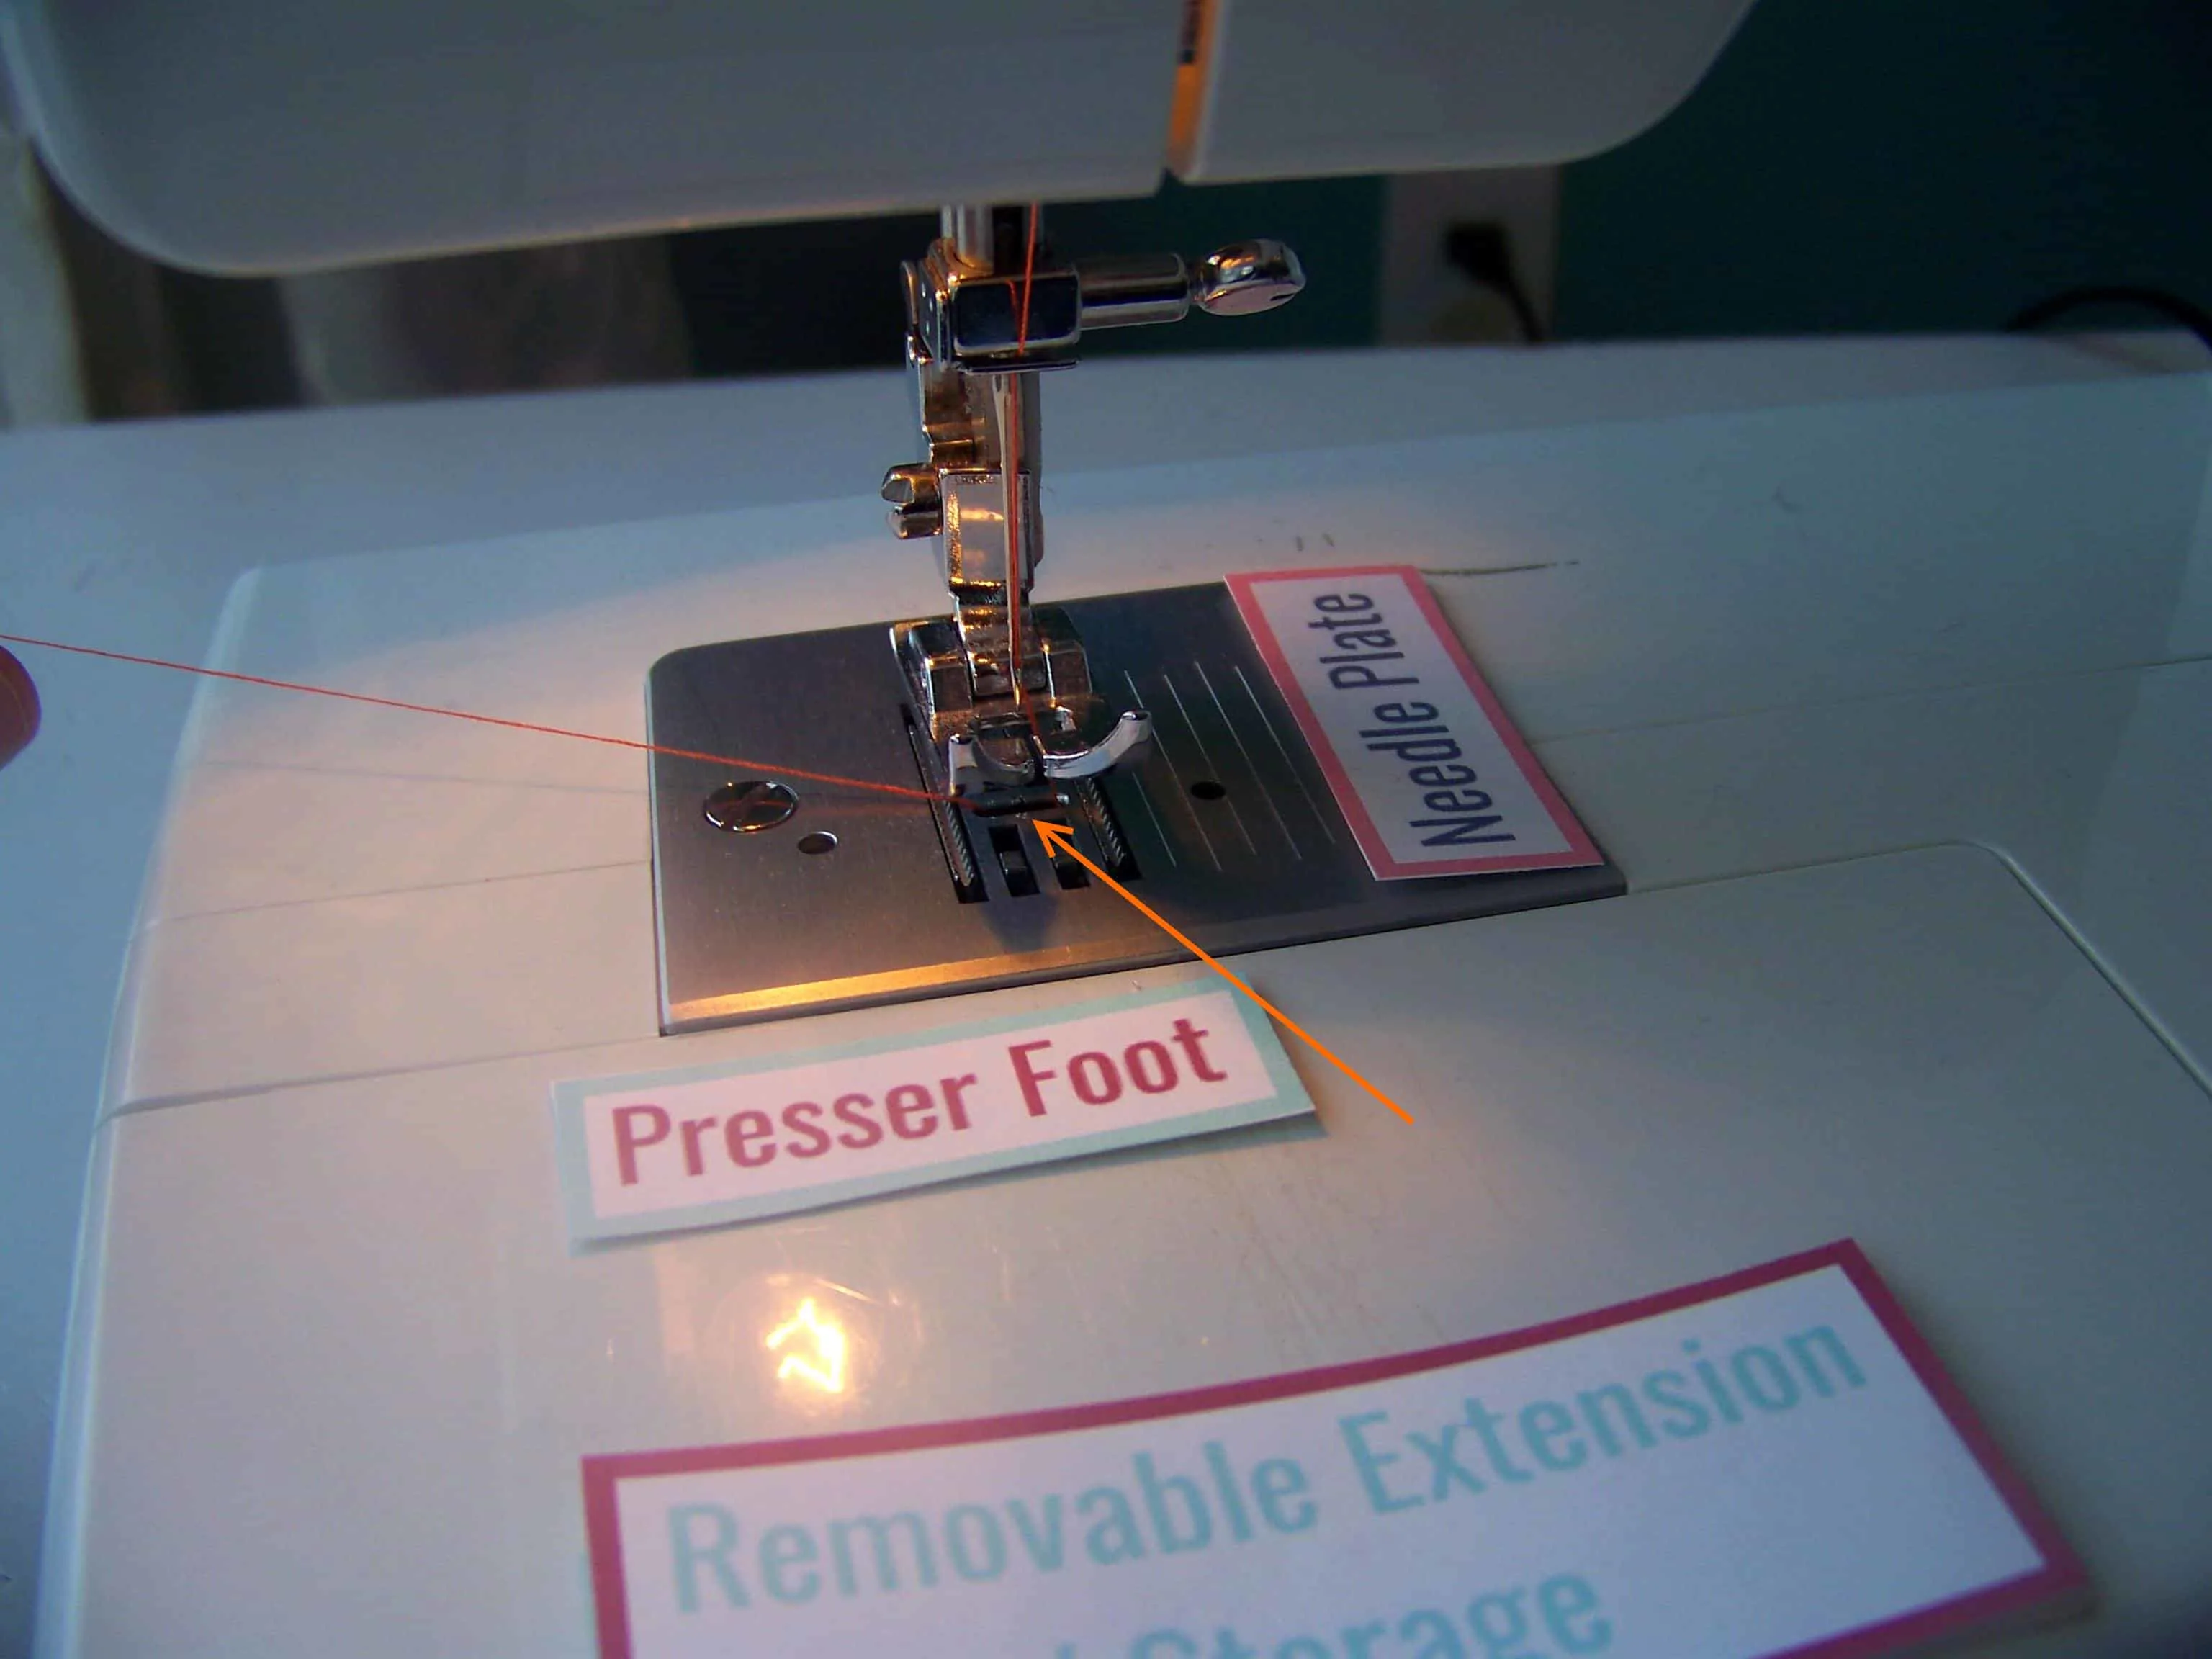
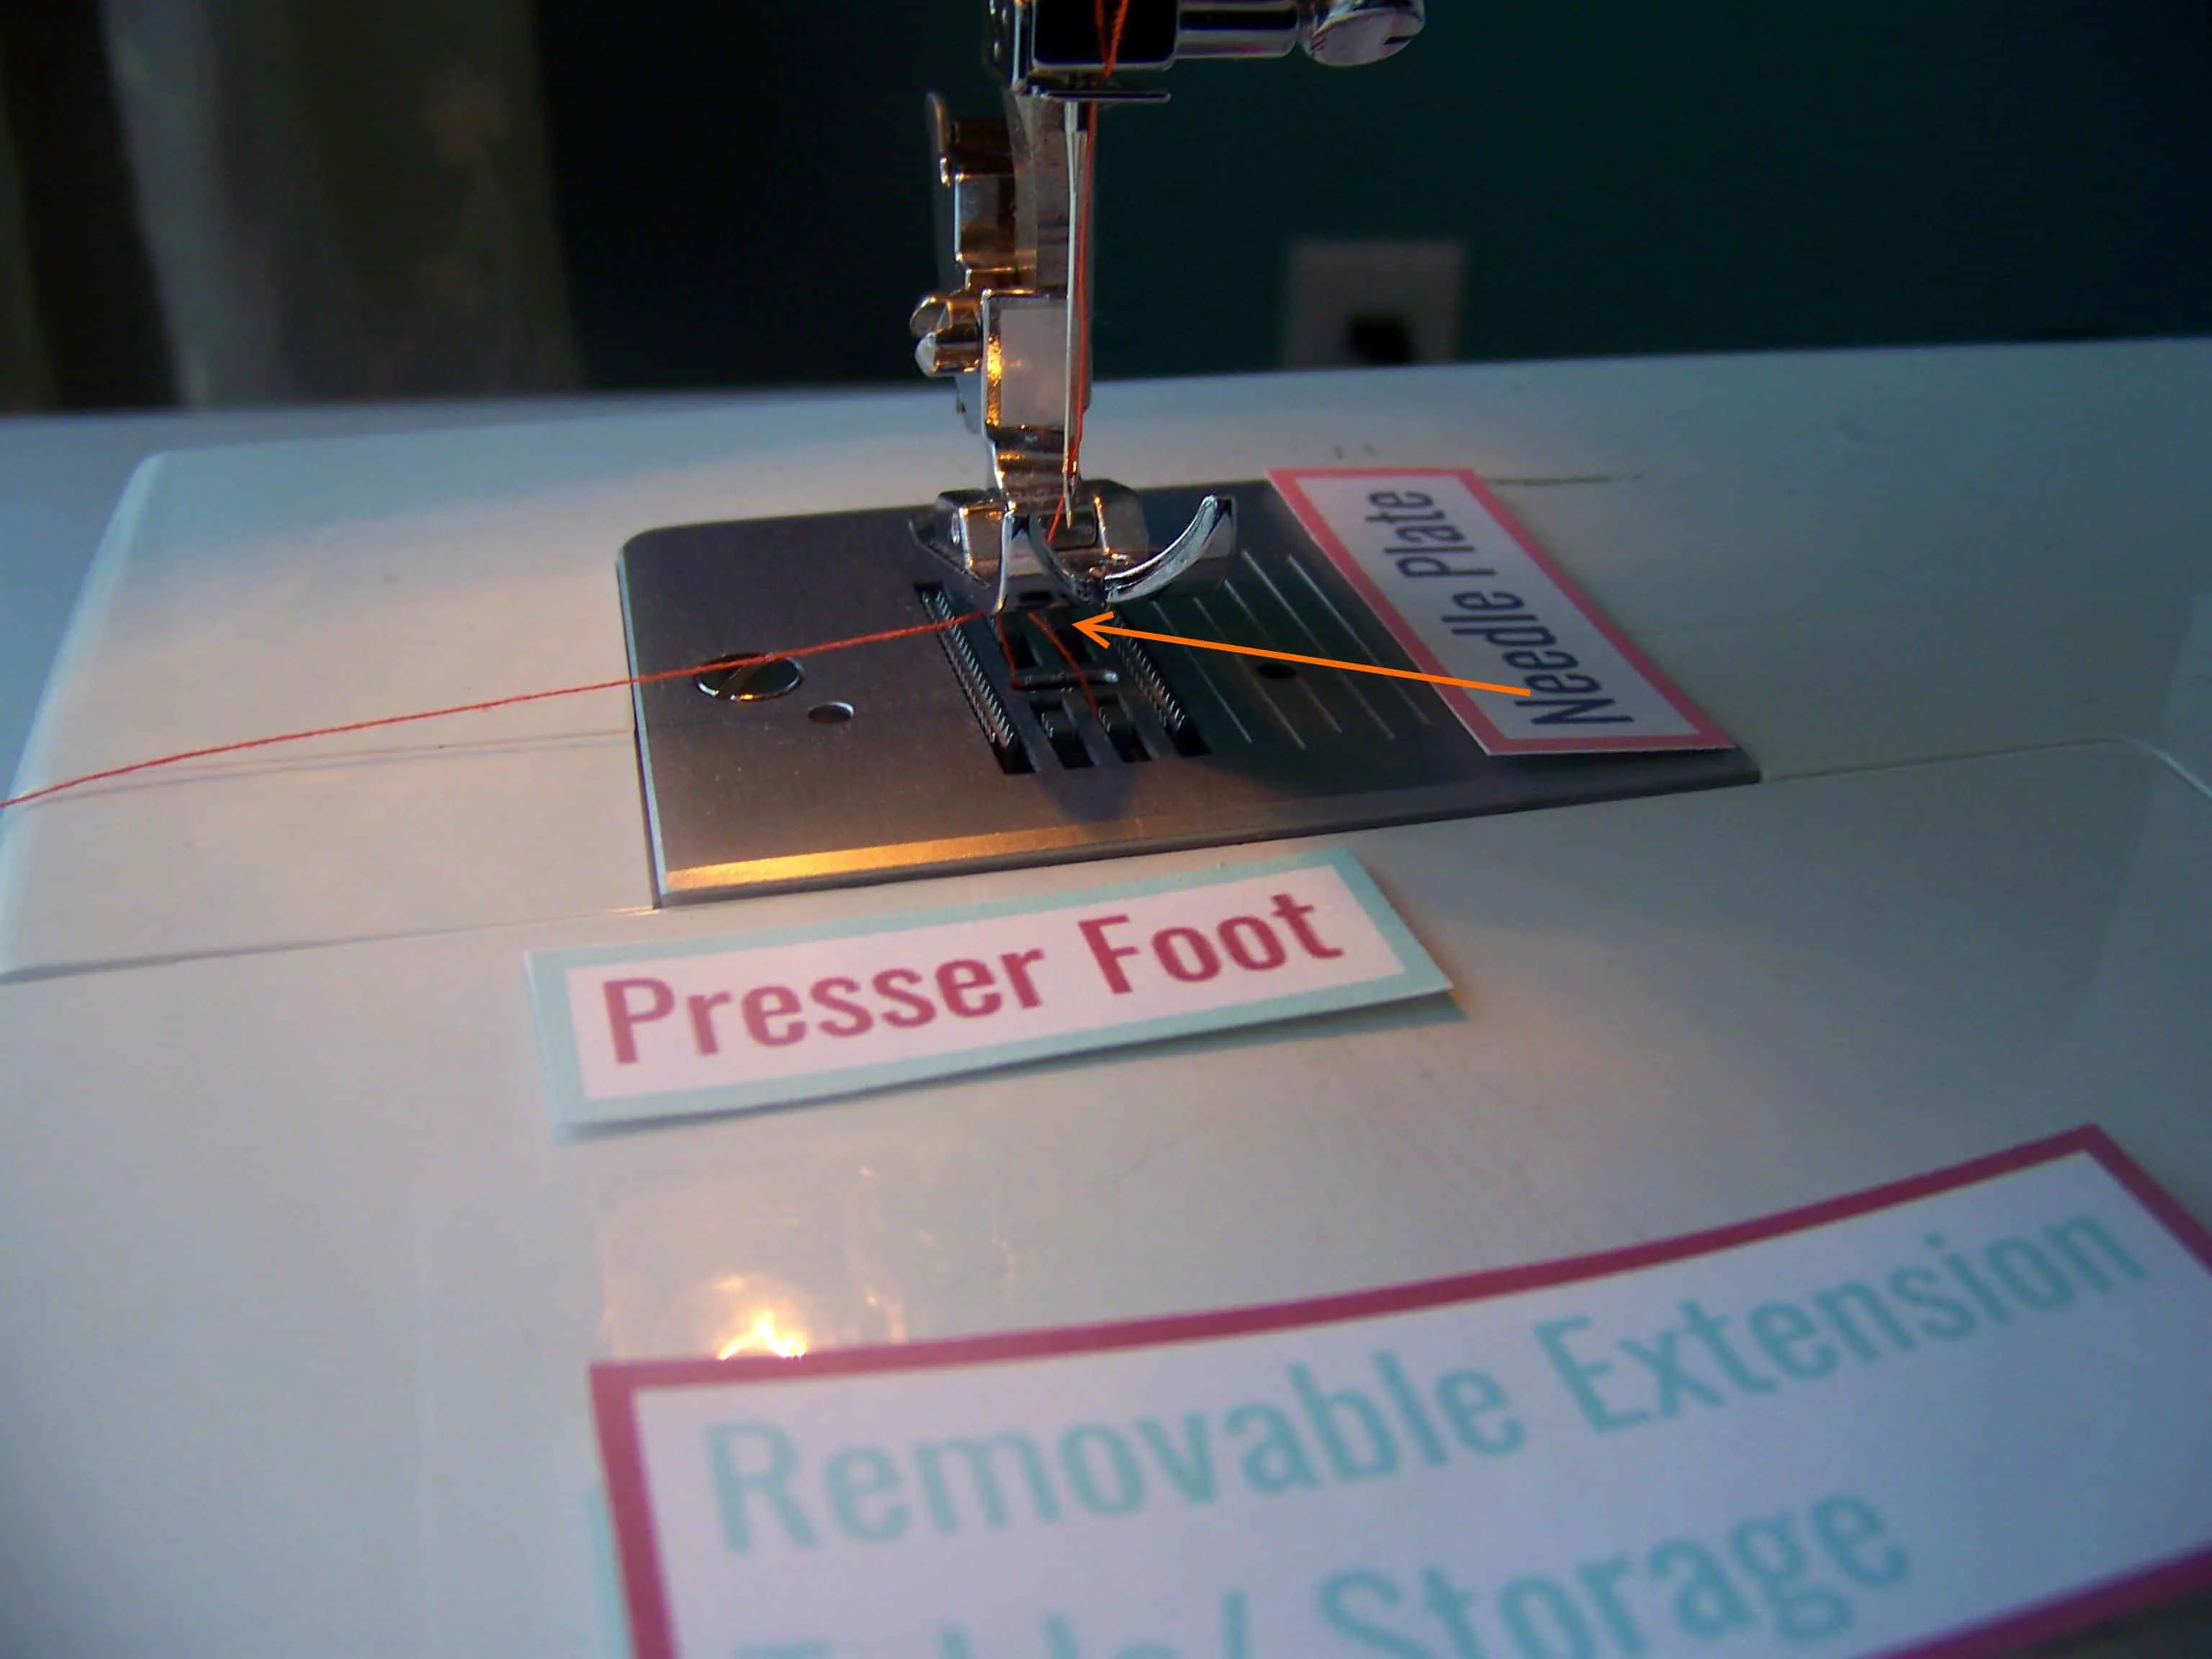

When you do this it should bring the lower thread up with it. Gently pull the thread up a couple of inches and lay it to the back under the presser foot together with the upper thread.
*If you are having trouble doing this then you should check to be sure that your bobbin is inserted correctly and that you popped the housing back in all the way. Also make sure that you left a few inches of thread sticking out of the bobbin so that it can be pulled up. If you are still having trouble for some reason then you can grab a scrap piece of fabric, lower your presser foot, and sew for a few inches. This is totally the cheater/incorrect way to do this but it works any time I have trouble with getting my thread to come up.
5. Pick a Stitch- Now that the threads are all ready to go it’s time to pick a stitch! Some of this will depend on what type of material you are working with and what project you’re doing (see cheat sheet for examples) and some of this will depend on your preference. Take a scrap piece of fabric and do a line of each of your machine’s stitches so that you can know what they look like. Keep the scrap for future reference.
6. Check Tension & Stitch Length- Once you pick your stitch (but before you start sewing!) check to make sure that your tension and stitch length dials are set correctly. Your machine will have a guide that will tell you how they should be set for the stitches that your machine has. See the cheat sheet for a few general guidelines. I’ll go more into depth about this when I talk about different stitches and fabrics.
Please let me know if you have any questions about what we’ve covered so far- especially if you want me to break anything down some more.
Now that we have got our machines set up it’s time to start sewing! Next week’s lesson will be all about getting started sewing and stitches… really the mechanics of sewing with your machine… how to start, how to stop, tips to help things go well. So be sure to check back for that and subscribe to the blog so you don’t miss out on anything!
*Is there anyone out there who would prefer to watch video explanations of all this? I’m toying with the idea of adding videos to this series so please let me know if you would be interested in those. I want this series to be as helpful as possible and any input is as always greatly appreciated!
On to Lesson 3: Get Sewing!
