This is a sponsored post written by me on behalf of Cricut. All opinions are 100% mine.
The end of the school year and graduation is such an exciting time! The weather makes it perfect for hosting outdoor graduation celebrations. Today I’m sharing how I used my Cricut Joy and Smart Materials to make DIY graduation party decorations that are perfect for a small outdoor or drive by graduation celebration.

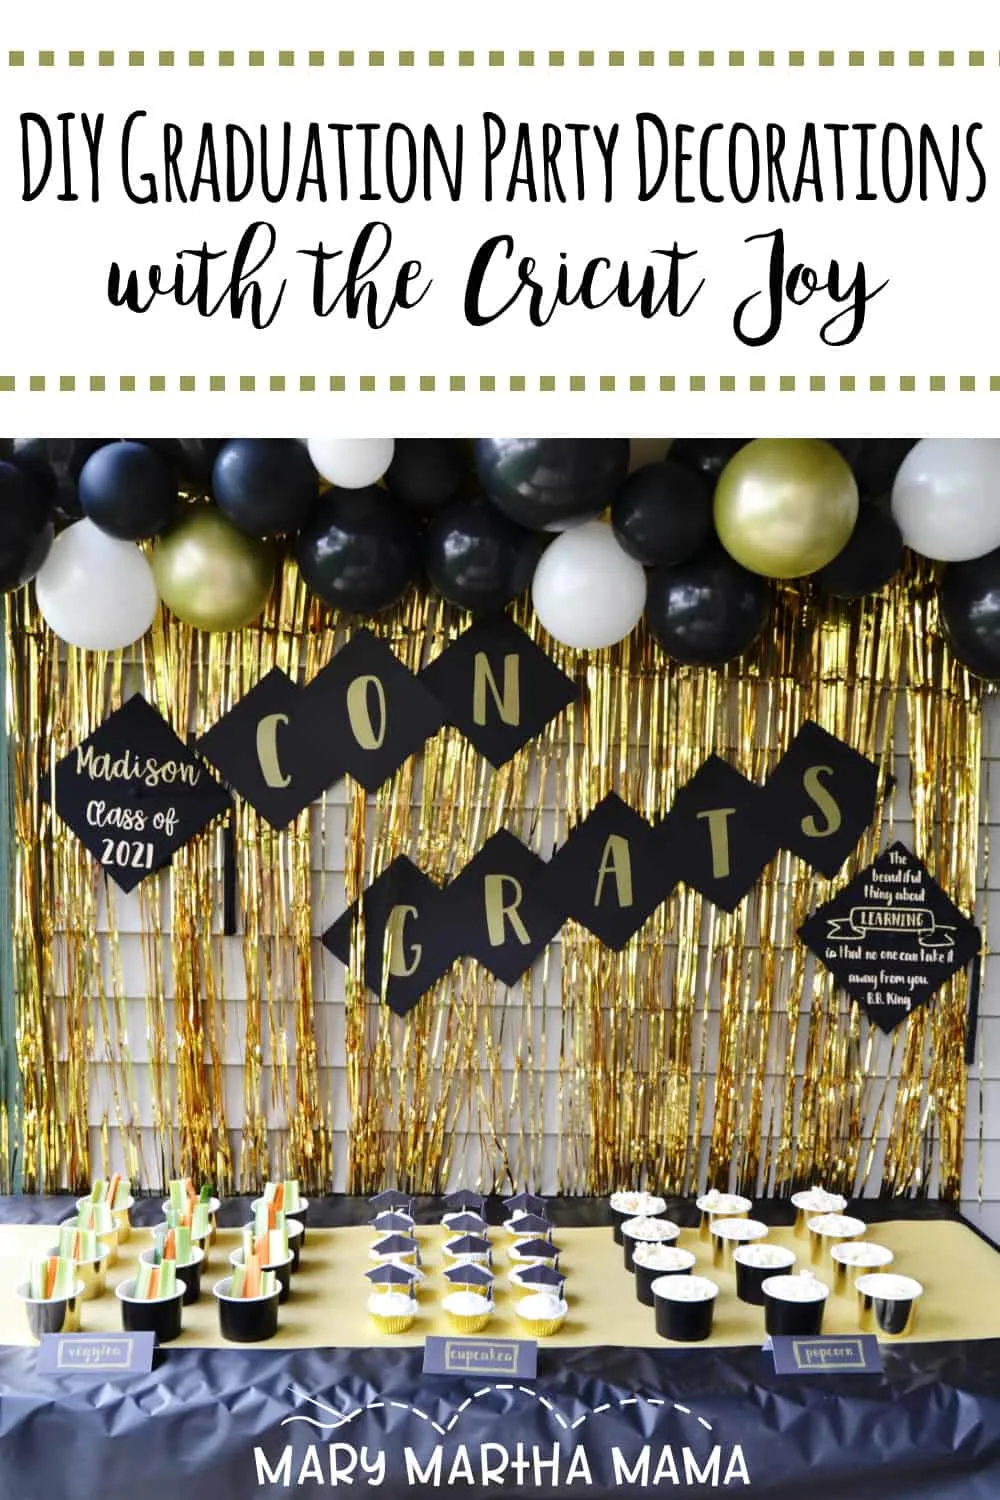
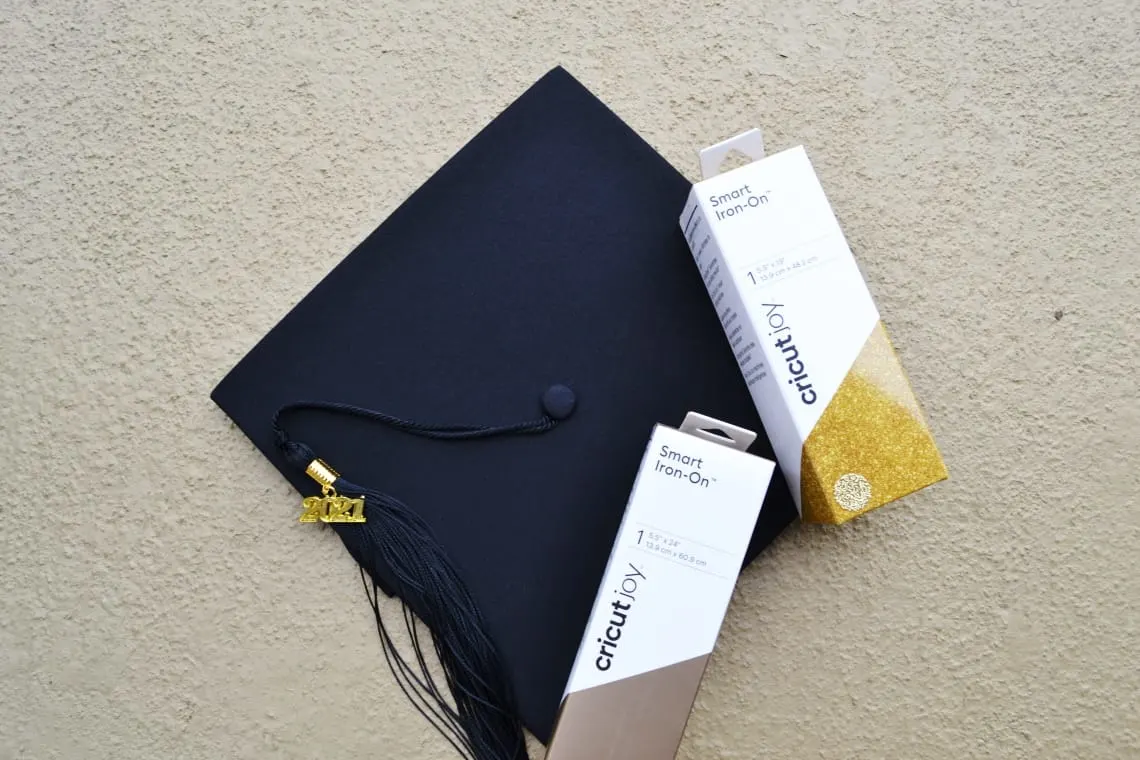
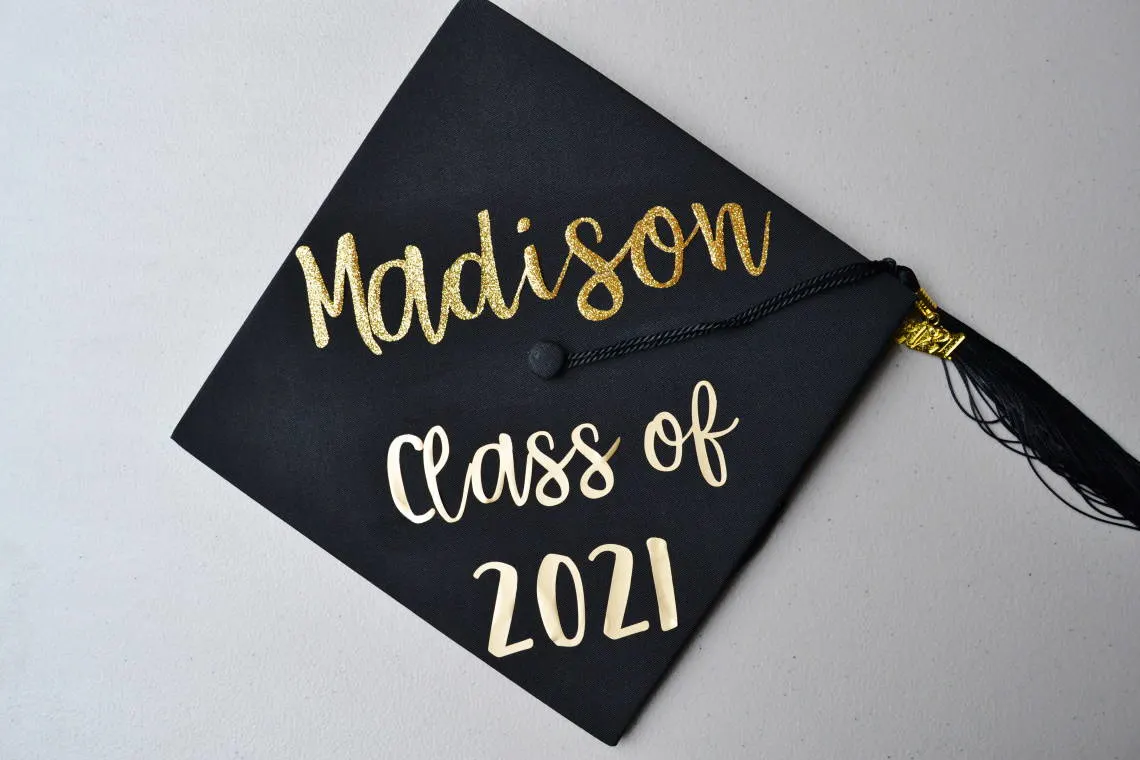
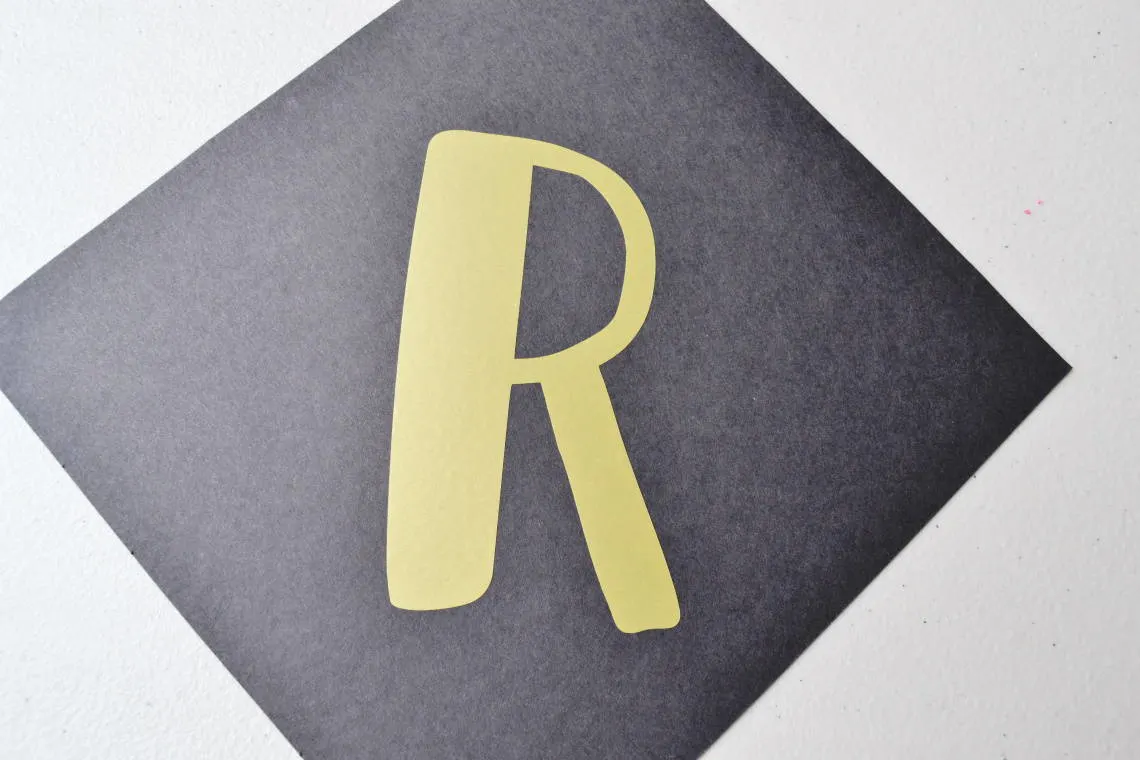
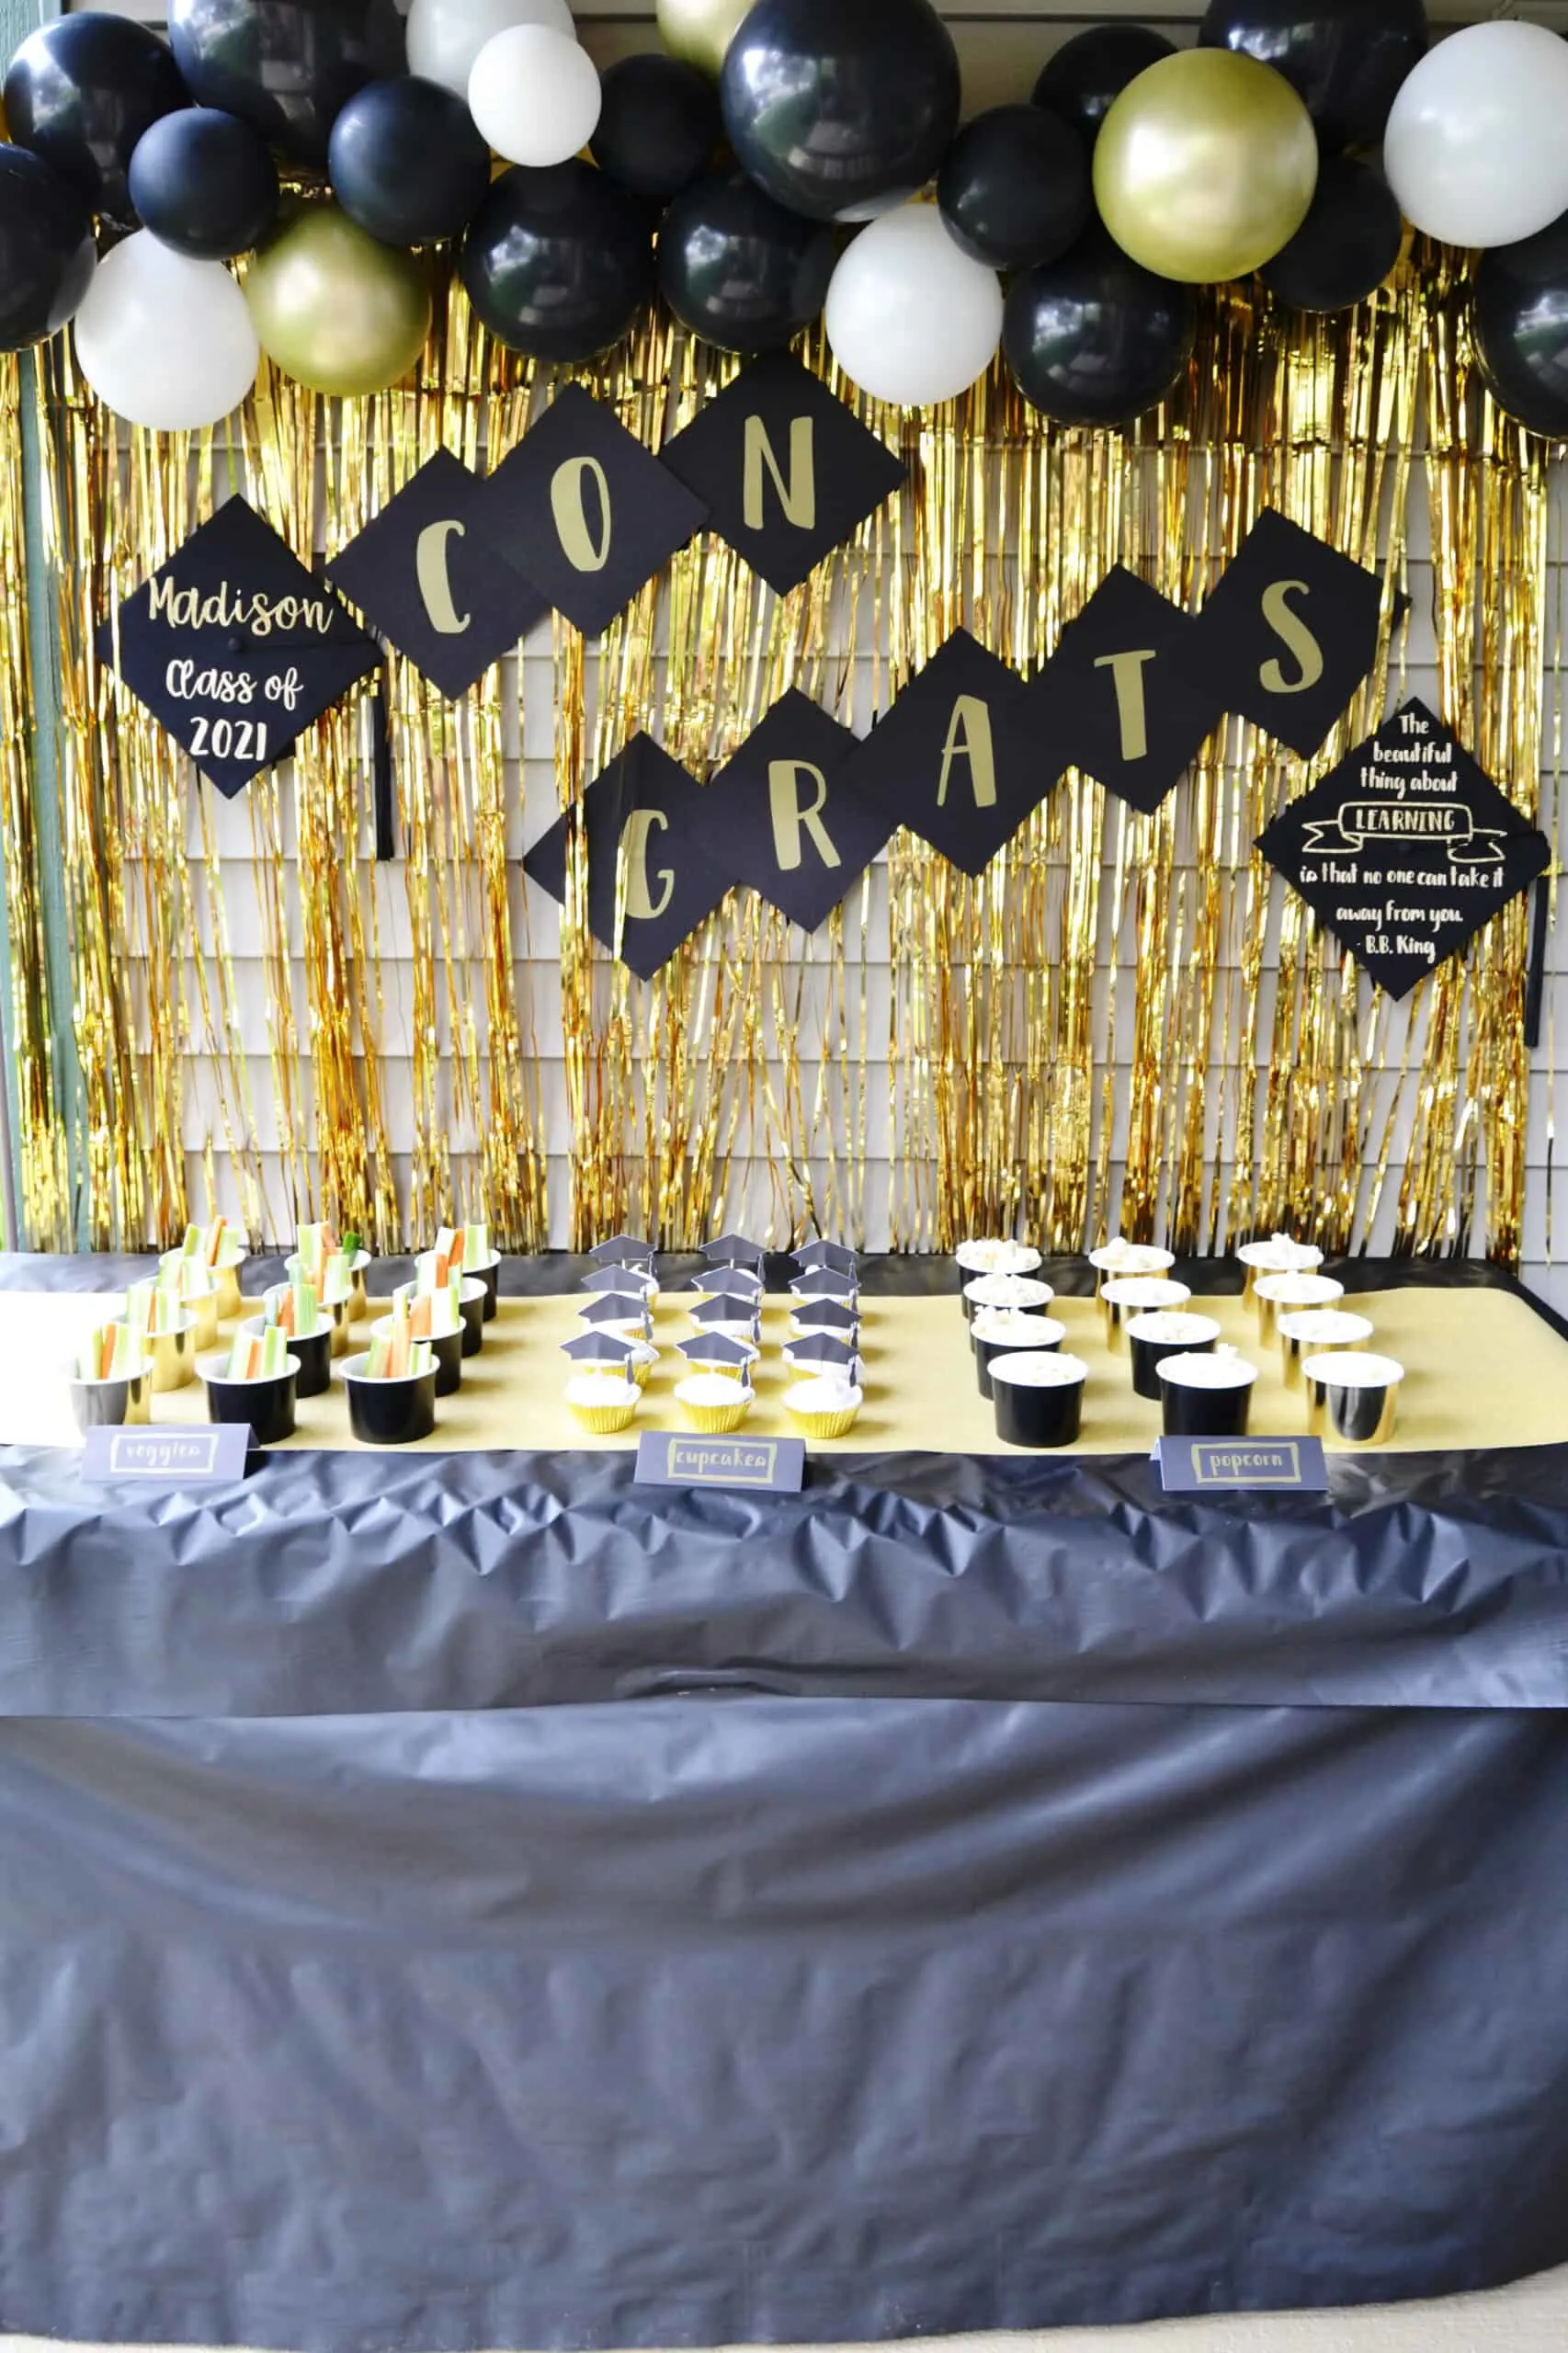
I’ve always loved personalized graduation caps and so I chose to make a banner incorporating them as a focal point for my party decorations. You could make a banner just like this one or you could use this tutorial just to decorate your cap if that’s allowed for your ceremony.


How to Decorate a Cap for Graduation
To decorate the graduation cap I used my Cricut Joy and it was so easy.
Supplies Needed
- Cricut Joy
- Cricut Smart Iron-on Vinyl- Gold
- Cricut Smart Iron-on Vinyl- Glitter Gold
- Cricut Easy Press Mini
- Cricut Weeding Tool
- a graduation cap
- graduation cap project file (Use my “class of 2021” Graduation Cap 1 or “BB King” Graduation Cap 2)

Graduation Cap Tutorial
Design
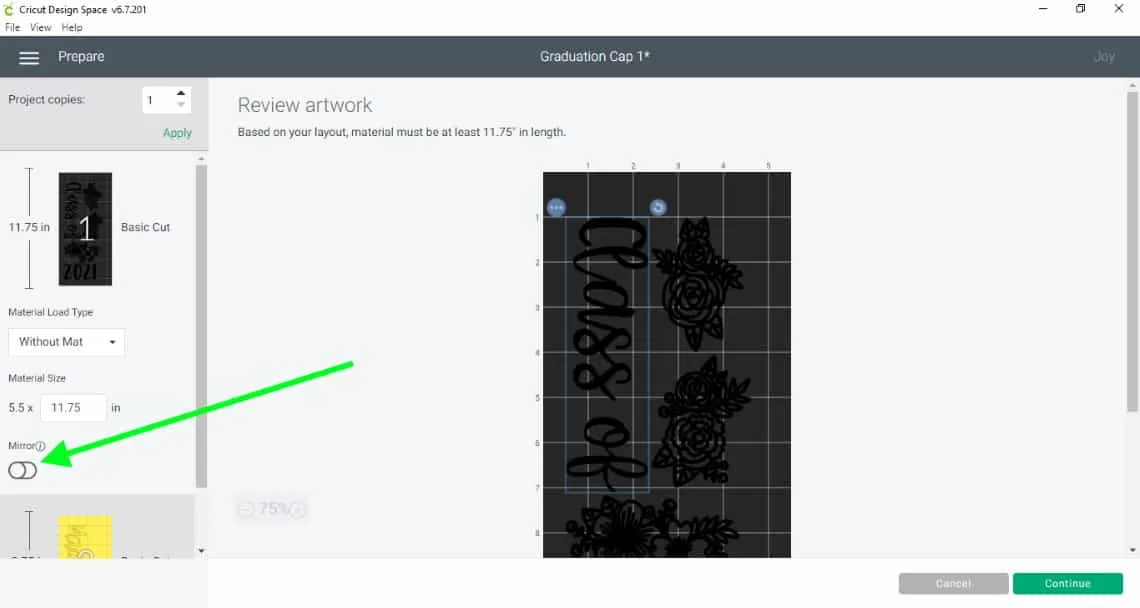
In Cricut Design Space you will pull up my Graduation Cap 1 Project File. Open it up and click customize. You’ll see that I have a 9.5 inch square and some text. The 9.5 inch square is just there to help you visualize the size of the graduation cap while you are personalizing the project. You’ll remove this once you have your design the way you want it.
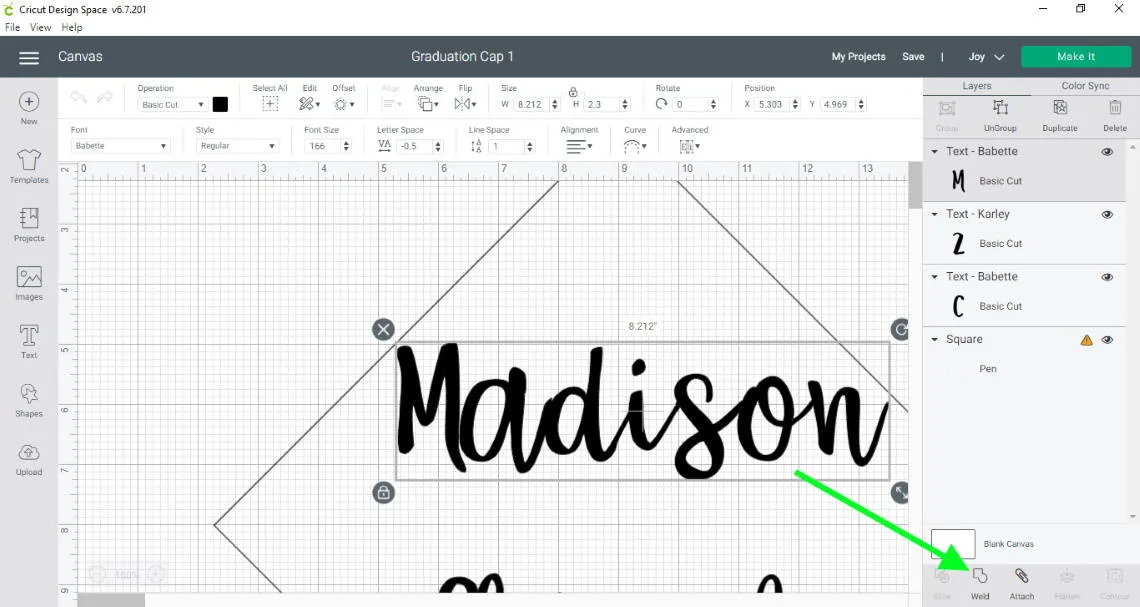
Click on the name “Madison”. You’ll see that it is welded together. I’m going to show you how to make your graduate’s name look just like that if you so choose. Go ahead and delete Madison. Click on the Text button and then type your graduate’s name.
I used the font “Babette” if you want the same look. Adjust your font size to make it fit the space at the top of the cap. Now the letters in this font have space between them but if you want them to touch then you have to adjust the Line Space down until they touch.

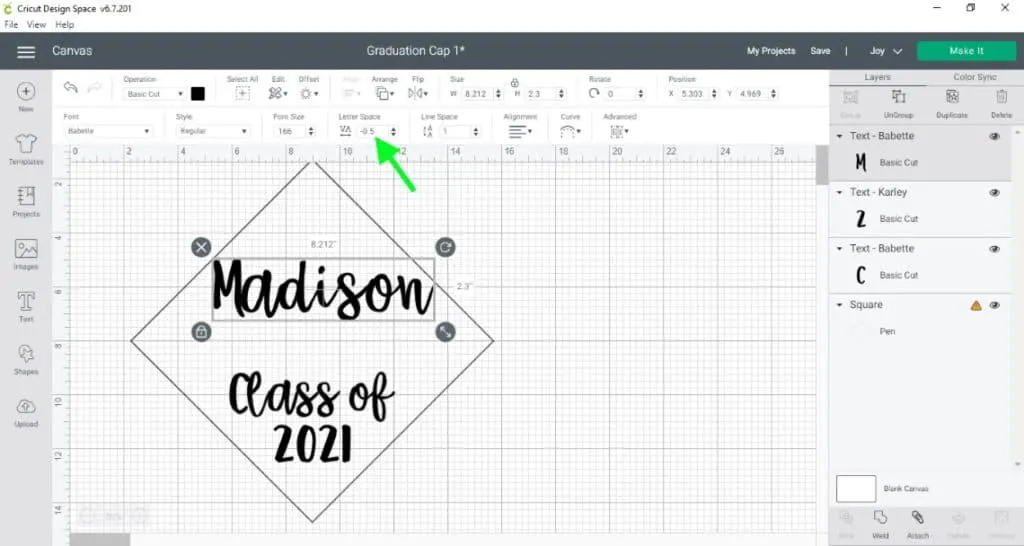
To get the machine to cut the name all out as one piece then you will need to Weld the letters together.

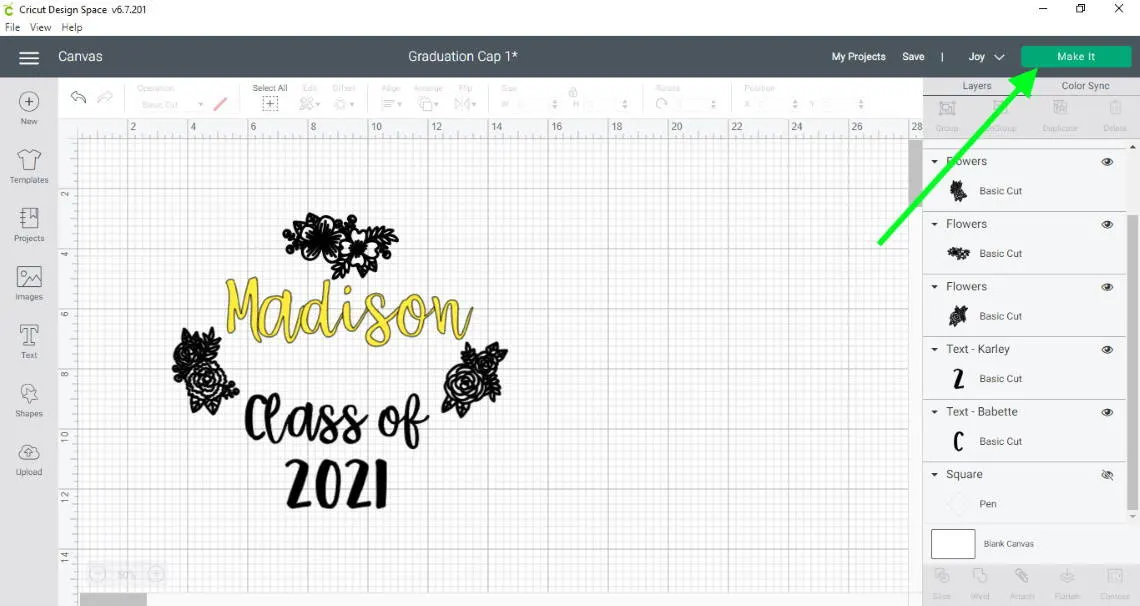
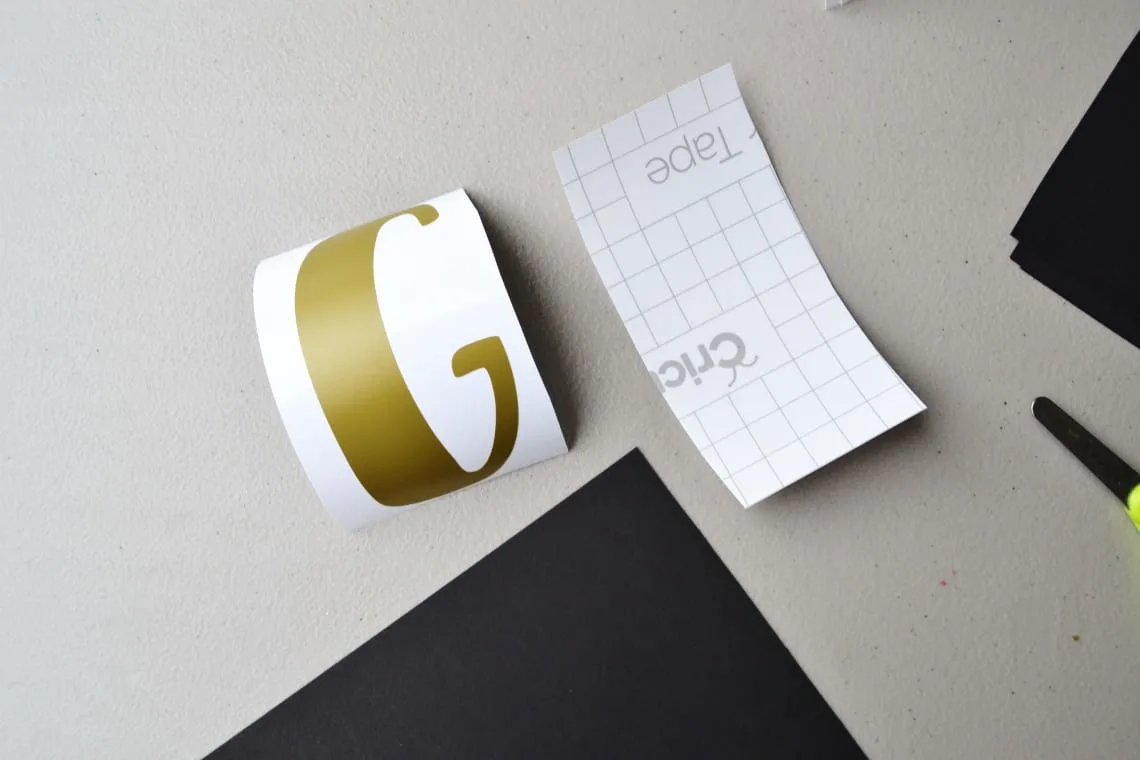
For this cap I opted to have the name cut out of a different vinyl. If you want to do the same then you need to click on the name and then click the color square under Operation and click a different color.

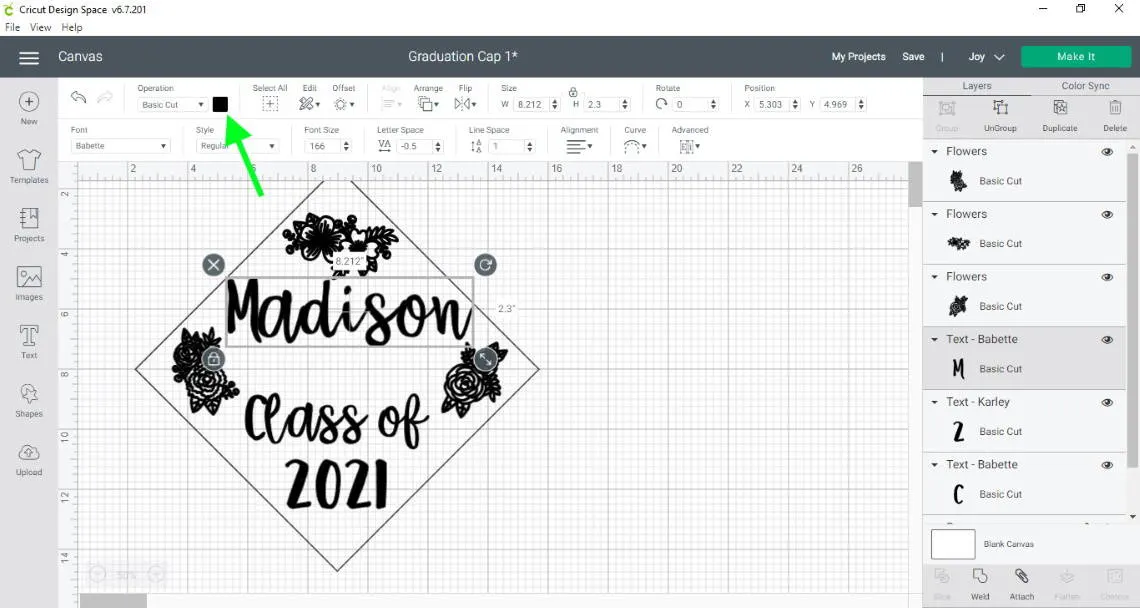
When you have everything just like you want it click on the square outline for the cap and then click the eye on the right hand side to hide it.

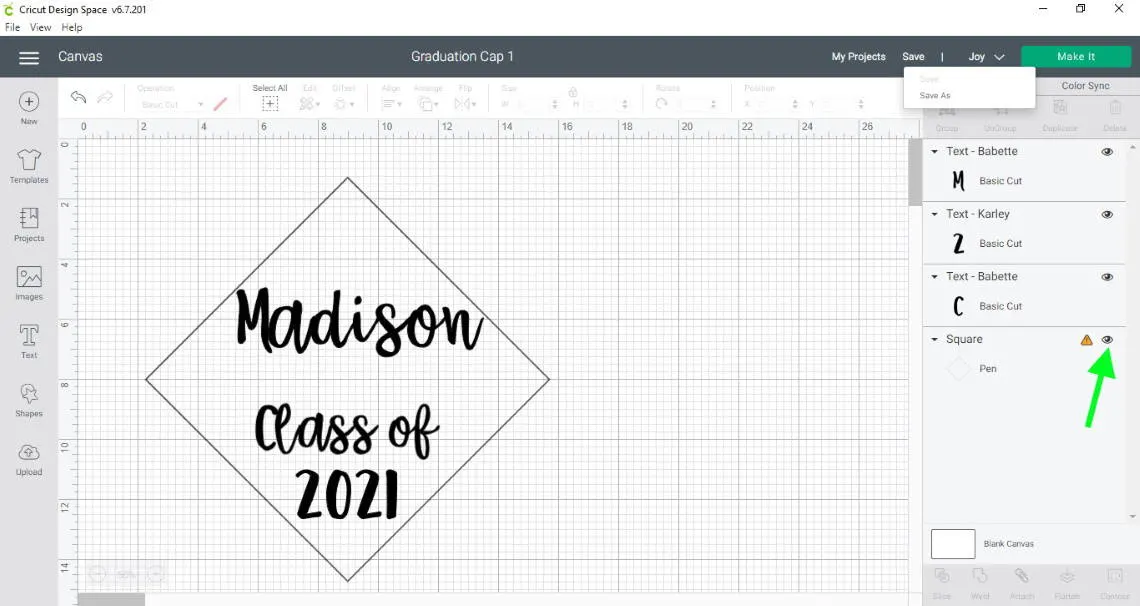
Then click Make It.

Cut
Now you’ll have to select if you are using a mat or not. The great thing about using Cricut Smart Materials is that you don’t have to use a mat unless you are using tiny little scraps.

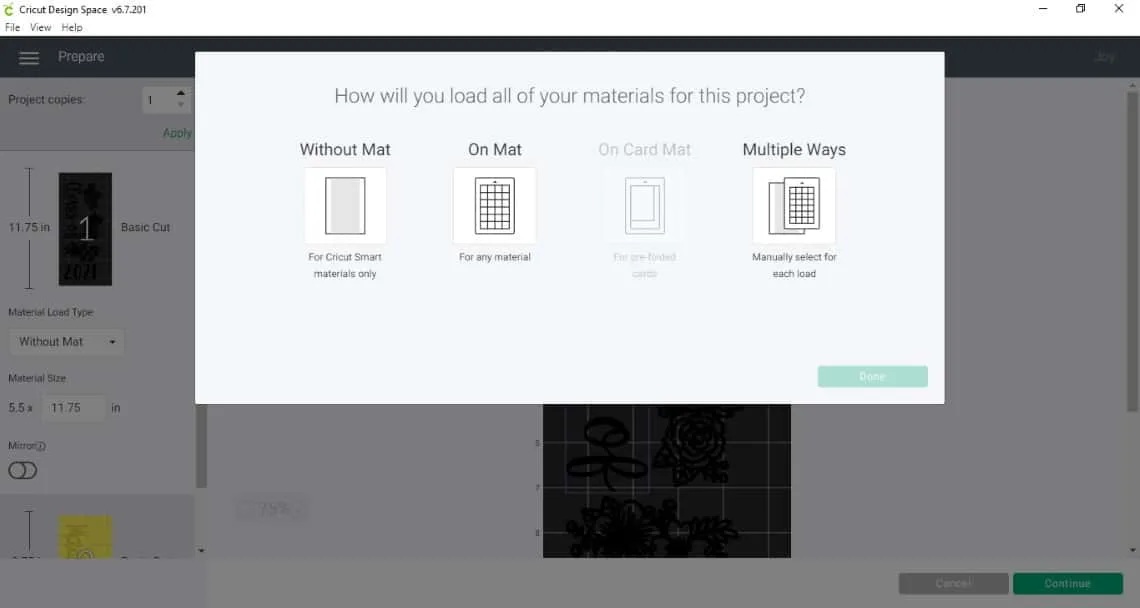
Super Important!!! Because we are using iron-on vinyl we need to mirror the design. Then click continue and Design Space will prompt you to load your vinyl into the machine.

Pay attention to the instructions about how to load your vinyl into the machine. With iron-on you want to load it shiny-side down. Then click Go to start cutting.

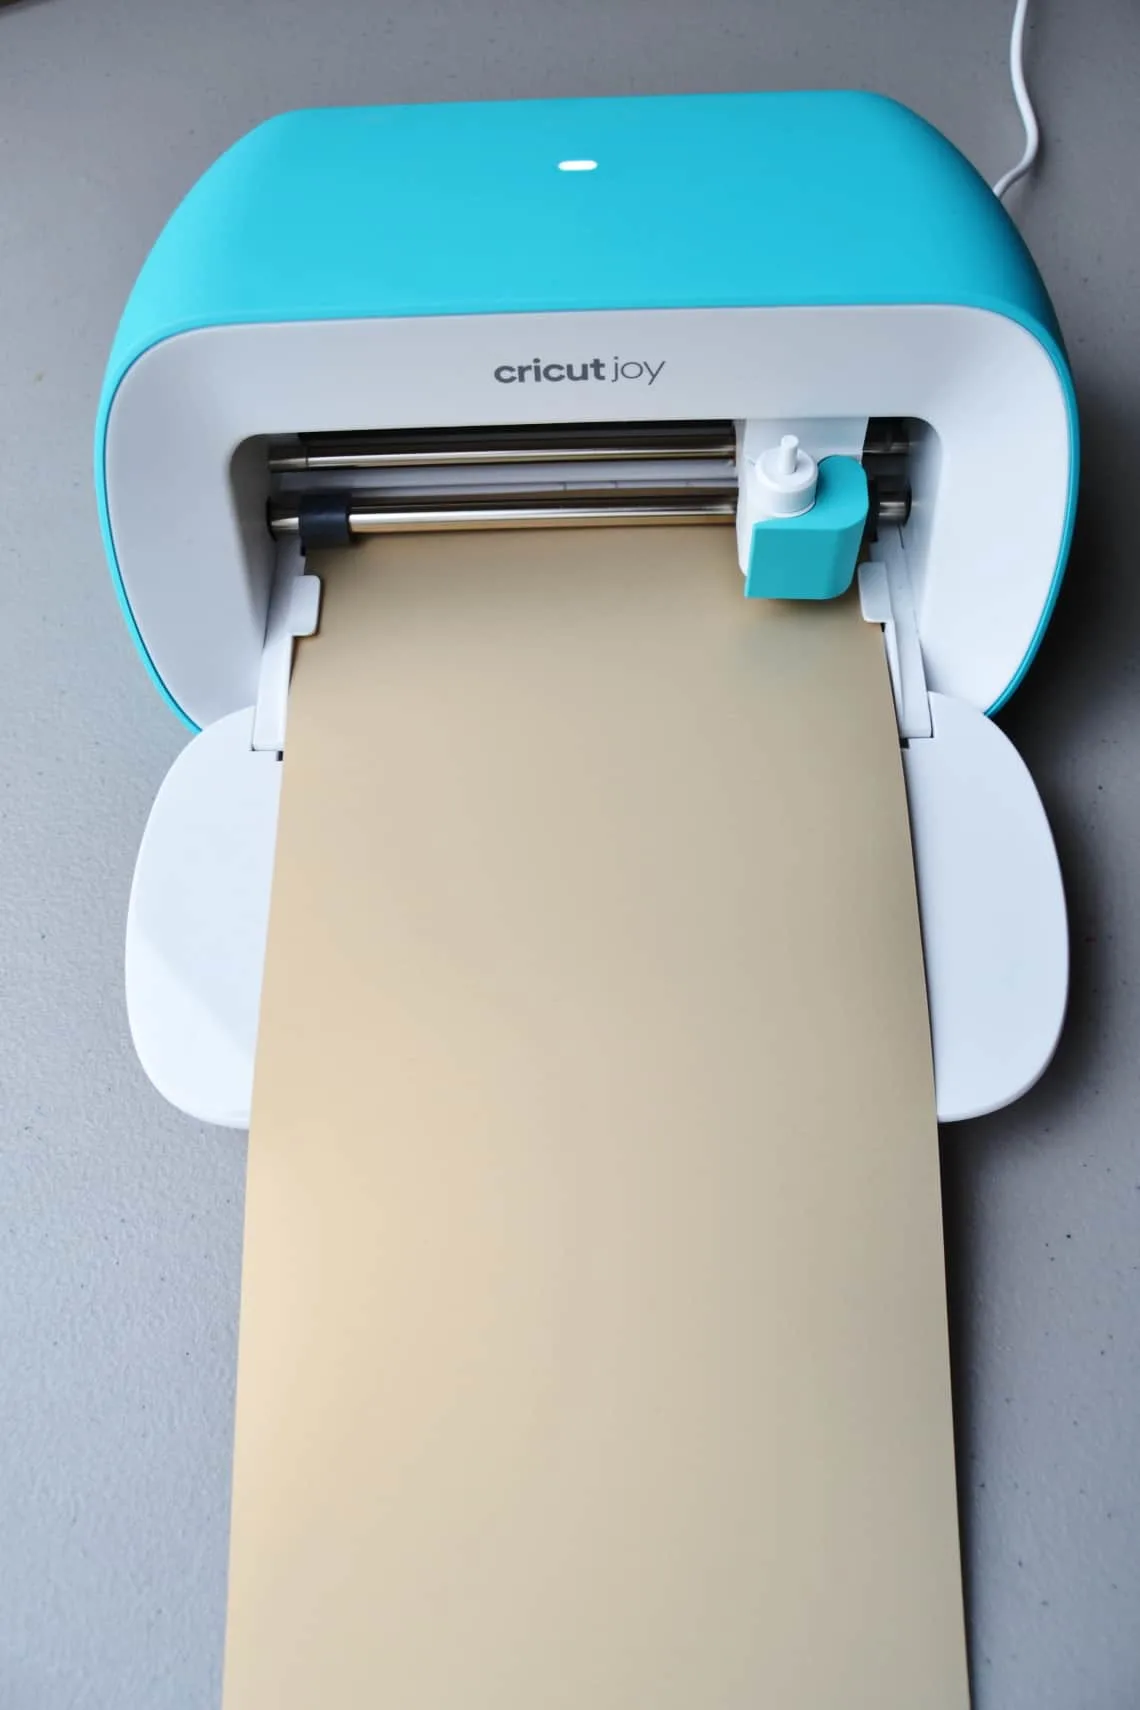
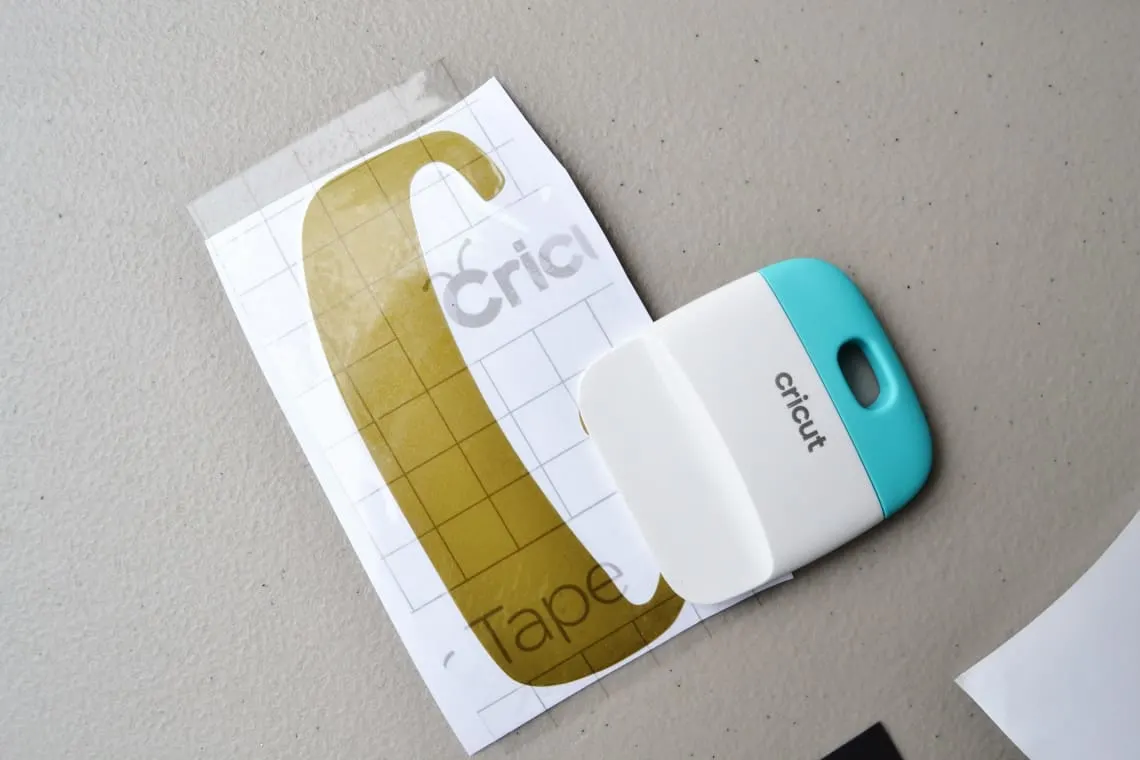
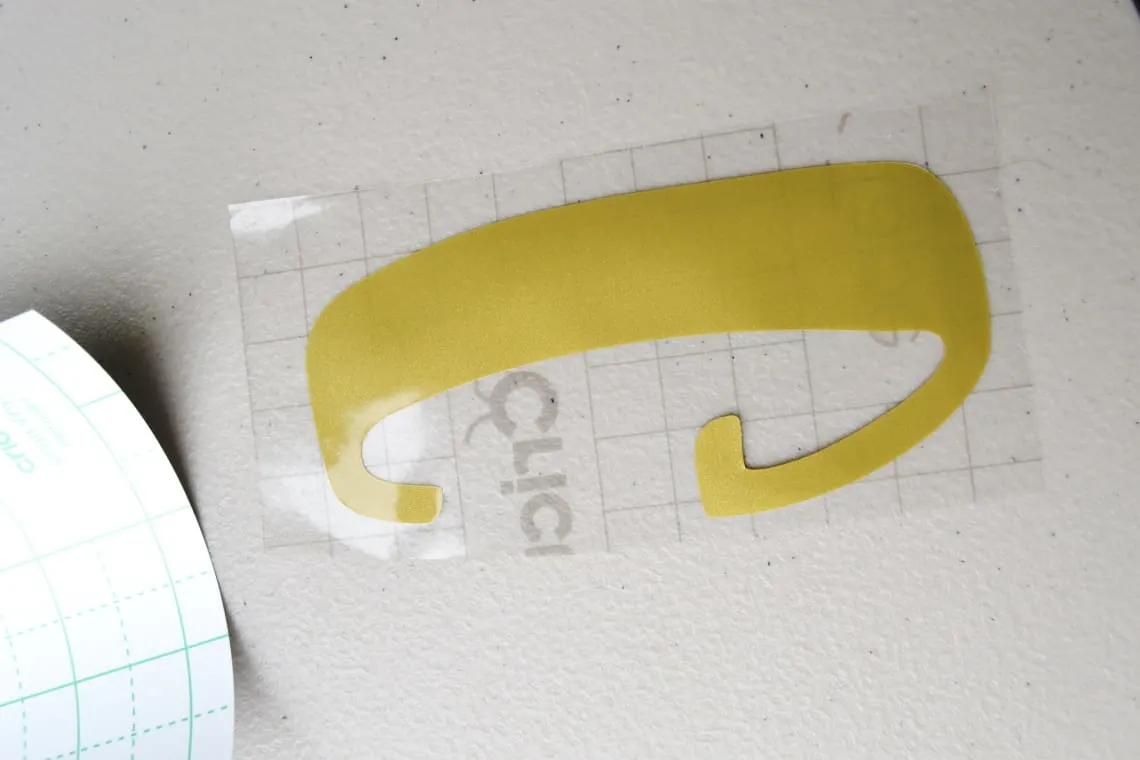
Once your cut is all done you will unload it and then weed out (remove) all the vinyl that isn’t part of your design.


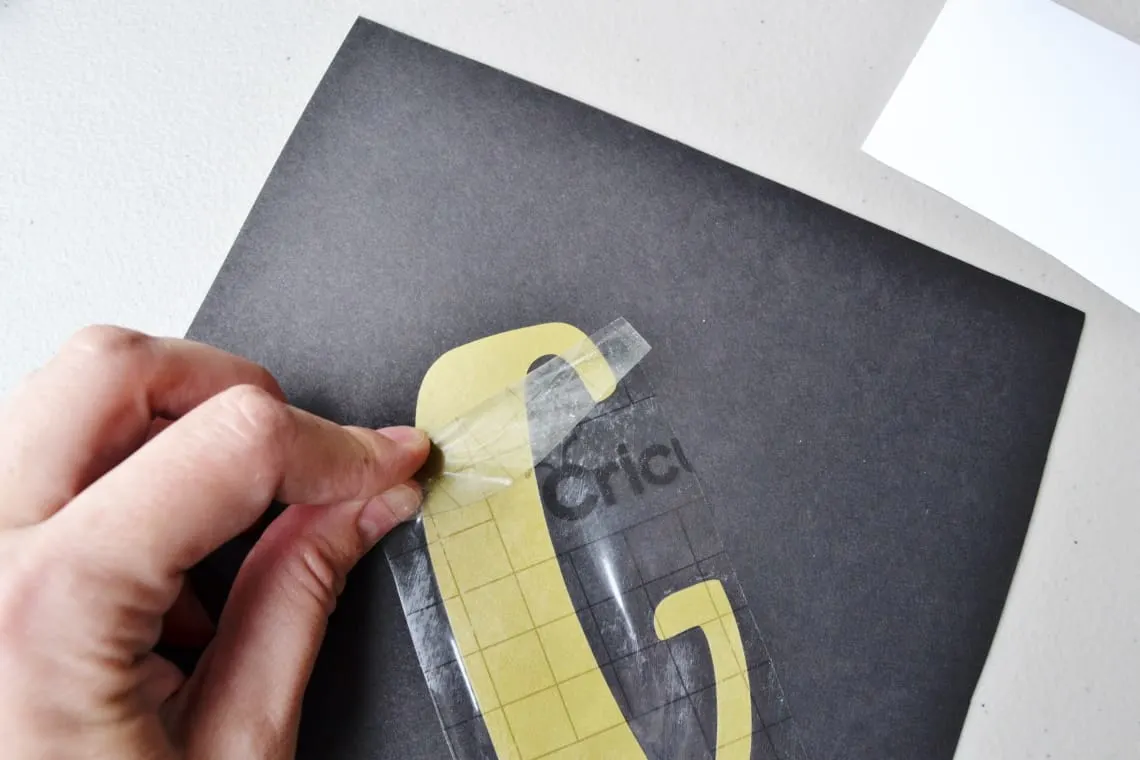
Apply
Take your vinyl pieces that you have weeded and place them where you want them on your cap. The clear backing is a little sticky but I also take the scraper tool and smooth them down once I get them exactly where I want them.

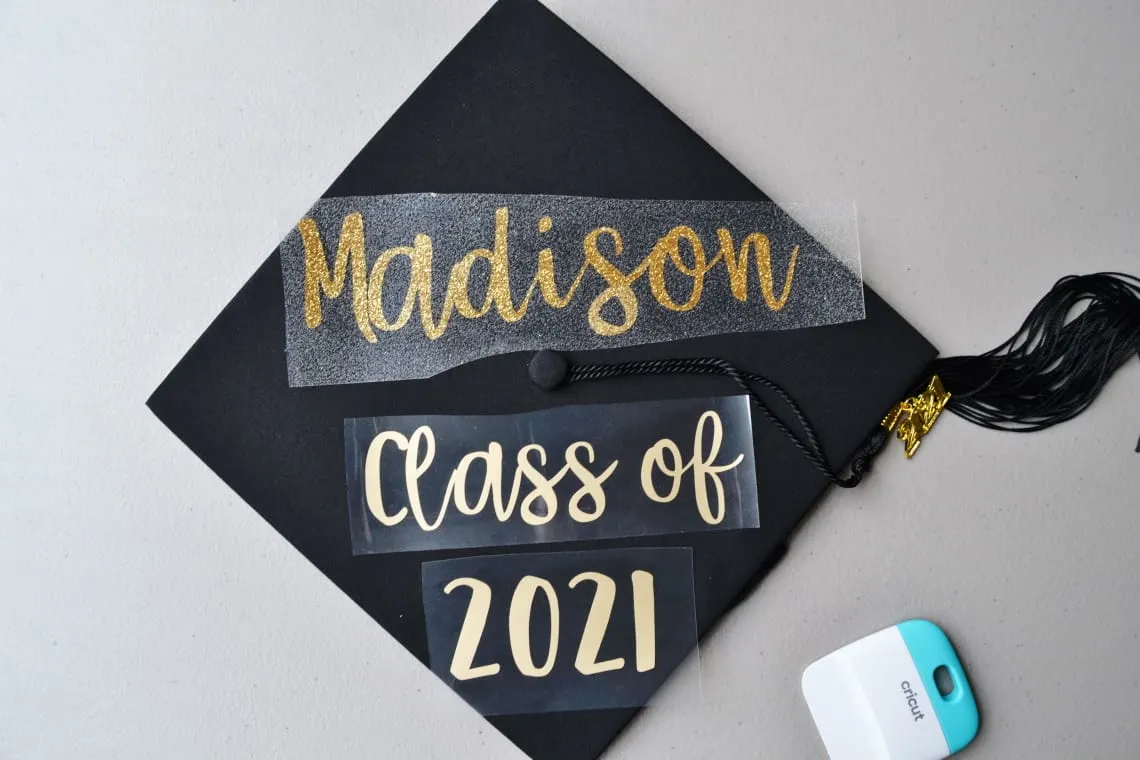
Then use the Cricut Easy Press Mini or one of the other Cricut Easy Press machines to adhere your vinyl designs to the cap. I always like to follow the Cricut Heat Guide for exactly what temperature to use, how long to press, and what kind of peel to do.
The kind of vinyl you use and the material you apply it to will determine what exactly you need to do so plug all of that info into the Cricut Heat Guide and it will tell you what to do!


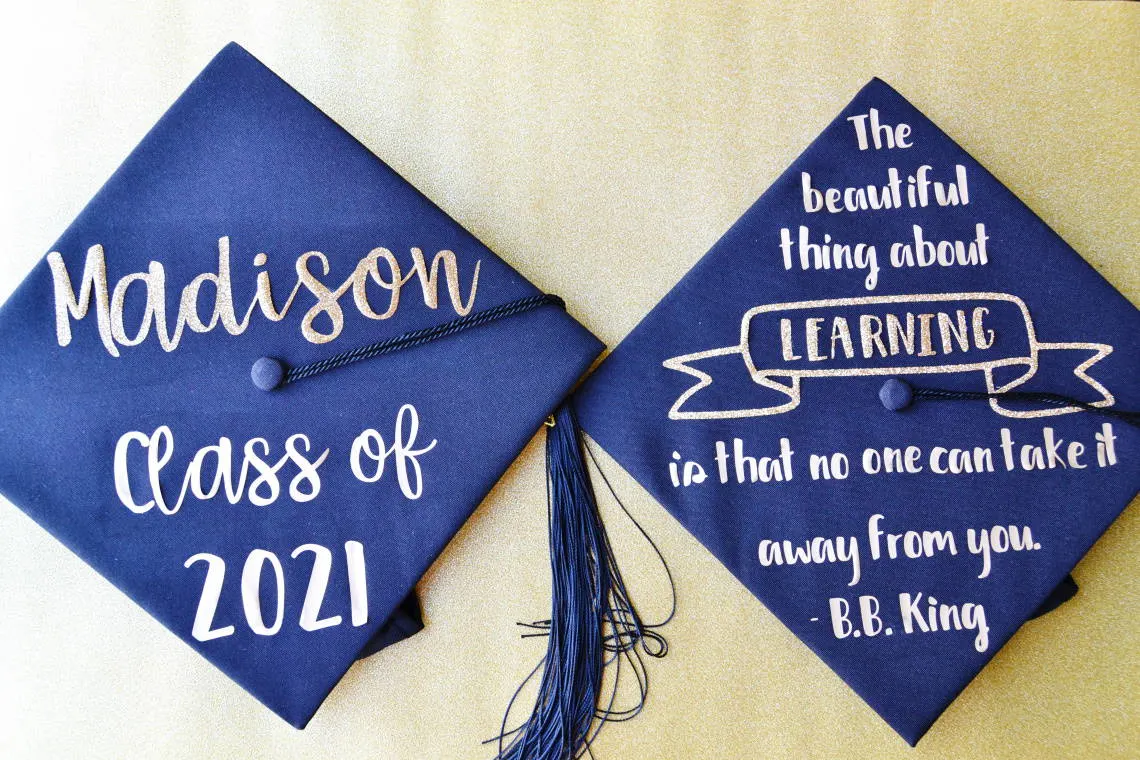
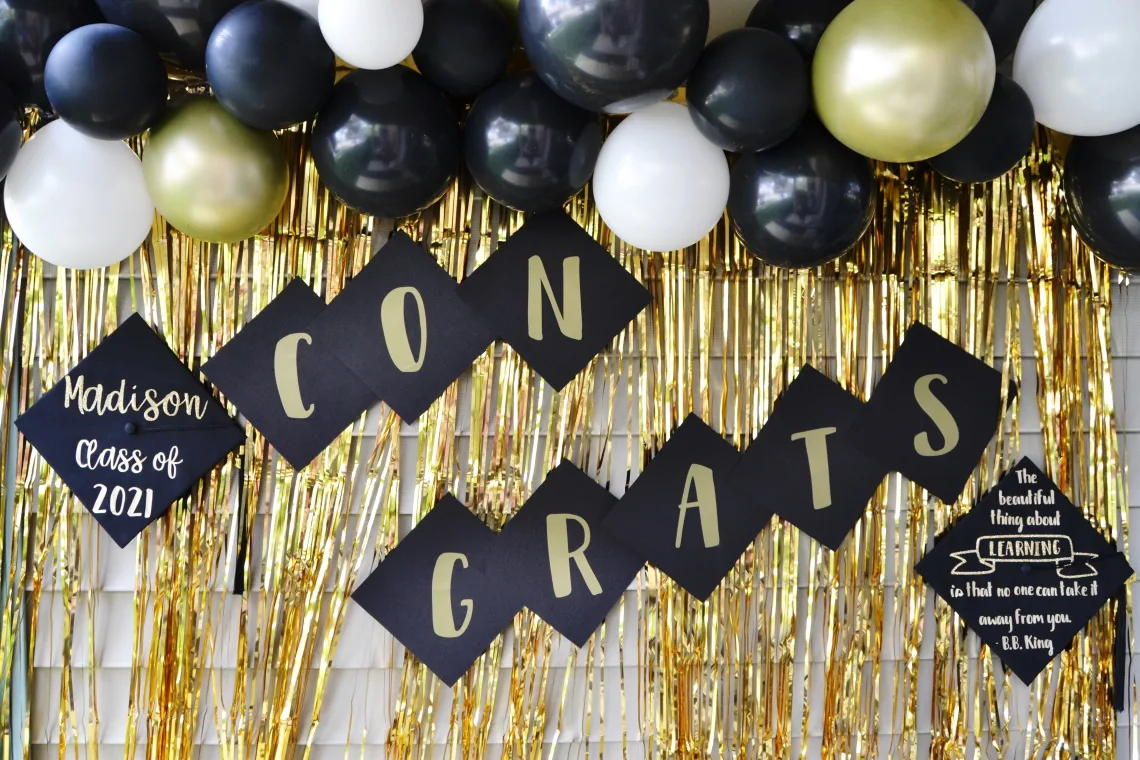
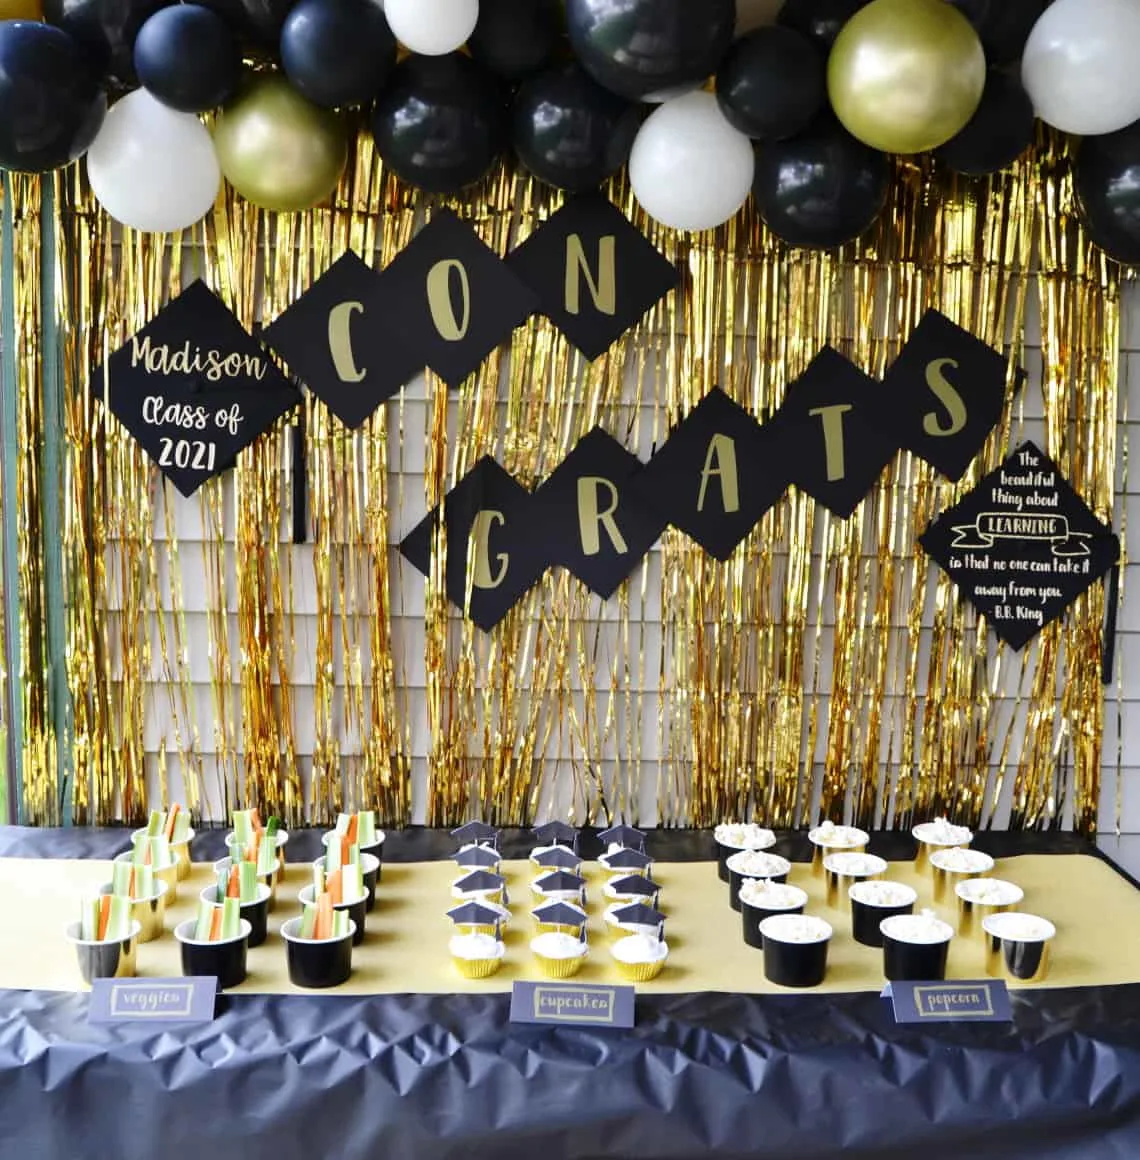
I added “Congrats” in between the two caps for the background for my table. To make those I simply used this Congrats file in Design Space and cut the letters out of Smart vinyl.
I then applied the letters to squares of black paper that mimic the look of the graduation caps. I used transfer tape to apply the letters to the paper but be sure to be careful not to rip the paper off when you remove the transfer tape.


Cupcake Toppers
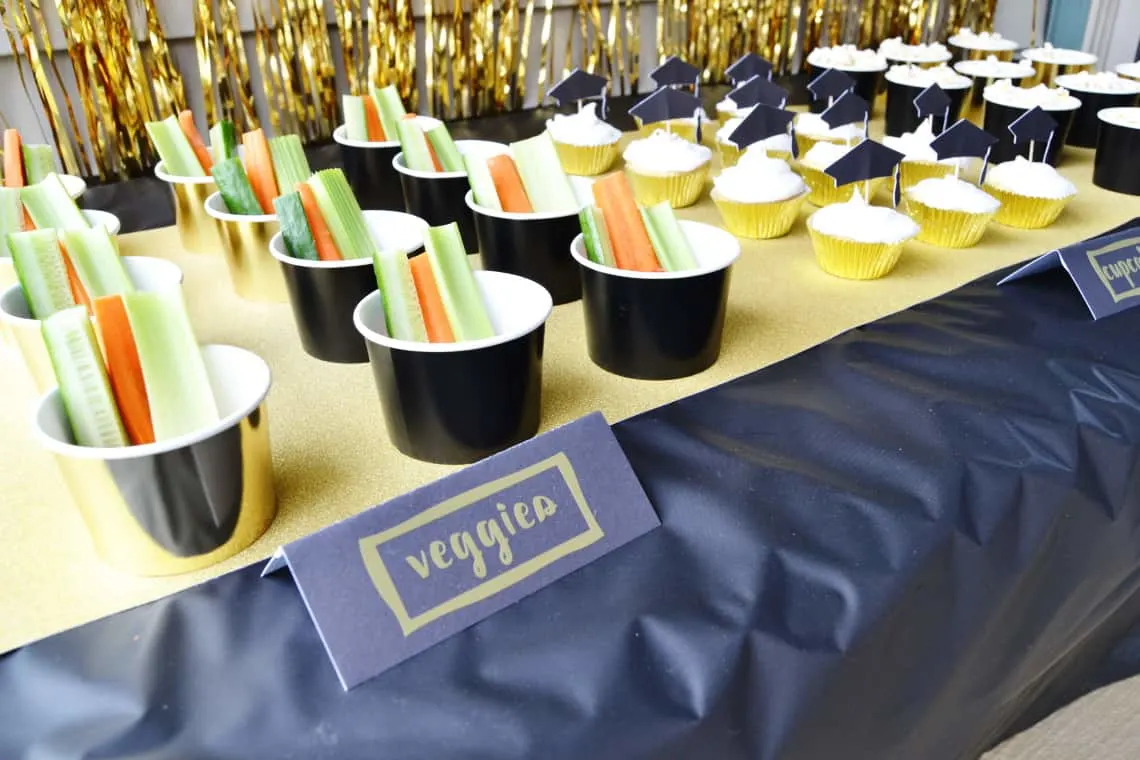
On the table I placed a few snacks that are individually portioned for easy grab and go. To make the cupcakes a little more festive I made some graduation cap cupcake toppers.


Supplies Needed
Cupcake Toppers Tutorial
First I pulled up an image of a graduation cap in Design Space. You can use my Graduation Cupcake Toppers file in Design Space or find another image that you like. Design Space has a ton of great Graduation images to choose from for your DIY graduation party decorations.
In my file I had 6 graduation caps and I flipped half of them so that the tassel was on the right for half and the left for half. If you use my file I have already done this for you so you don’t need to flip anything.

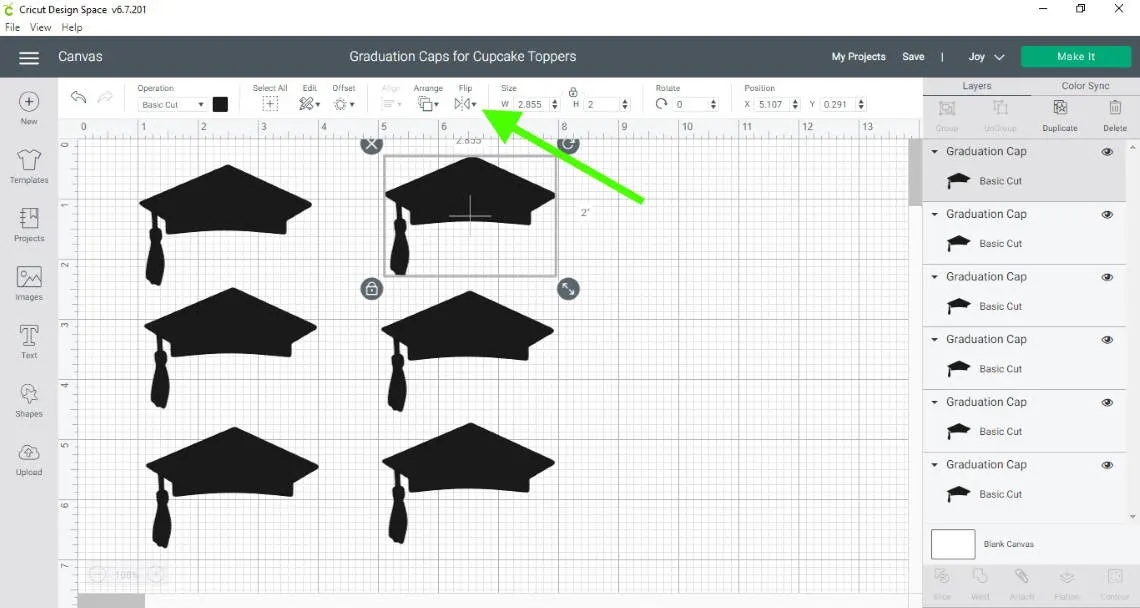

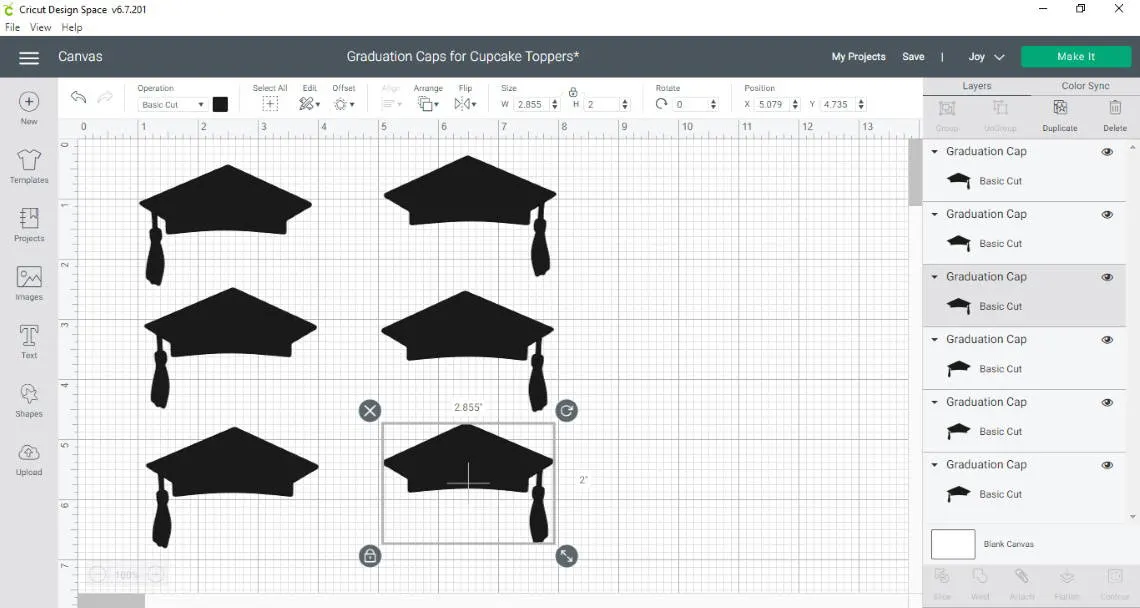
Each pair of caps will make one cupcake topper. Click make it. Adjust the number of copies to make the number of cupcake toppers that you need.
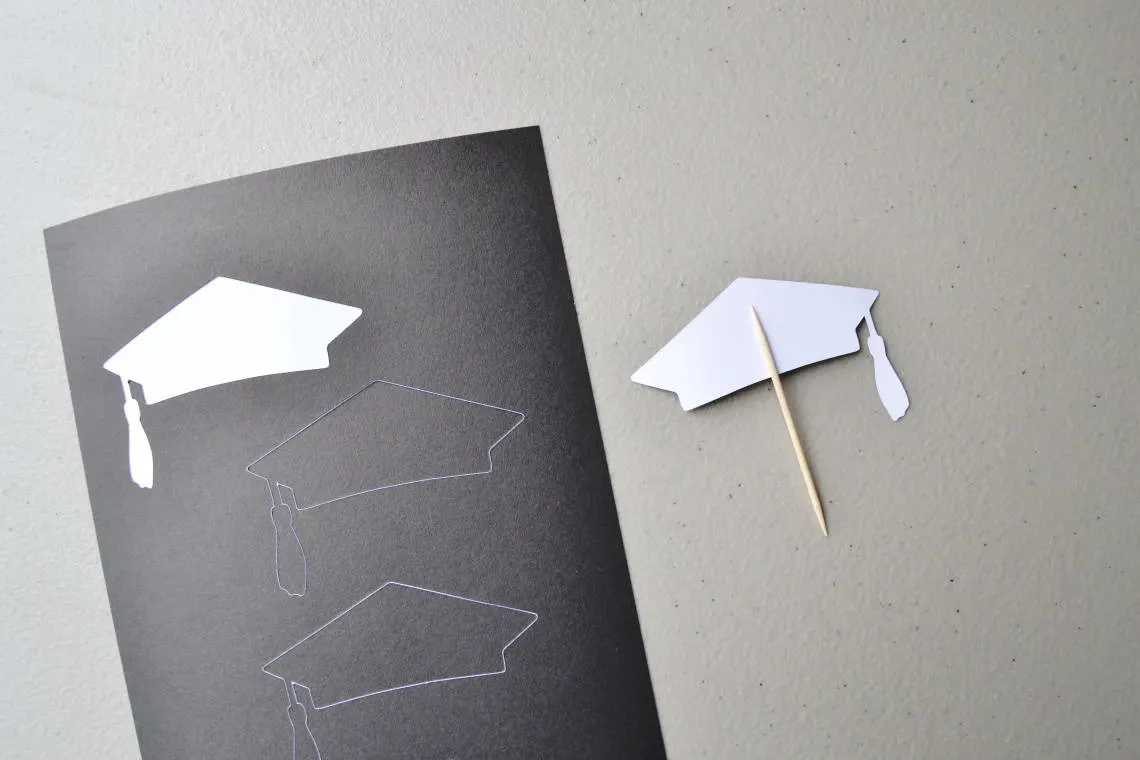
Once you have cut them all out you will peel one sticker off of the page and place it sticky side up on the table. Place a toothpick in the center of the graduation cap. Then top it with a cap that had the tassel on the opposite side, so that they line up. Press around the edges and middle so that it all stays stuck together nicely.


Food Labels
The last little details that I made were labels for the food. You can grab my food label file for Design Space. When you open it up click Customize so that you can edit the text and write in the names of food you are going to serve.
Duplicate any labels if you need more. To construct these I simply followed the steps that I did for the Congrats papers above.

I love that the Cricut Joy enables me to make DIY Graduation party decorations so so easily. There are so many graduation decoration ideas in Cricut Design Space so be sure to check them out for your graduation celebration.

More Cricut Fun


