This is a sponsored post written by me on behalf of Cricut. All opinions are 100% mine.
I recently got my hands on the new Cricut Joy and I am having so much fun seeing what it can do. Today I’m sharing with you 5 simple organizing projects I’ve recently done with the help of my Cricut Joy.
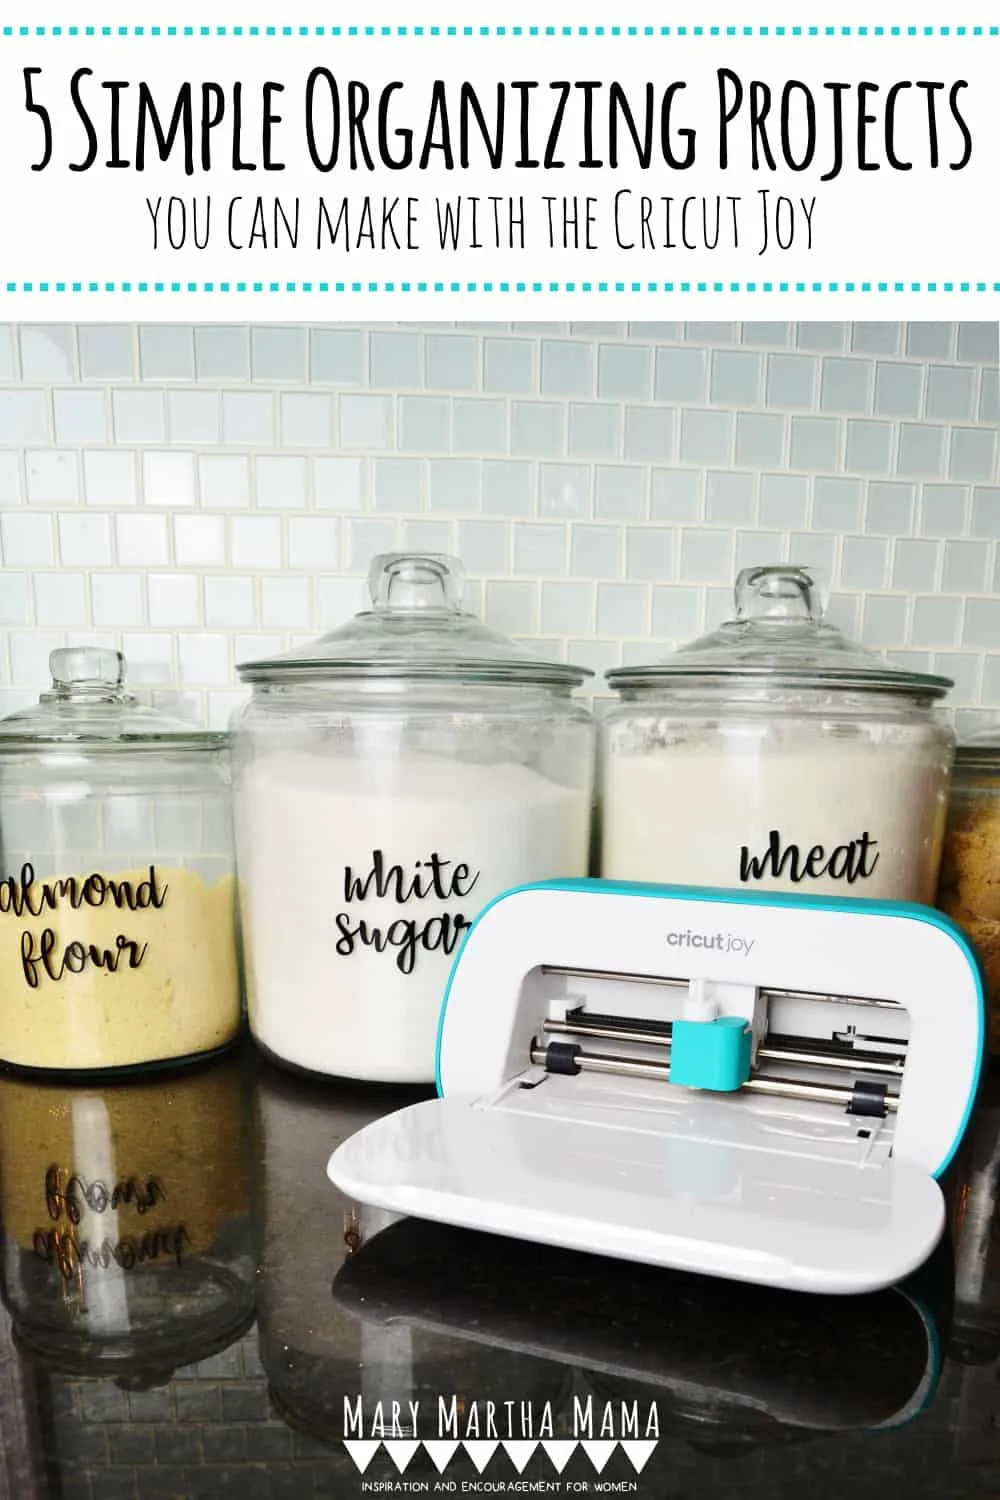
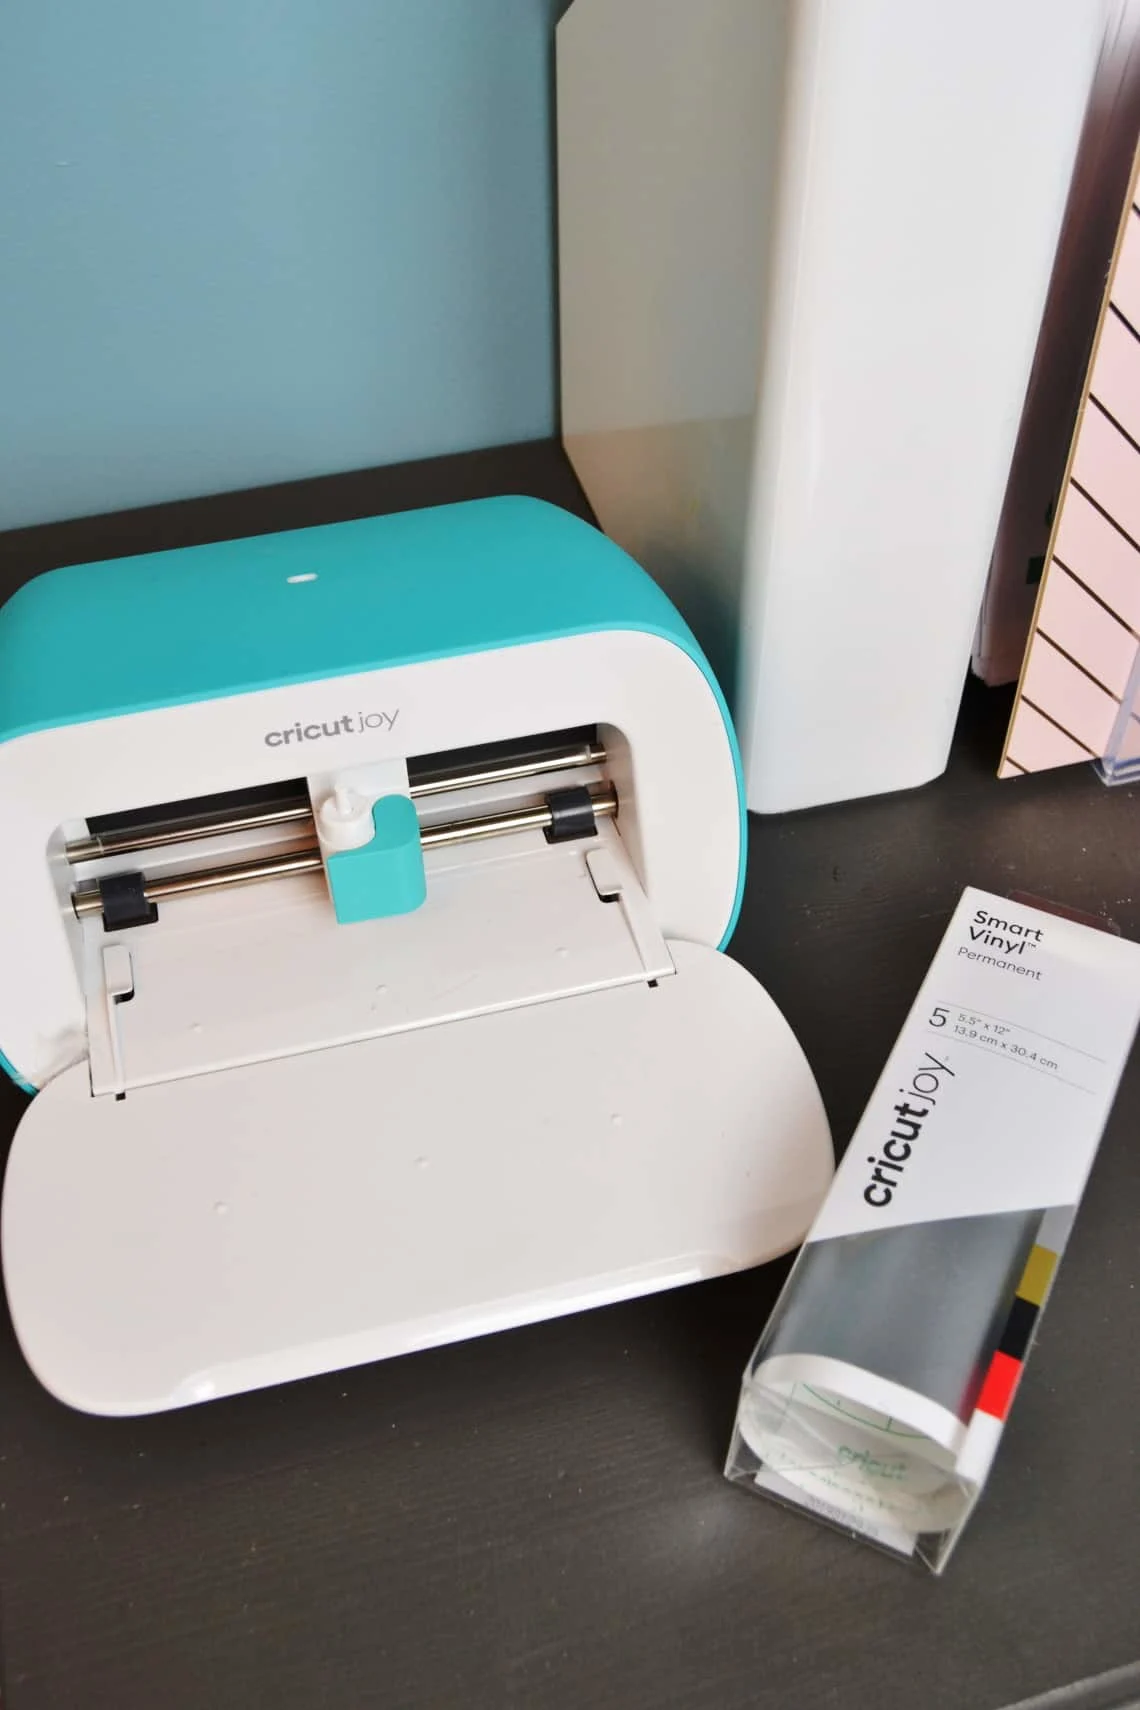
Ok, so some of you may be wondering what is the Cricut Joy? The Cricut Joy is a new, compact cutting and writing machine from Cricut that enables you to personalize all kinds of things.
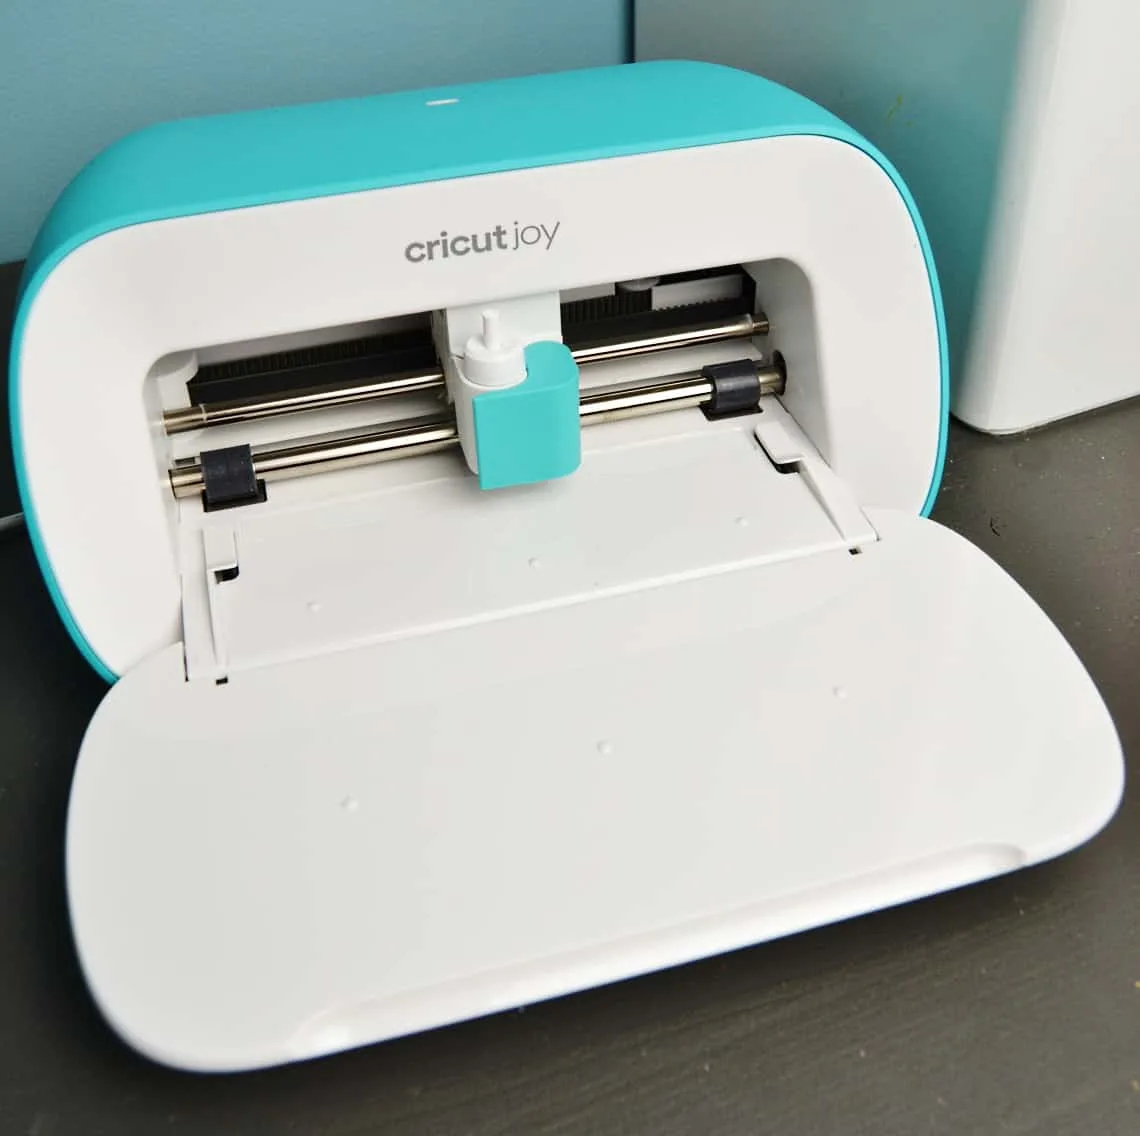
This machine is perfect for those looking to do some crafting but needing something that is smaller and portable. This is Cricut’s smallest cutting machine ever. You don’t need a big craft room or a whole lot of space for the Cricut Joy.
Mats are option with the Cricut Joy which means it can fit nicely on a counter and be set up quickly if you need to move it. Not having to carry a mat and smaller materials make this a very portable system. Having the option to not use mats also means fewer steps and quicker projects. You can personalize anything with one cut and one color in 15 minutes or less.
The Cricut Joy also has the ability to make long cuts of up to 20 feet which opens up the possibility of making some really awesome, large projects. New Smart Vinyl comes in extended sizes of up to 20 feet.
Here are some of the projects I have been able to do so far:
My Organization Projects
Greeting Card Station
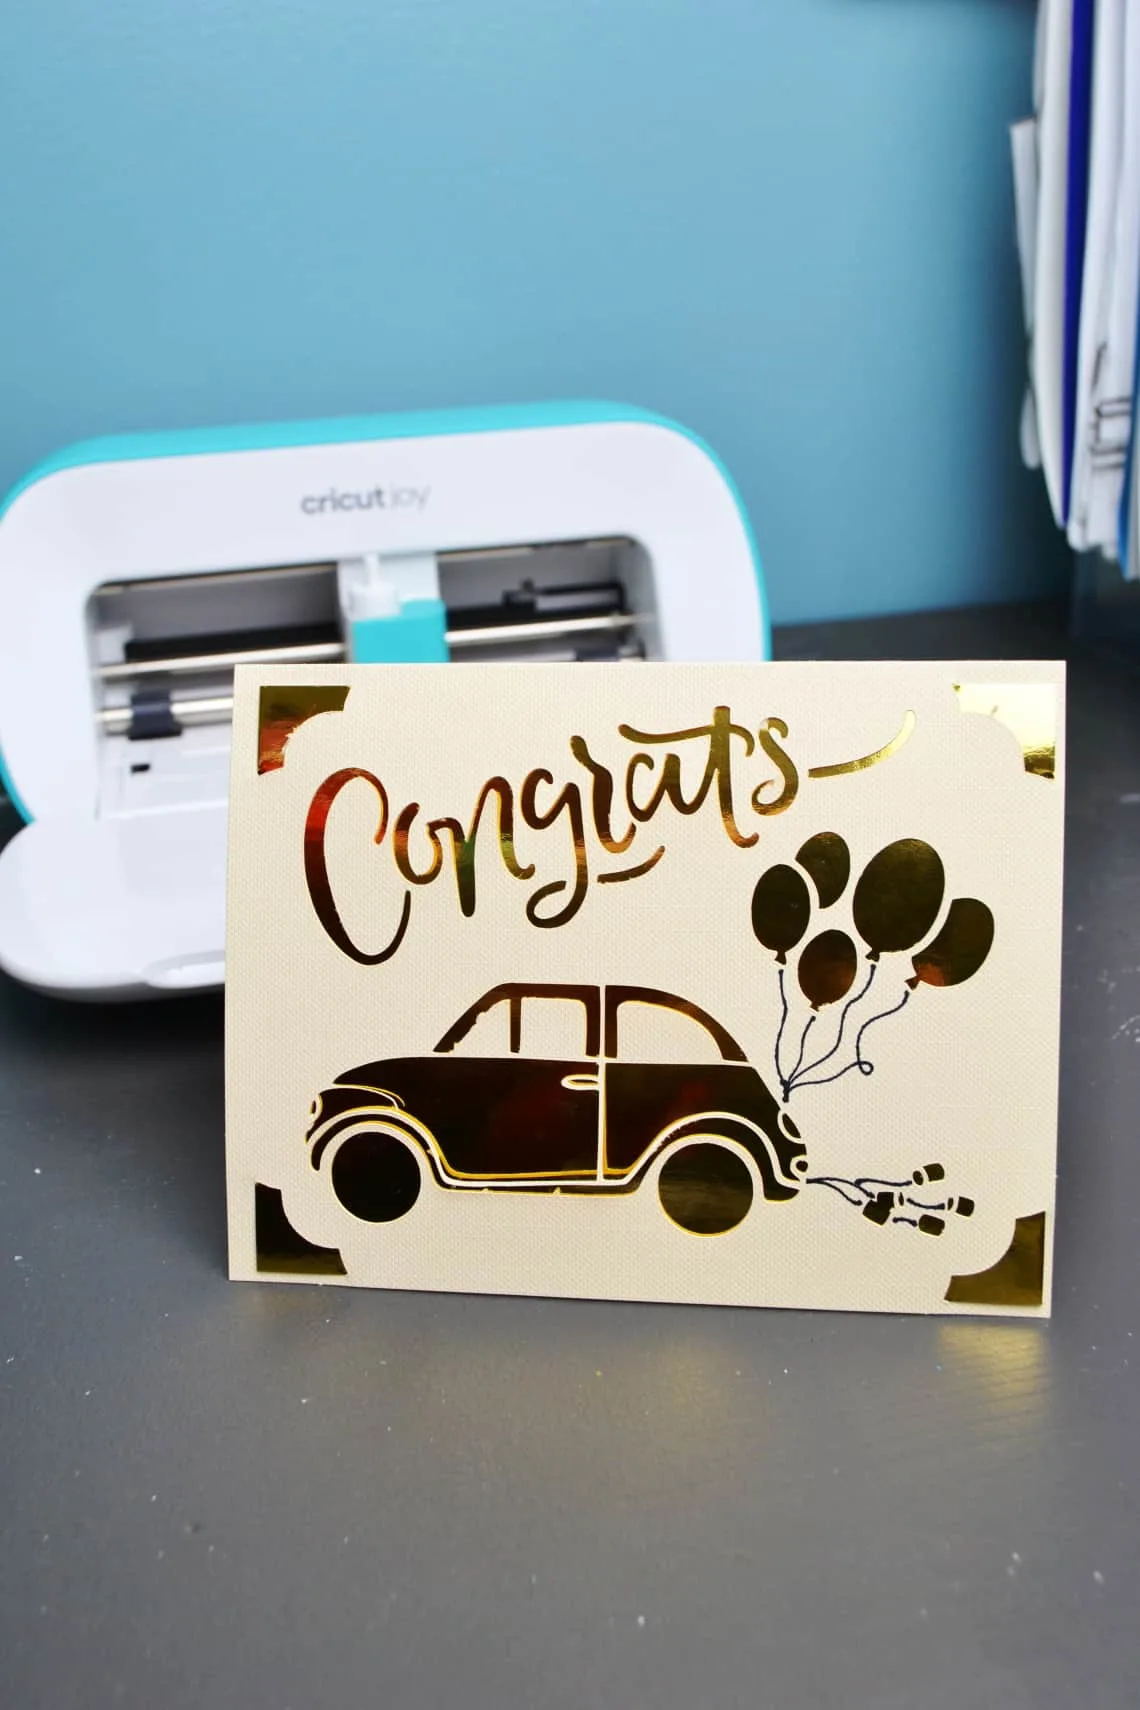
One thing I really love about the Cricut Joy is just how easy it is to make greeting cards with it. I made a few cute cards and a little bin for them. In the bin I keep a calendar of loved one’s birthdays and upcoming special occasions for the year along with some envelopes and stamps to make it easy for me to send them out.
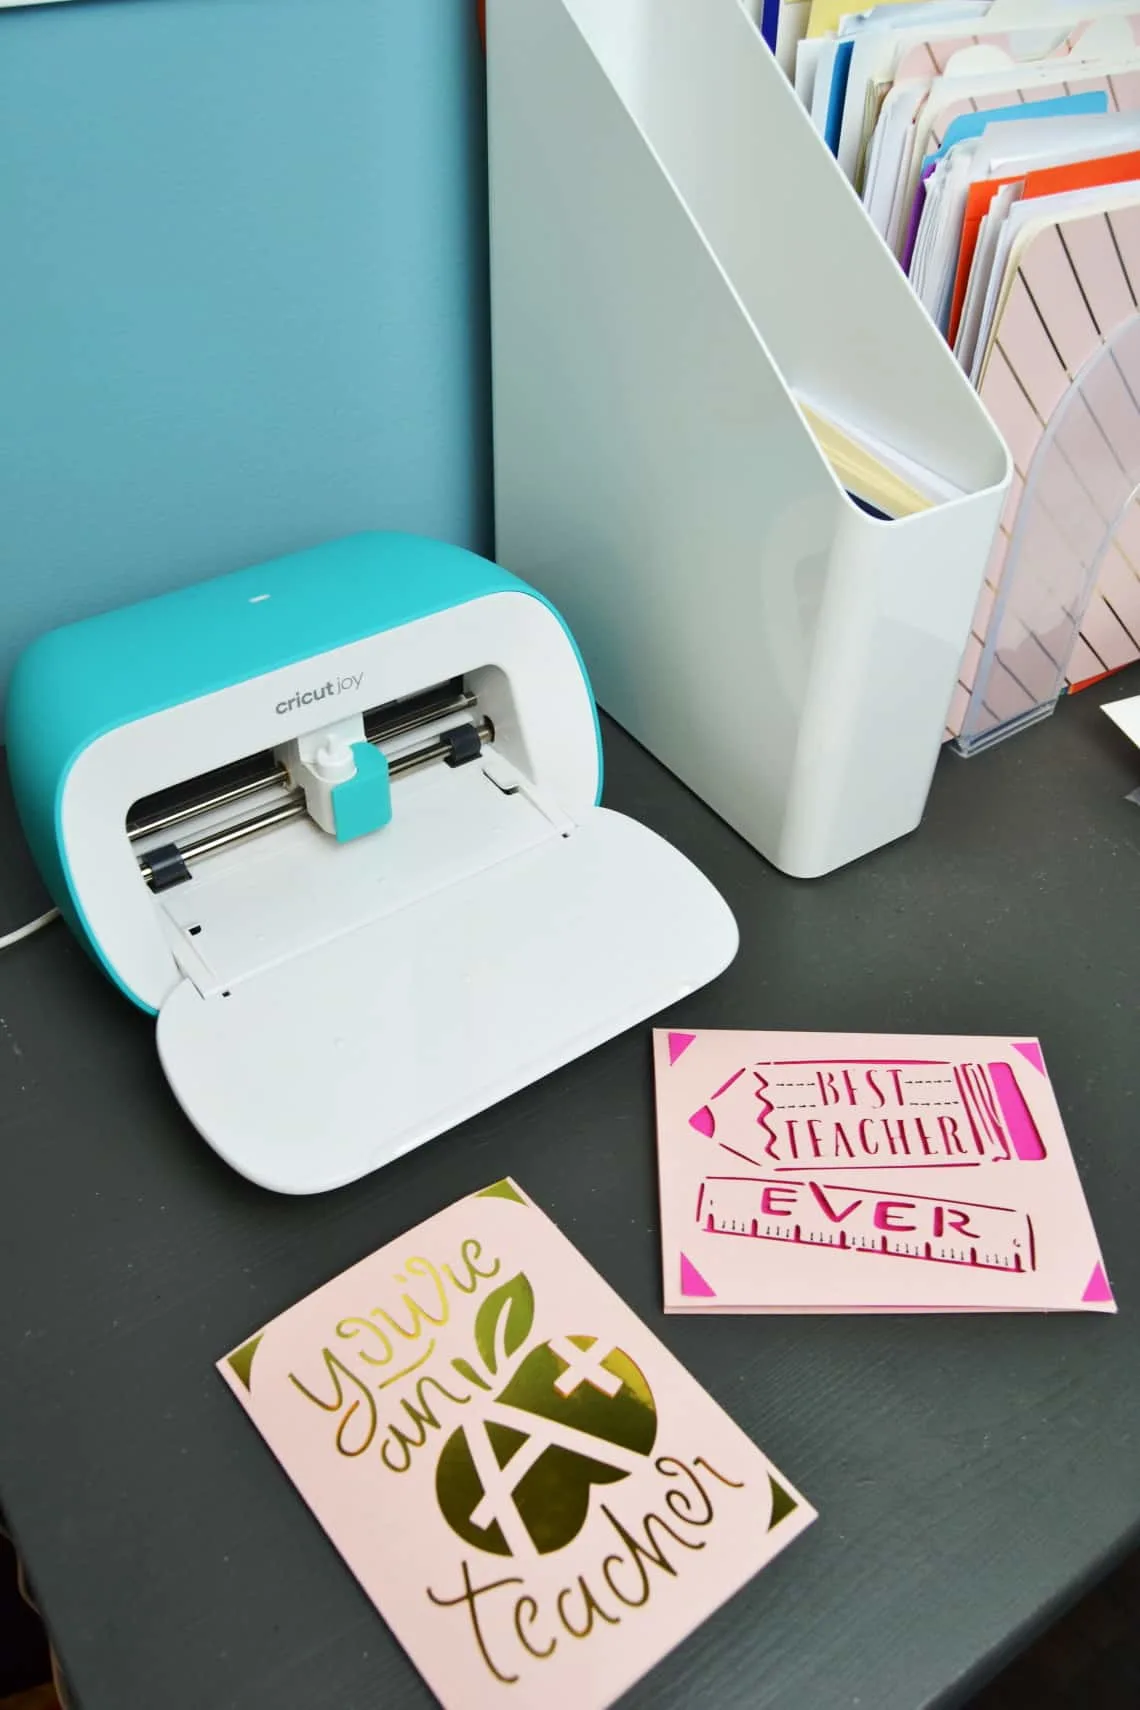
I’ll show you how to make one of the cards so that you can see how easy cardmaking with the Cricut Joy is. To make a bunch of cards for my station I used the Cricut Joy card mat and the insert card packages. These are great because they come with blank cards, insert sheets, and envelopes.
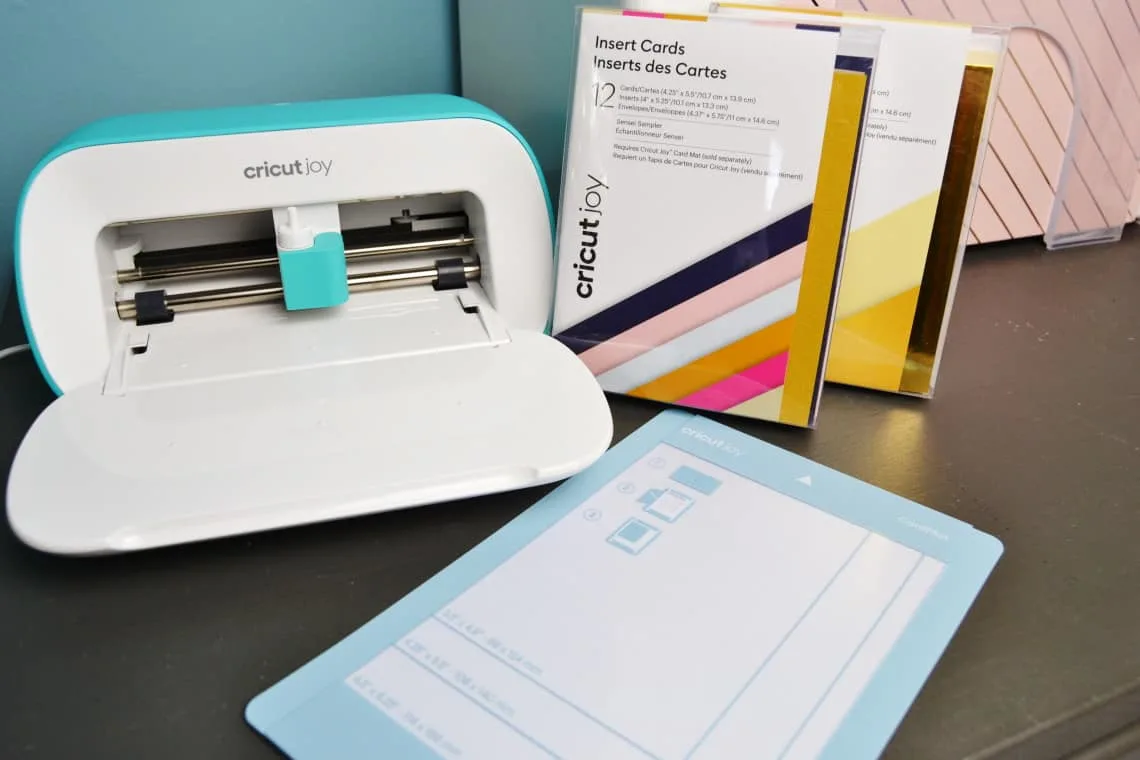
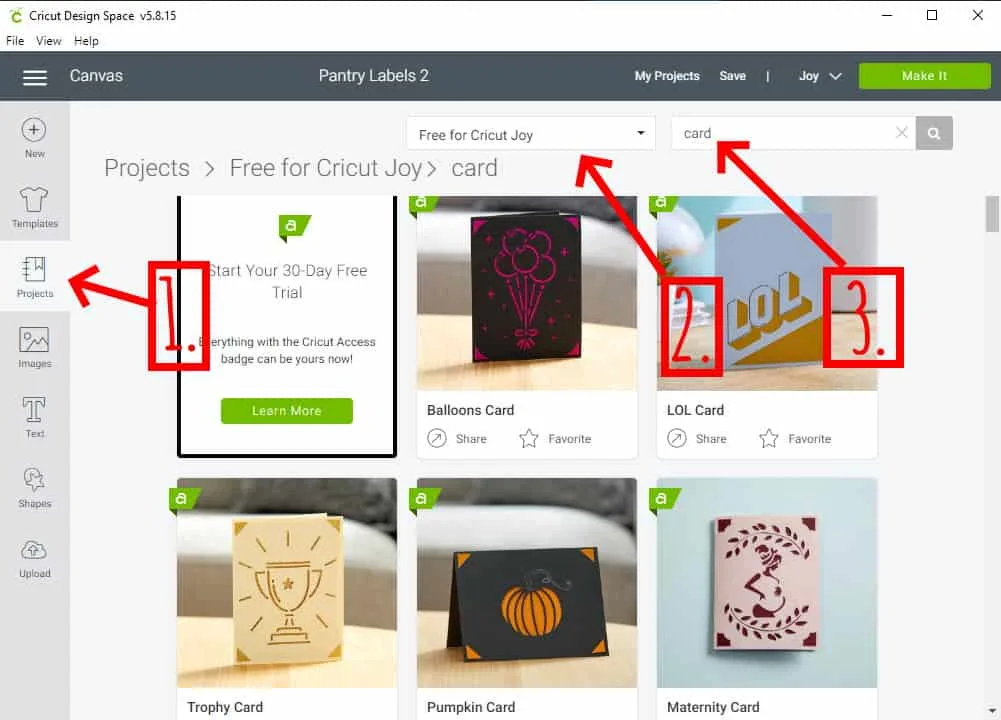
There are a bunch of free card designs in Design Space. Click on “projects”, then select “Free for Cricut Joy”, and then search “card” in the search box.
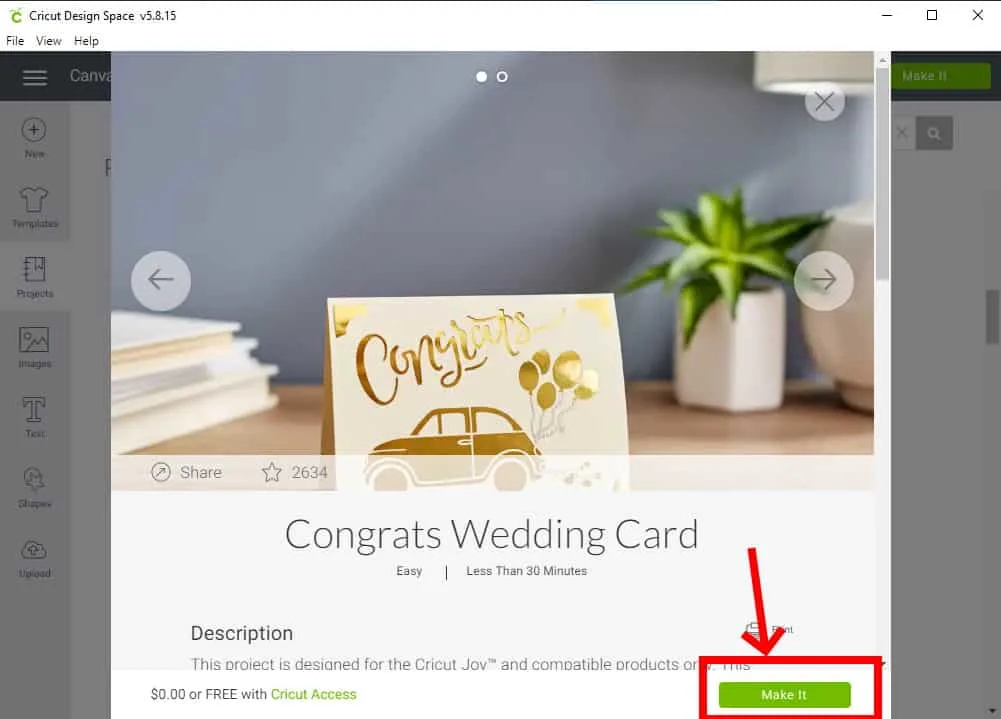
Once you find the card that you want to make you will click on it. Then click “Make it”.
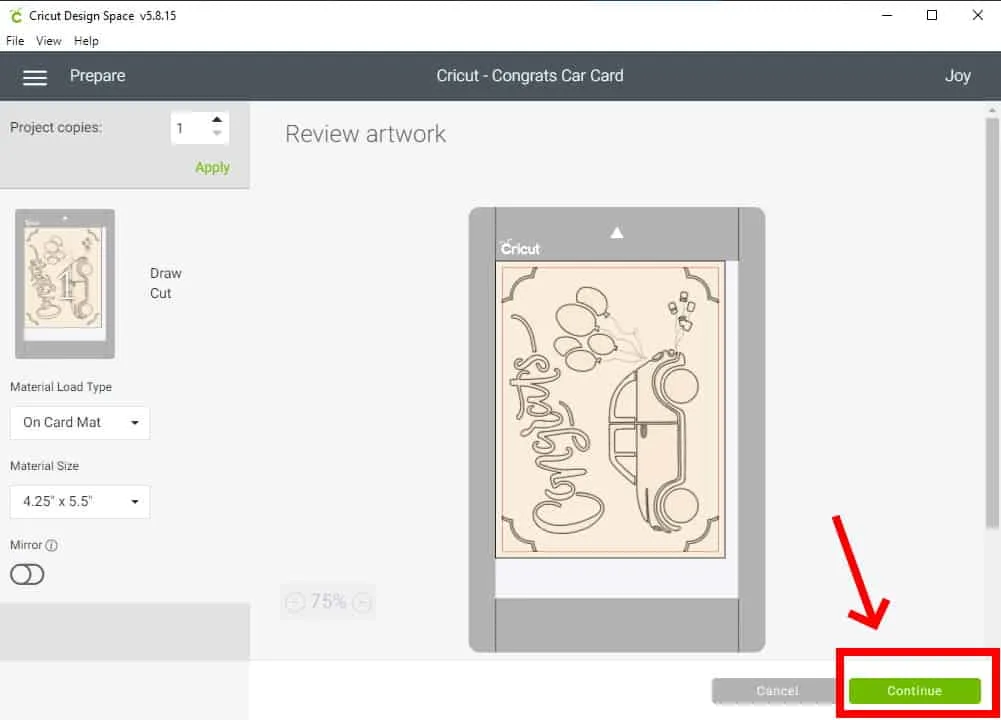
Review the project and then click “continue”.
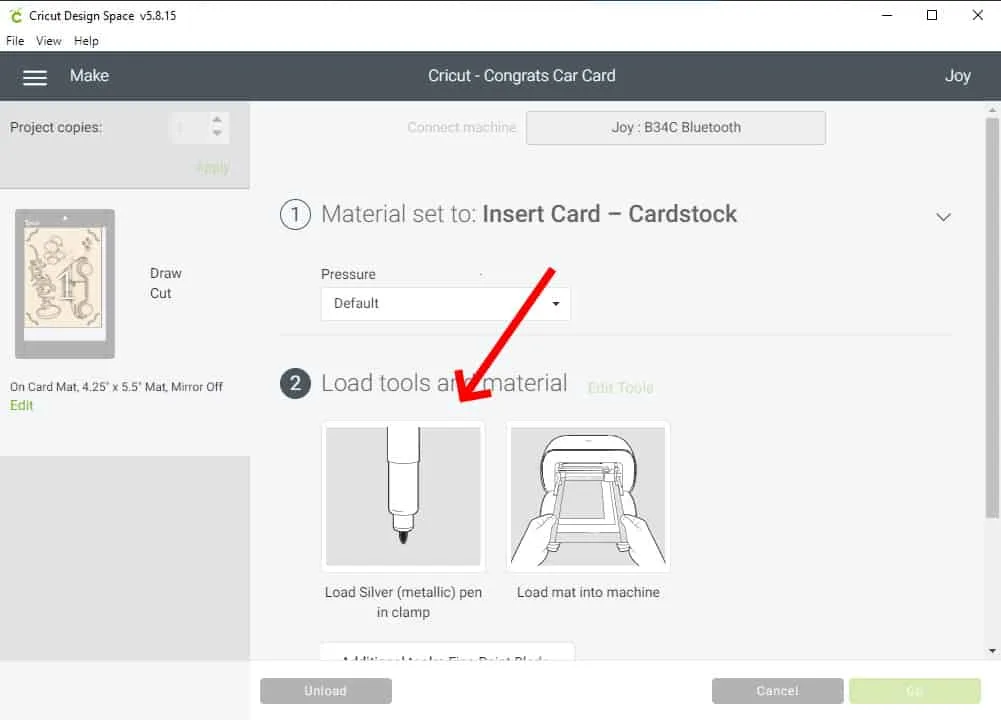
Select the material (in this case “Insert Card- Cardstock”) then load the tools and material. Once you have done this click “Go”.
The card mat makes this project super easy. Simply slide the card back behind the barrier and then close it, smoothing the front of the card down onto the adhesive part of the mat.
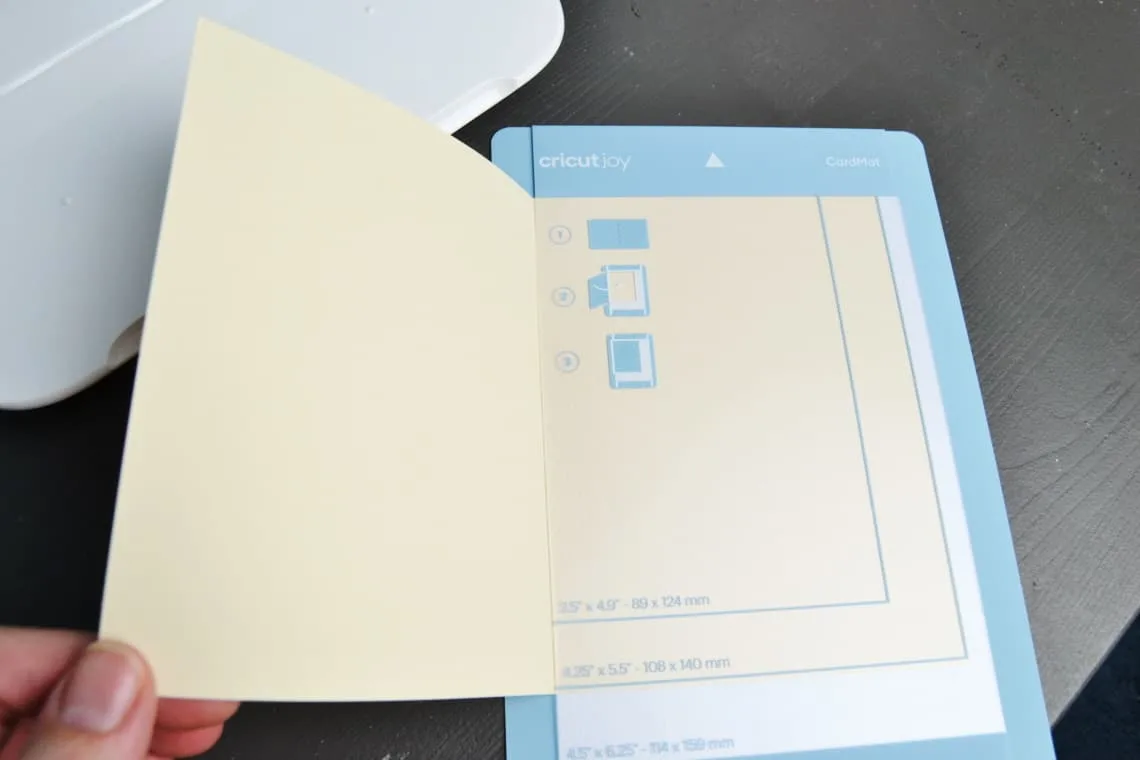
Once the Cricut Joy is done cutting you need to remove it from the mat and weed out any of the cut pieces from your card. Then slide the insert into the four corner notches and your card is all done!
Kitchen Storage Labels
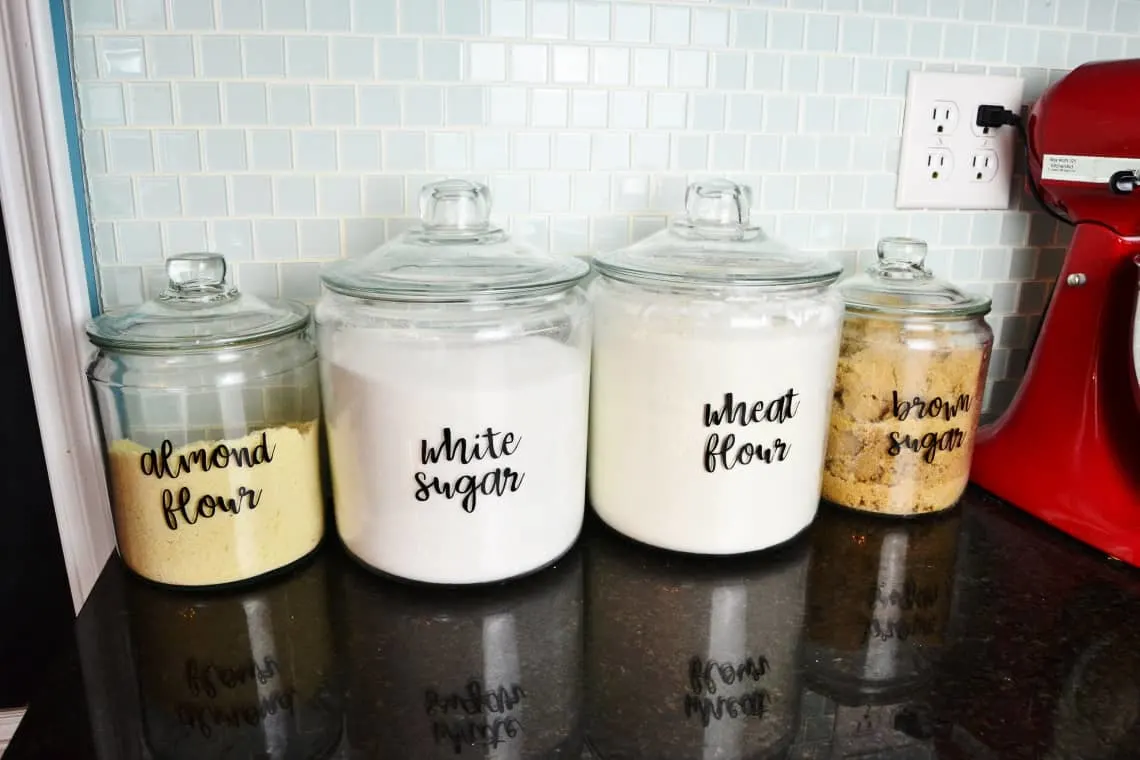
I cook with a whole lot of different flours and sugars so I decided to make labels for my glass storage jars in my kitchen. You can grab the Design Space file for my labels here or follow my tutorial below to make your own.
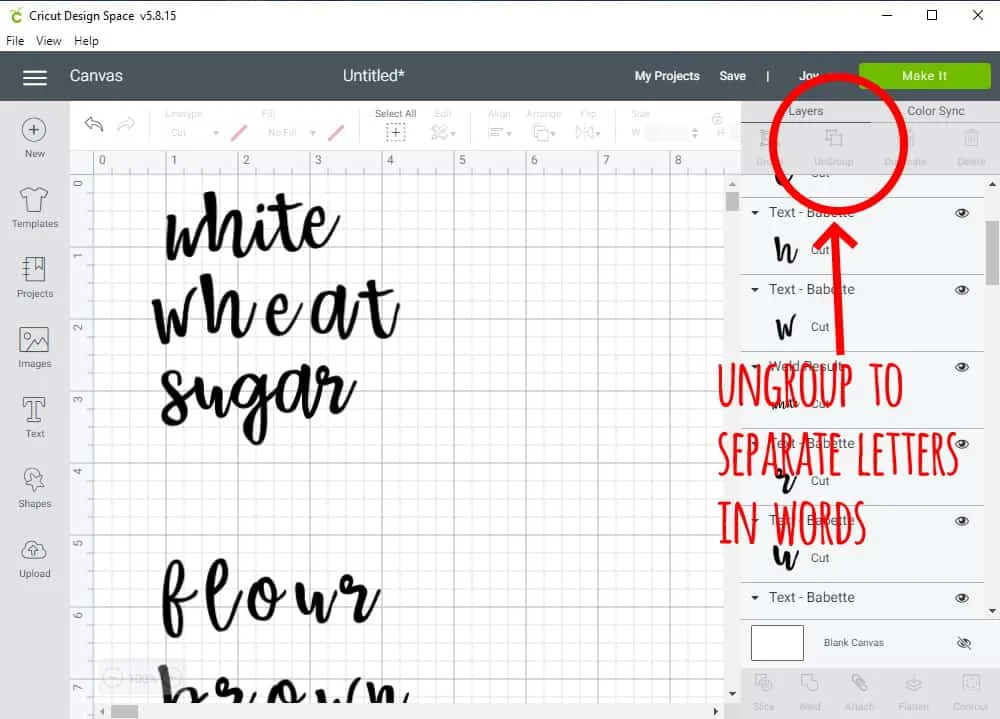
First I picked out a font I liked in design space- Babbette. Then I typed out the words I wanted for my labels. I wanted my letters to touch so I then made some modifications. I clicked “ungroup” to separate all the letters.
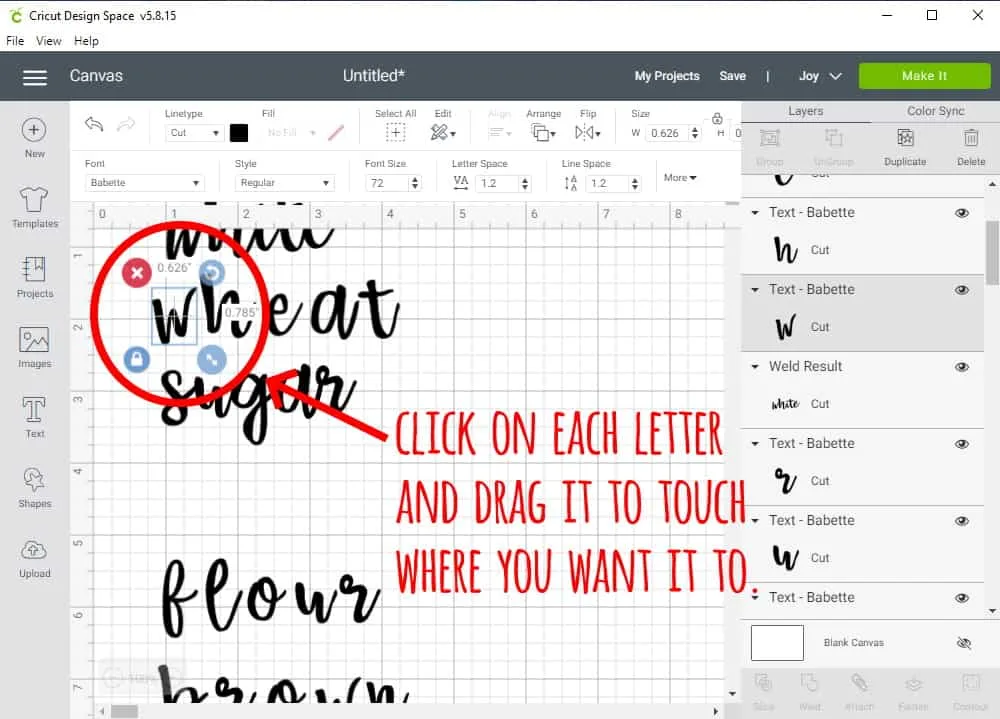
One you ungroup this then you can move each letter individually. Click on each letter and then drag it over to touch the next letter until they all are touching. Some of them I moved a little up or down or even rotated a little so that they looked how I wanted.
Then select all the letters in a word.
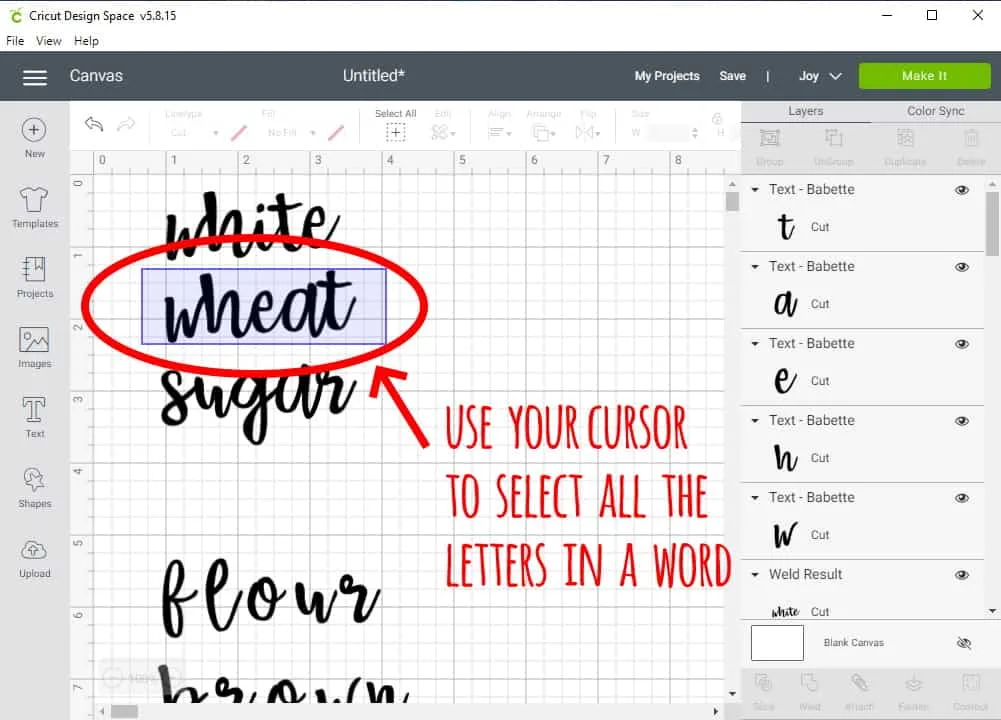
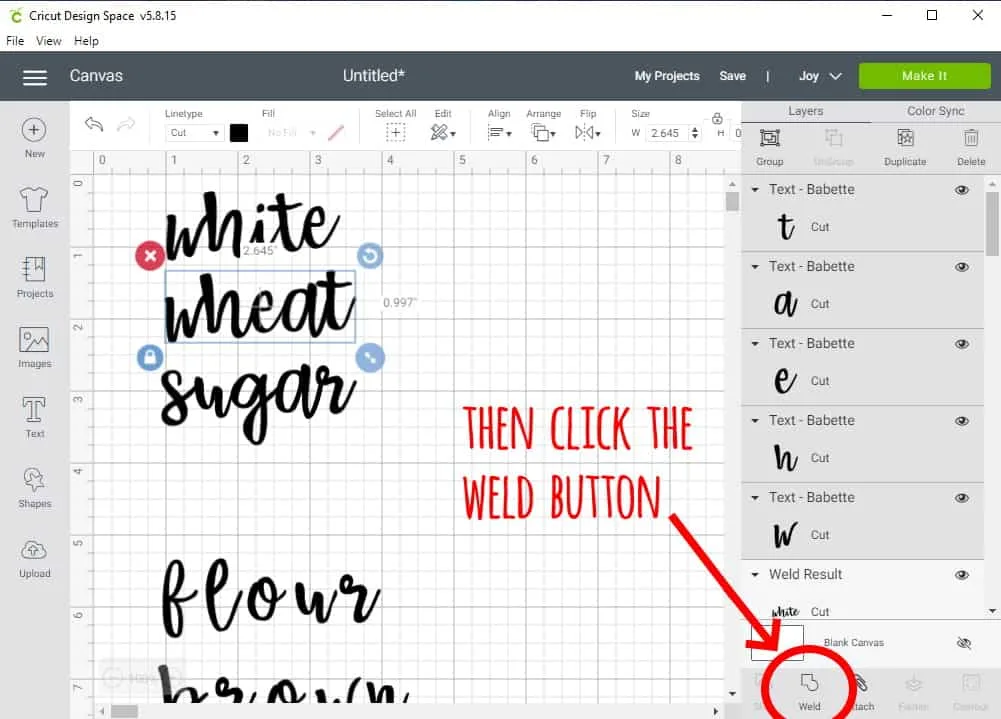
Next click on the “weld” button so that the letters of the word all become one piece.
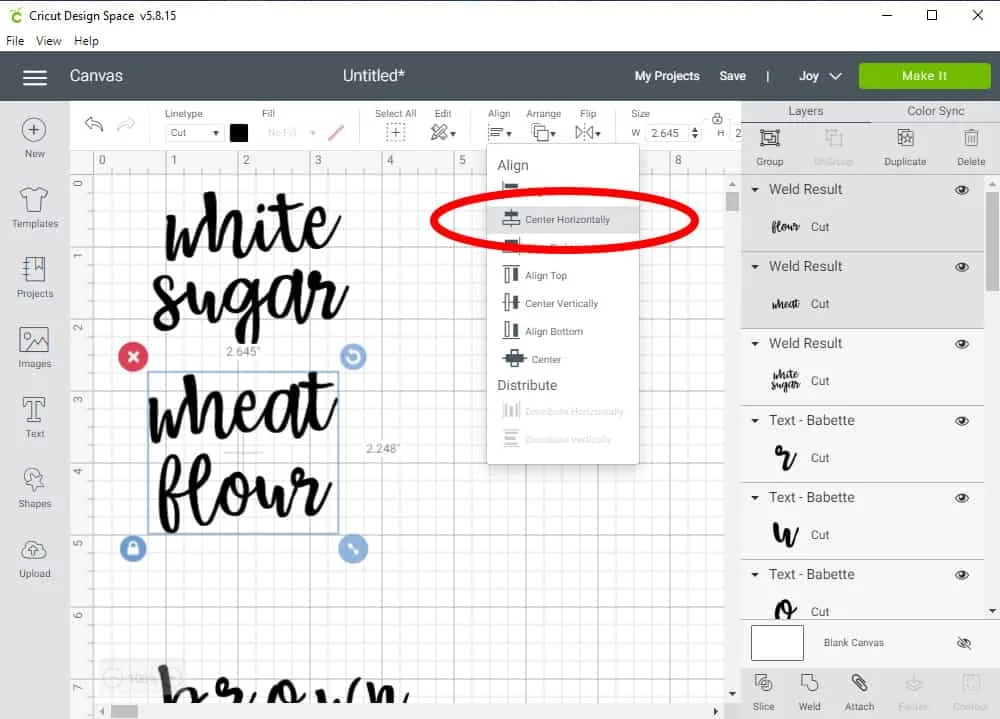
For labels with 2 words I wanted to organize them vertically so I selected both words, clicked “center horizonally”, then clicked “weld” to make them one unit together.
Once you have your words that you want or you have my project file open then you will click “make it”.
At this point Design Space will prompt you to choose how you will load the materials for the project. I love that with the Cricut Joy and the new Smart Vinyl you don’t have to use a mat.
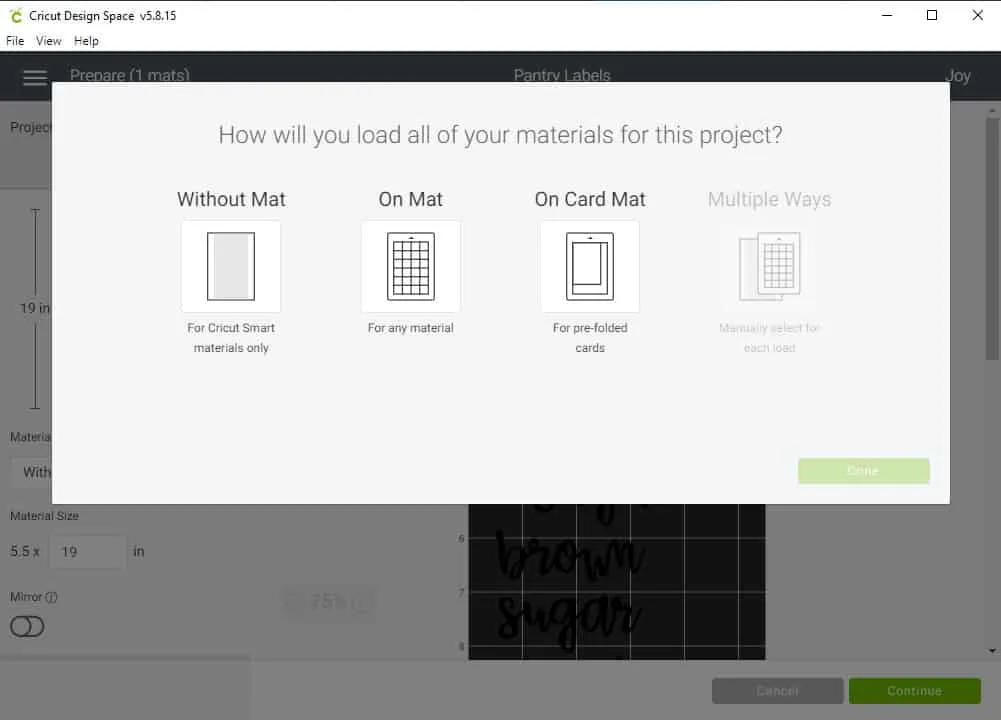
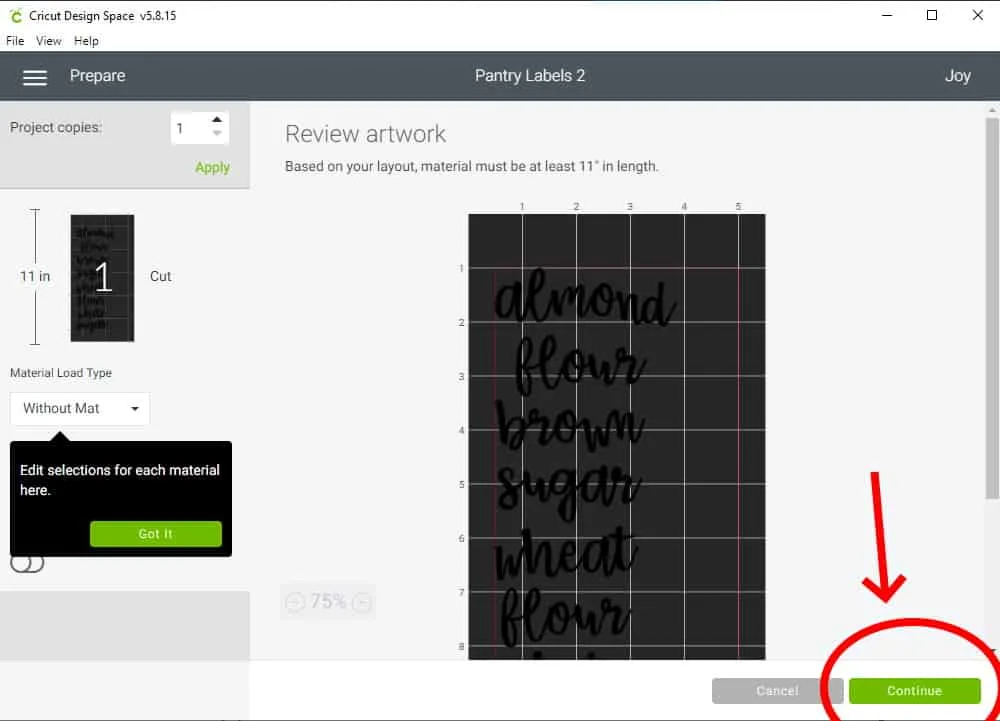
Once you select how you are loading the material then you will review everything and click “continue”.
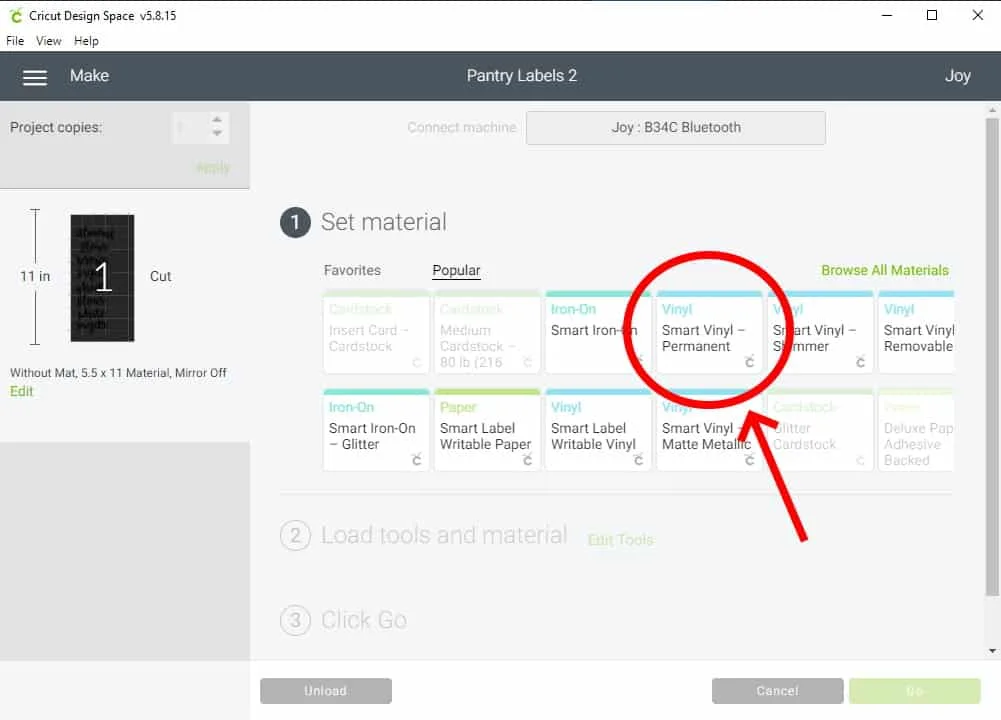
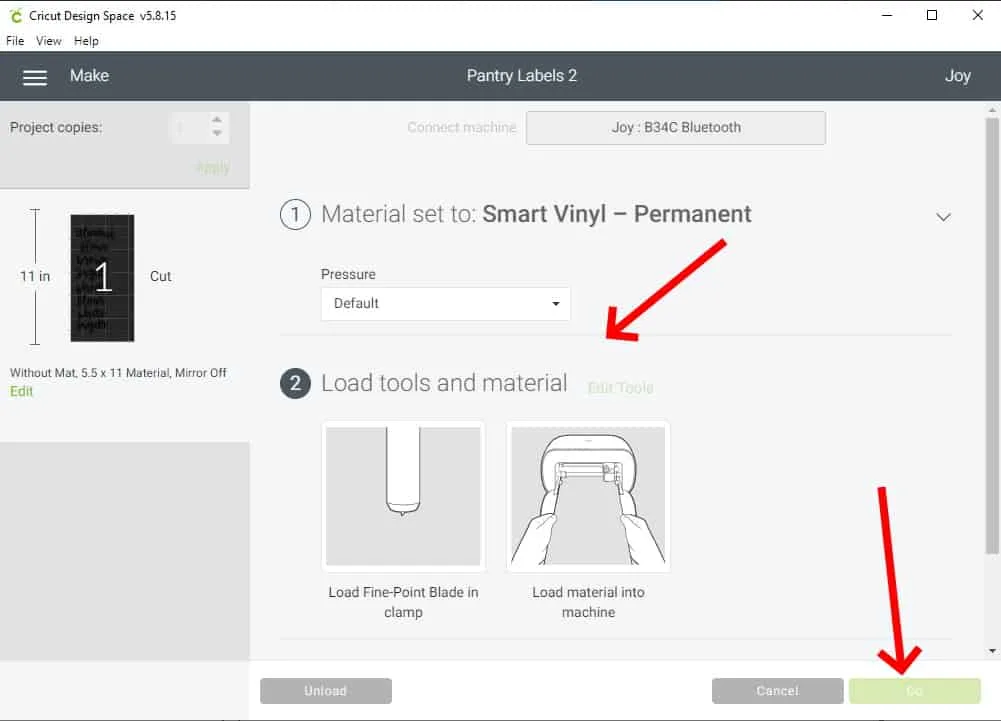
Then you will select your particular material, make sure the right tool is loaded (in this case the blade), load the material, and click “Go”.
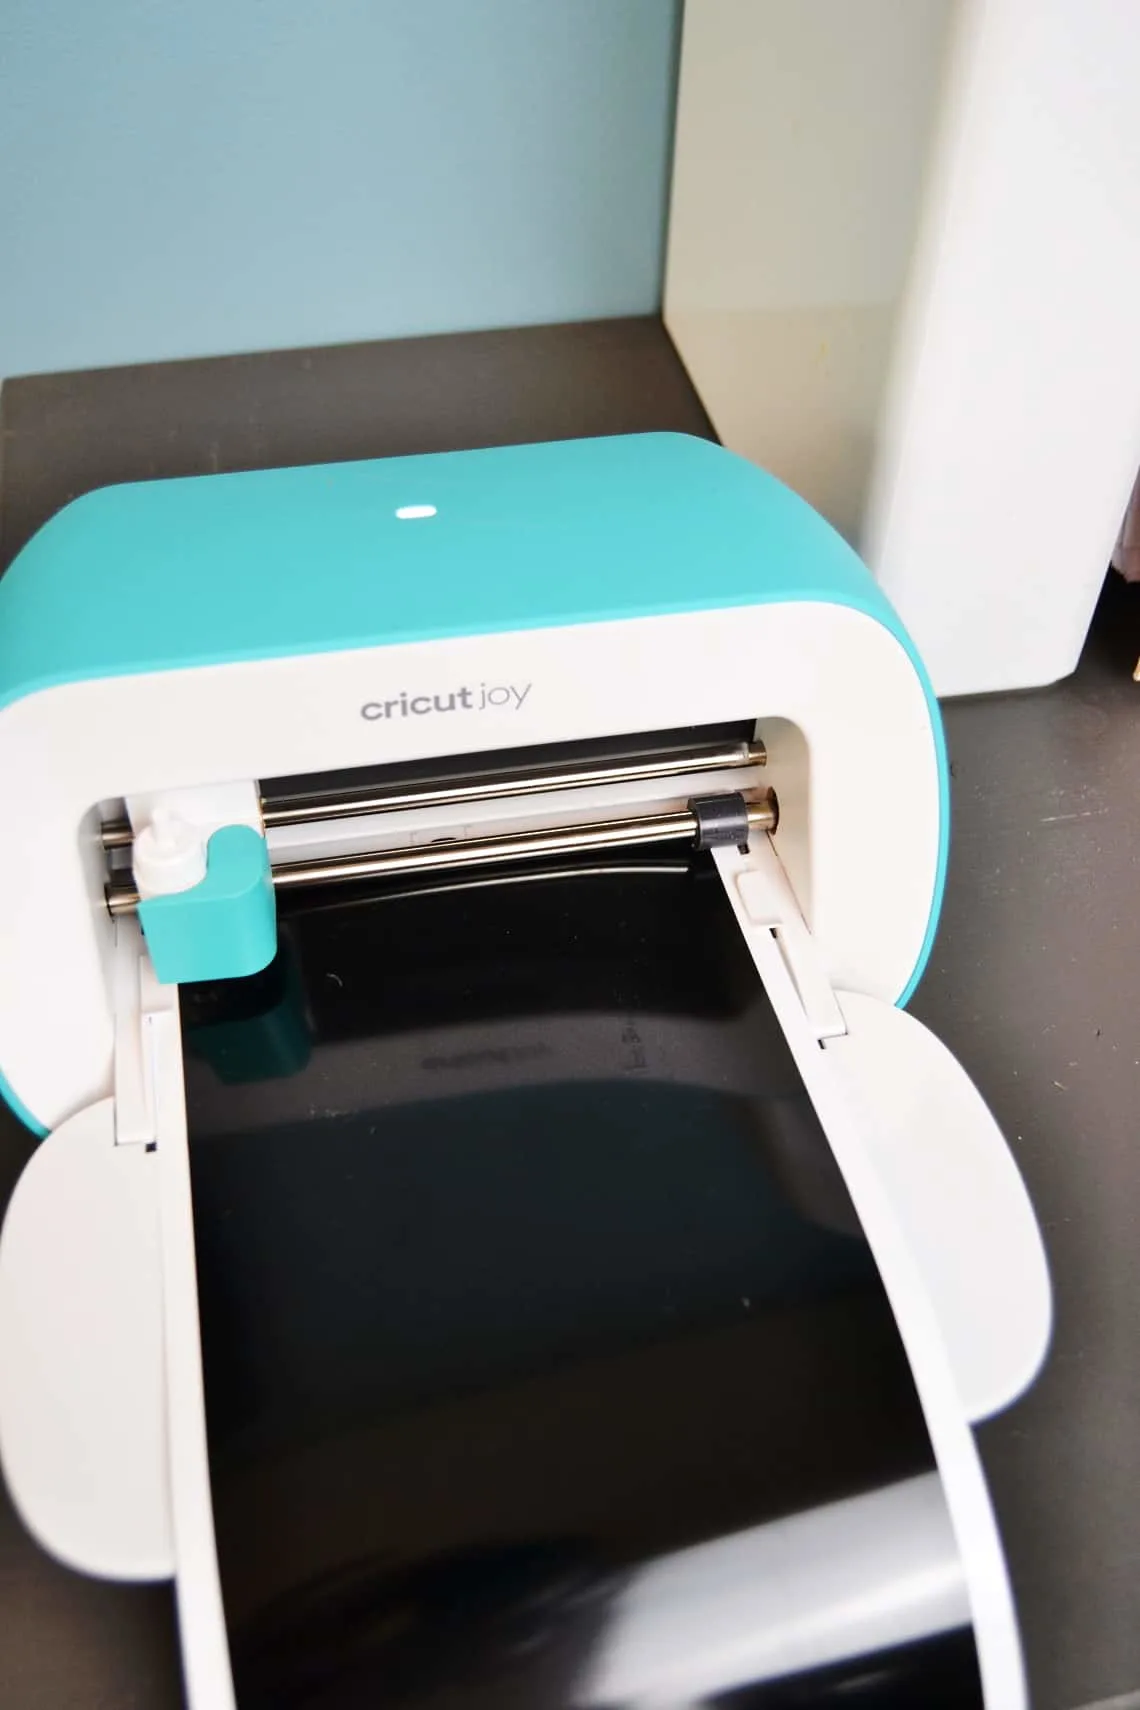
When the machine is all done cutting you will weed the unwanted vinyl away from your labels. Having the wedding tool really helps with this.
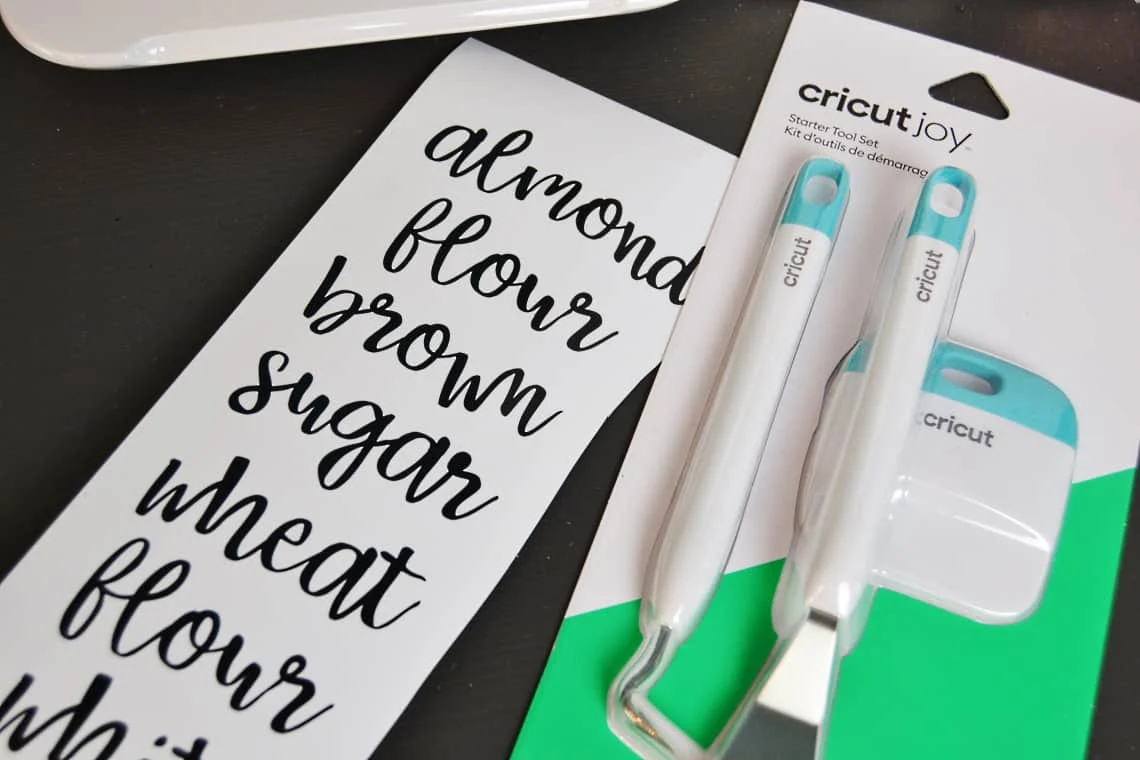
Next take your transfer tape and cut a piece slightly larger than your labels. Peel the backing off and use a scraper tool to smooth the tape onto the vinyl.
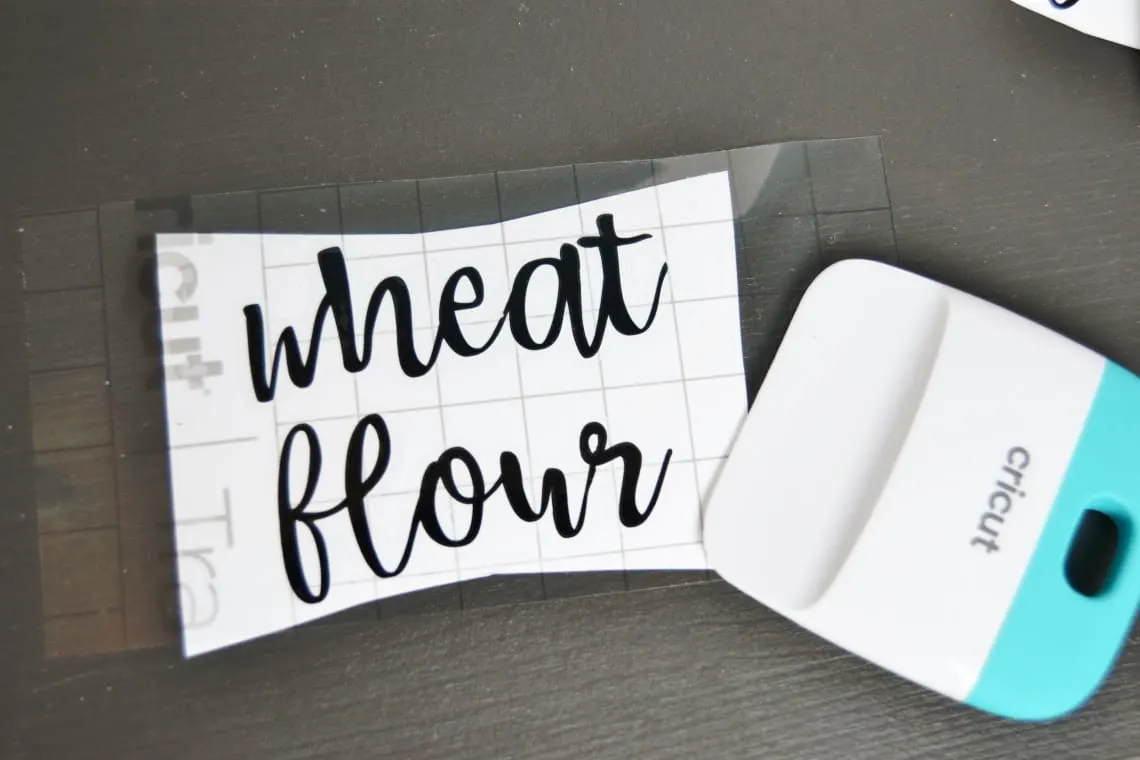
Carefully peel the paper backing off of the vinyl so that the vinyl is now on the transfer tape. Line it up on your container and smooth the words down so that they will stick.
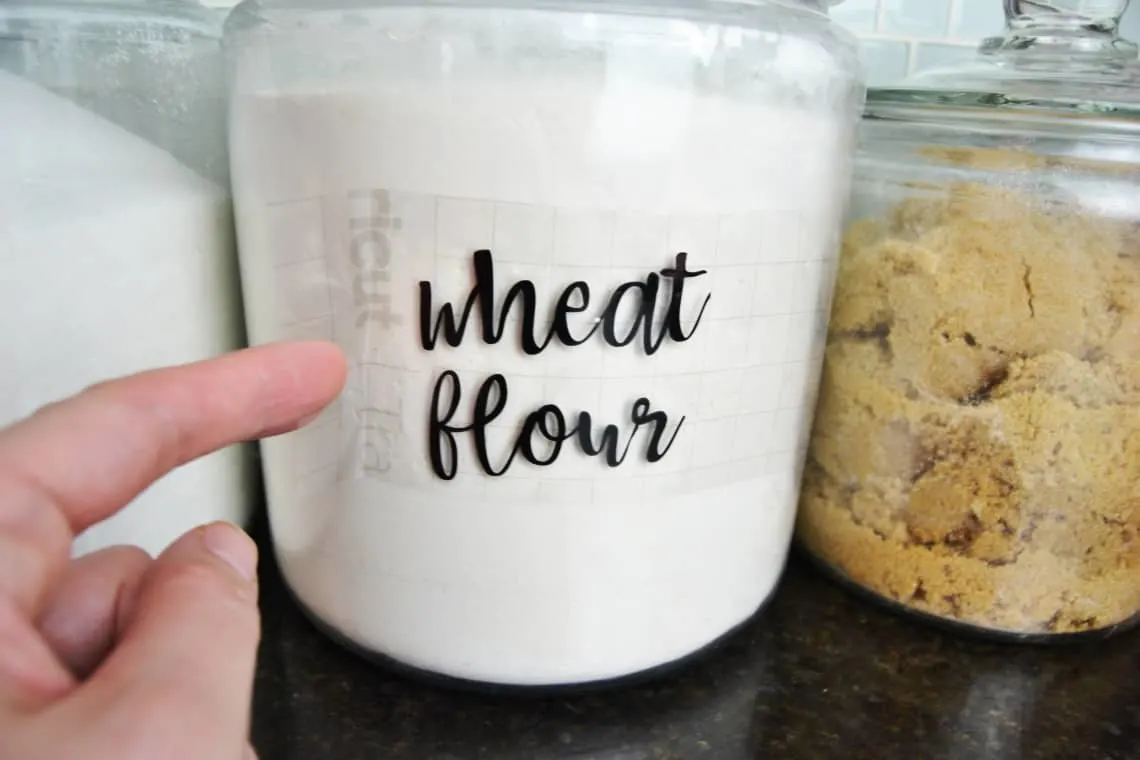
Now your labels are done!
Toy Bin Organization
My kids do a better job with helping to clean up when they know what goes where. I made some vinyl labels for my son’s toy bin to help him put everything back in the correct bins when he cleans up.
Dresser Drawer Organization
Laundry is a beast and I need all the help I can get around here. To help my kids be able to put their own clothes away I made some labels for their drawers. The labels go inside the drawer (on the top of the drawer front) so you only see them when you open the drawers.
Basement Bin Labels
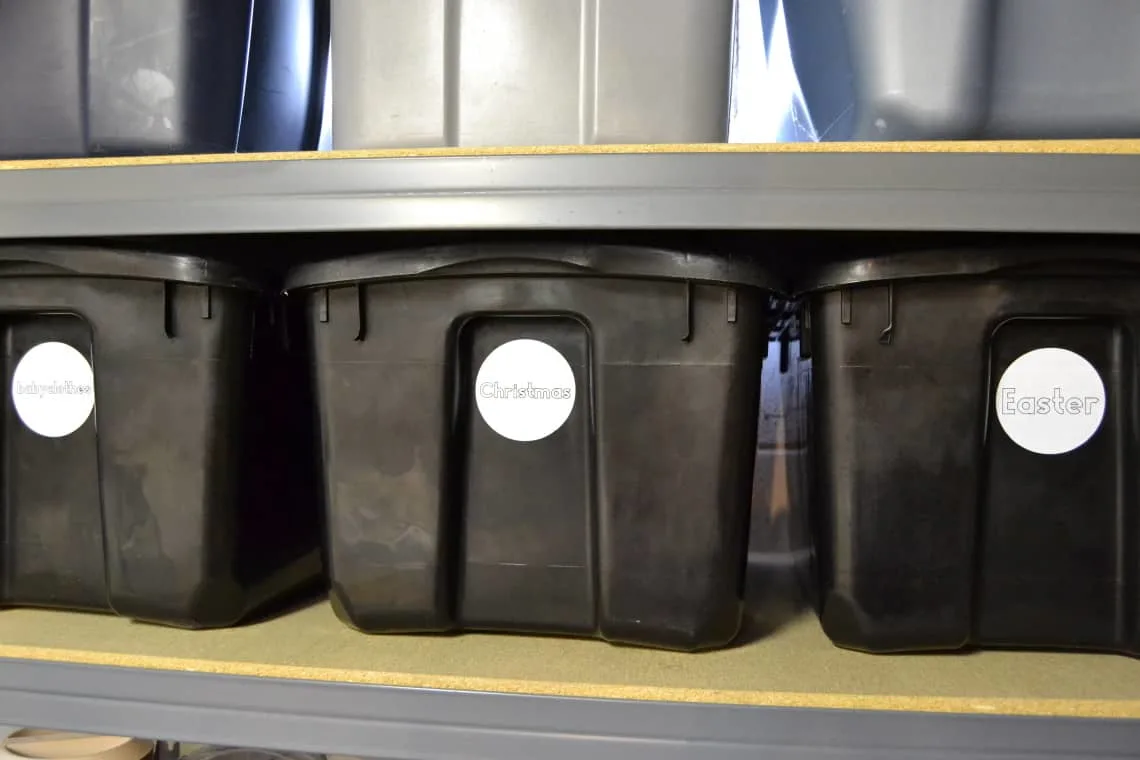
I finally got around to making labels for the storage bins in my basement. The Cricut Joy made this a quick and simple project. For years I have had to guess and then open bins to see which bin might have what I am looking for but not any more!
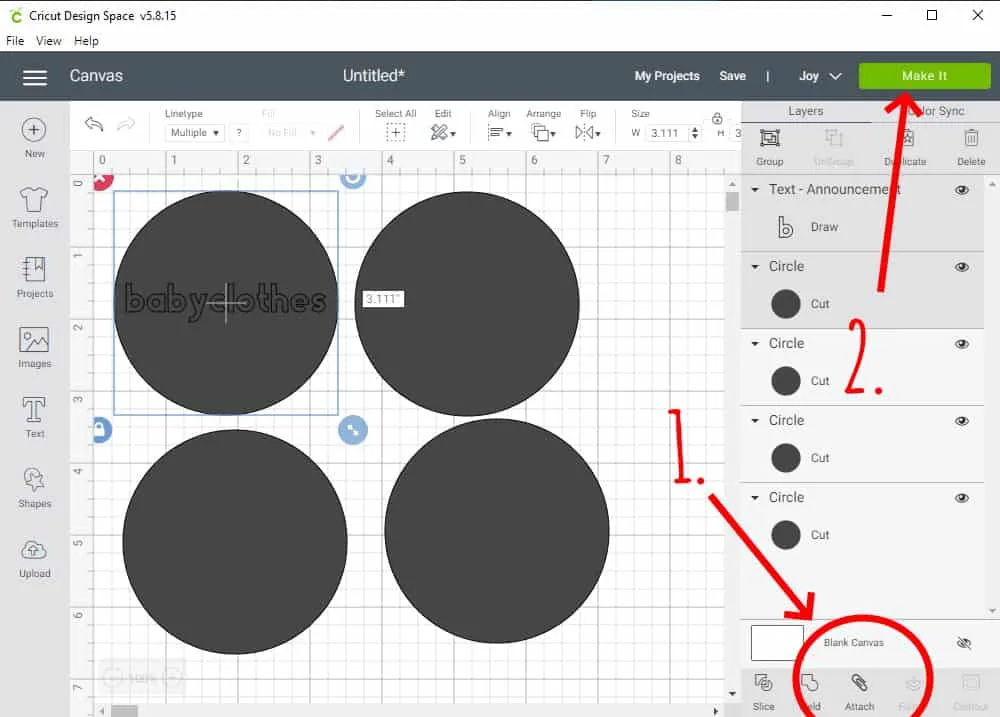
To make the labels I drew a circle in design space and then duplicated it.
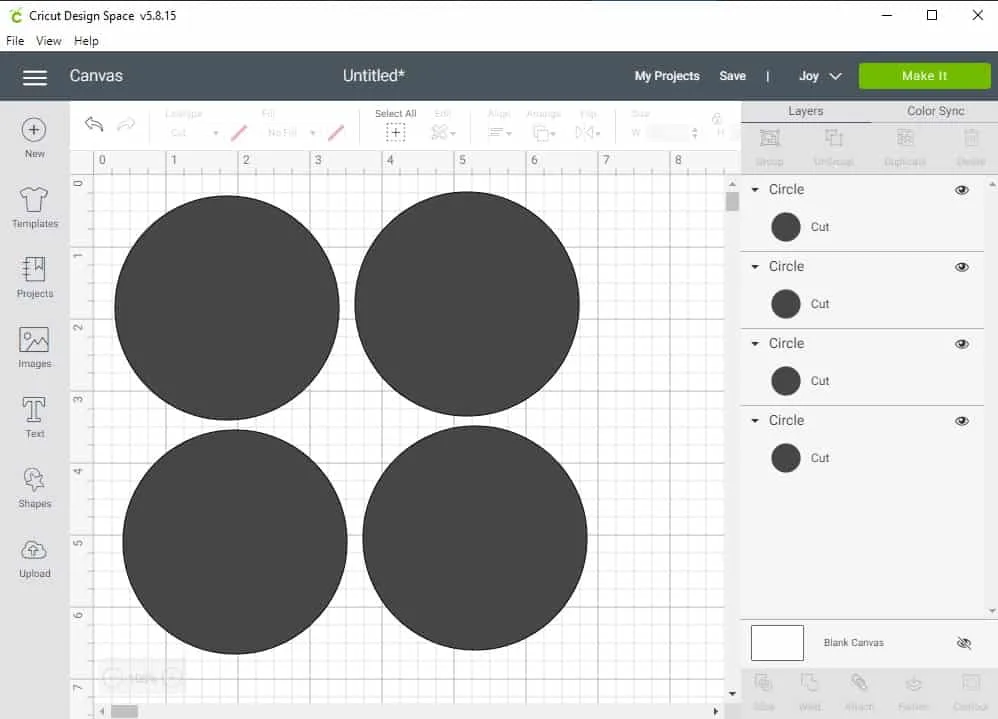
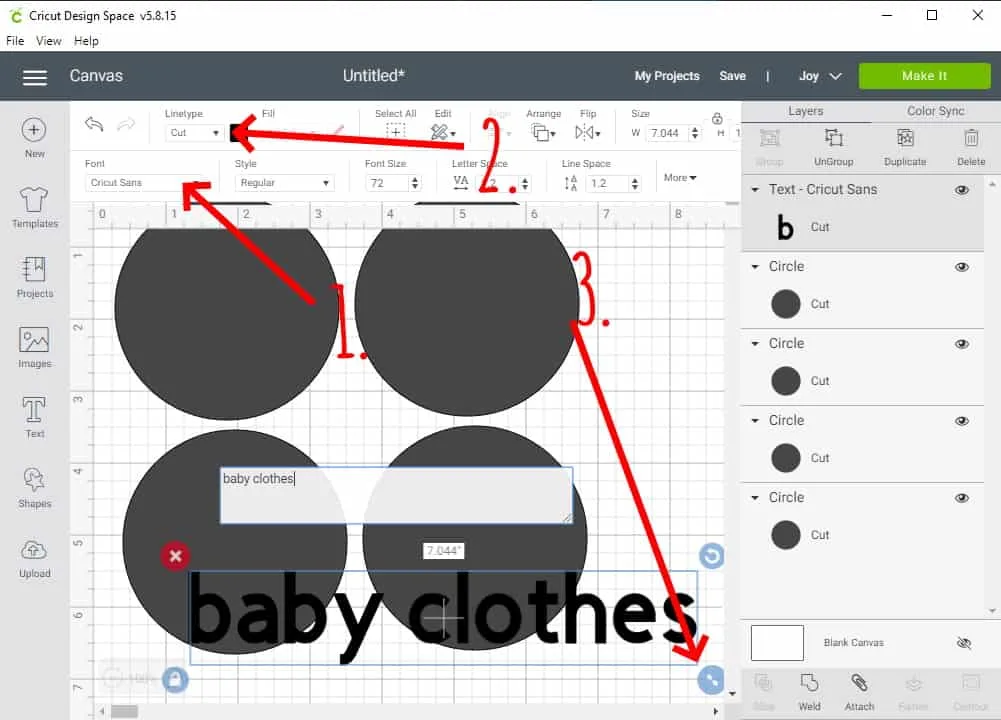
Next I typed out the text I wanted for each label. I picked my font and switched from cut to draw. Then I adjusted the size so that each word could fit inside of the circles.
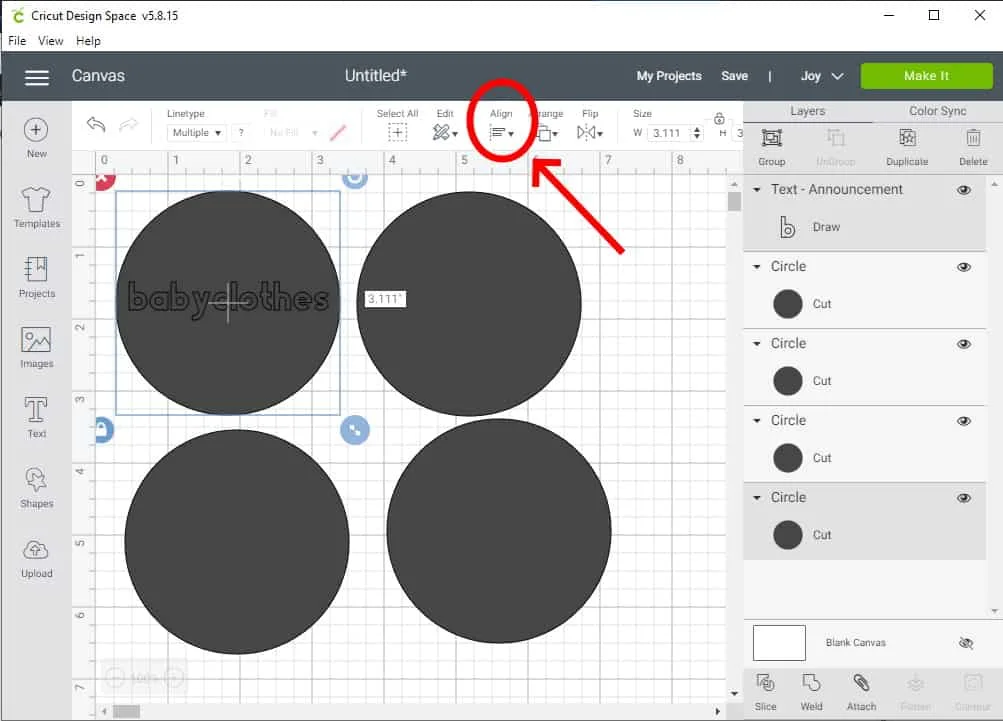
Then I selected both the text and the circle. I clicked “Align” and centered them to each other.
After this I clicked “attach”. I repeated this process with each one. When I was finished making all the labels I clicked “Make It”.
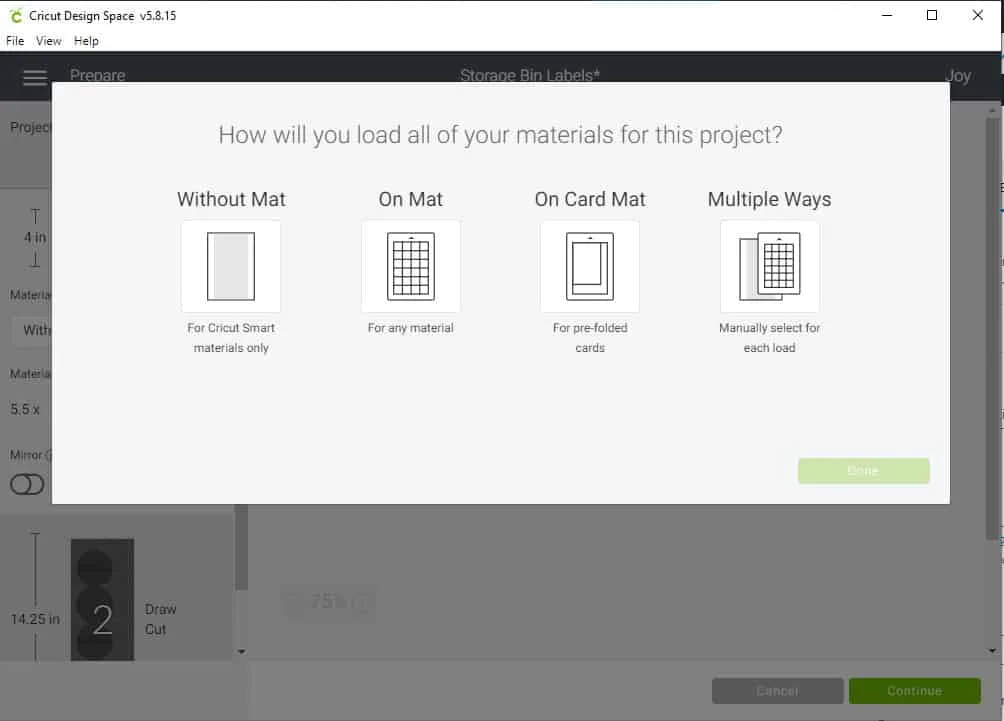
Then I picked “without mat” since I used Cricut Smart Label Vinyl.
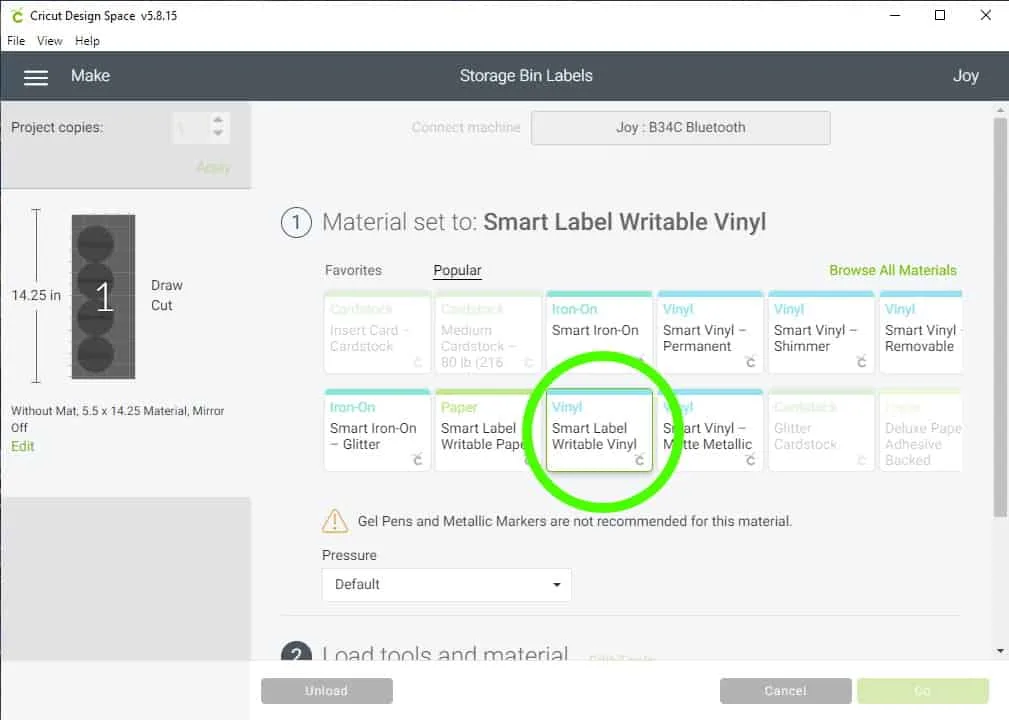
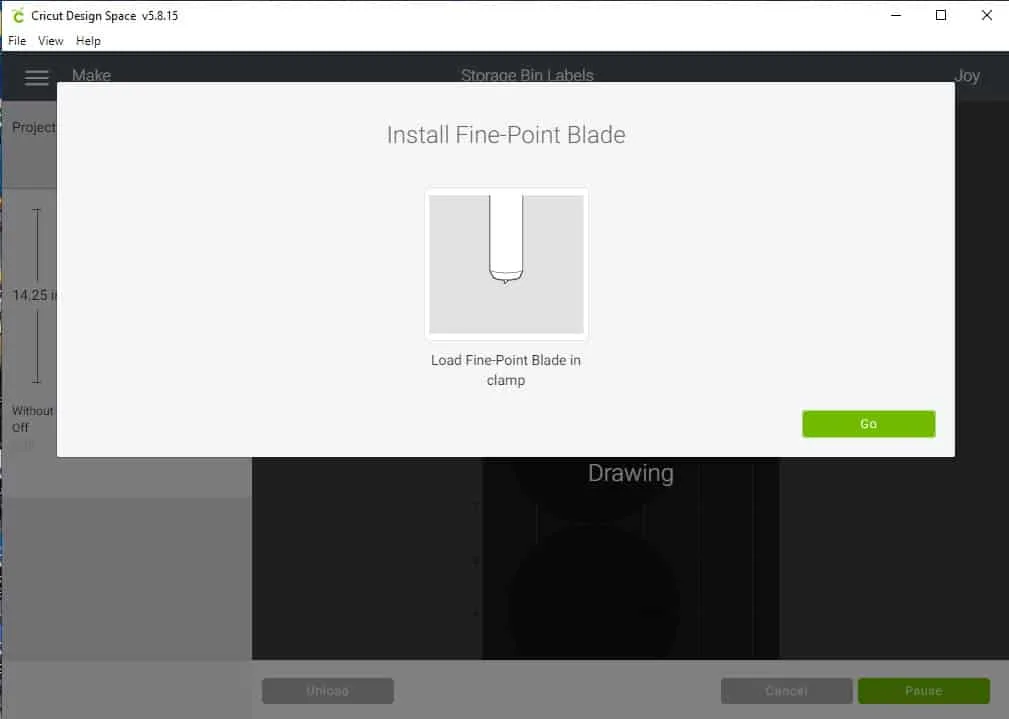
Next you select your material and load the correct tool. Then hit go! I love how design space walks you through all of this.
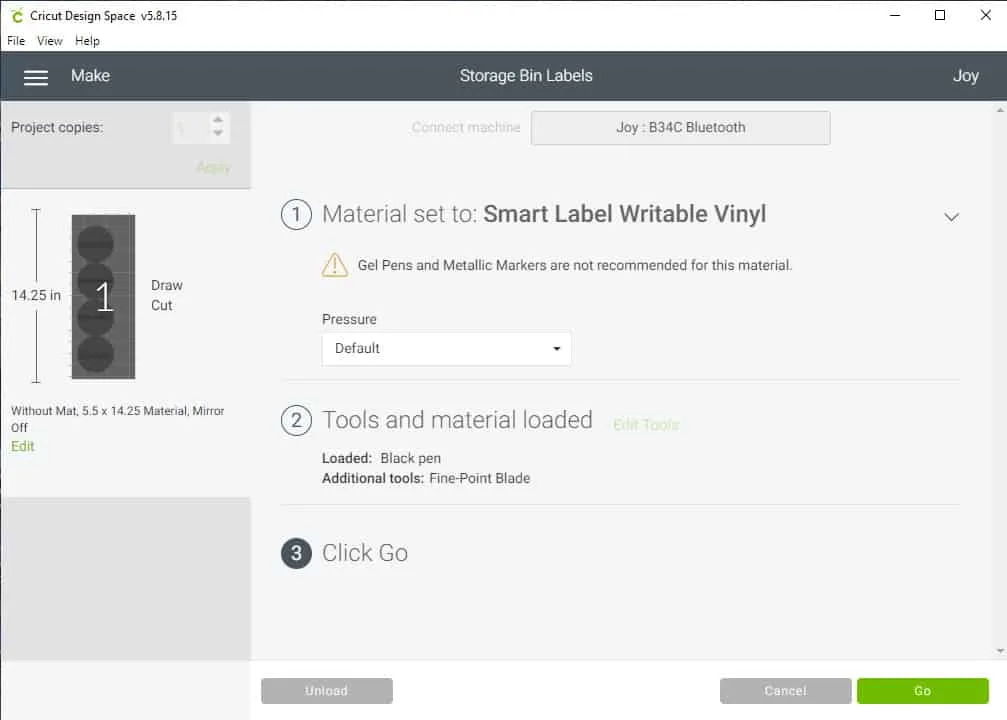
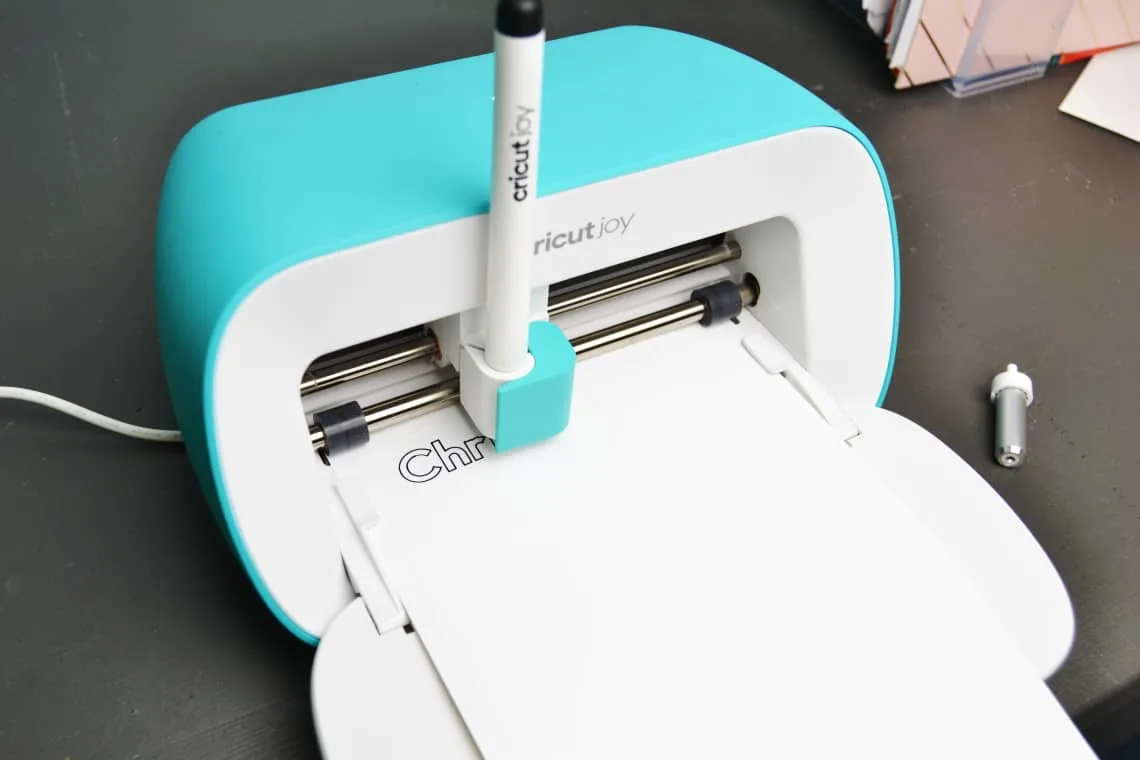
Since these labels involve both drawing and cutting I had to change the pen out for the blade part way through.
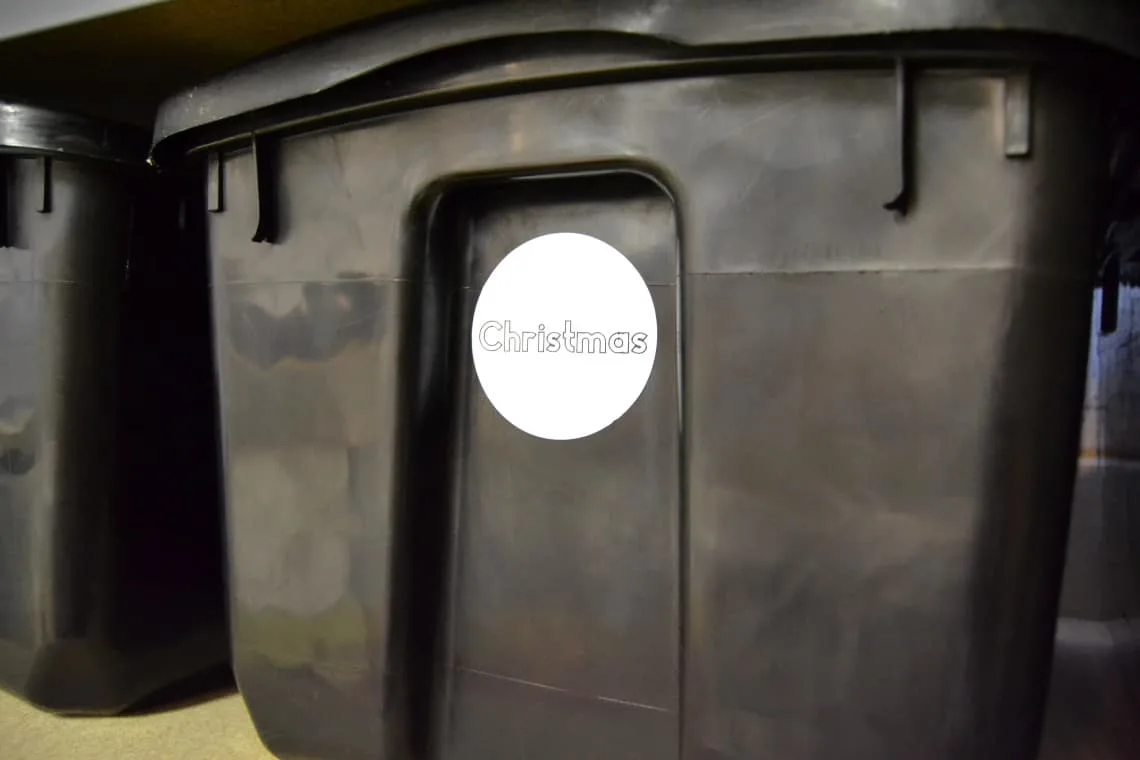
When it is all done drawing and cutting you’re left with some great labels!
I like the new Cricut Joy and think it would be great for anyone, especially those who are looking to dip their toes into the world of vinyl and get their first cutting machine. The portability and small size are fantastic, particularly for those who don’t have a large dedicated space for crafts.
I own a Cricut Maker but I love that the Joy gives me the ability to make those long cuts. I’m imagining all the large vinyl wall decals I can make for my house. Making cards with the Cricut Joy is also so easy especially because I can leave it and the supplies right on my desk in my kitchen.
The Cricut Joy is available in stores and online. Be sure to head over to Cricut.com to learn more about the Cricut Joy.
