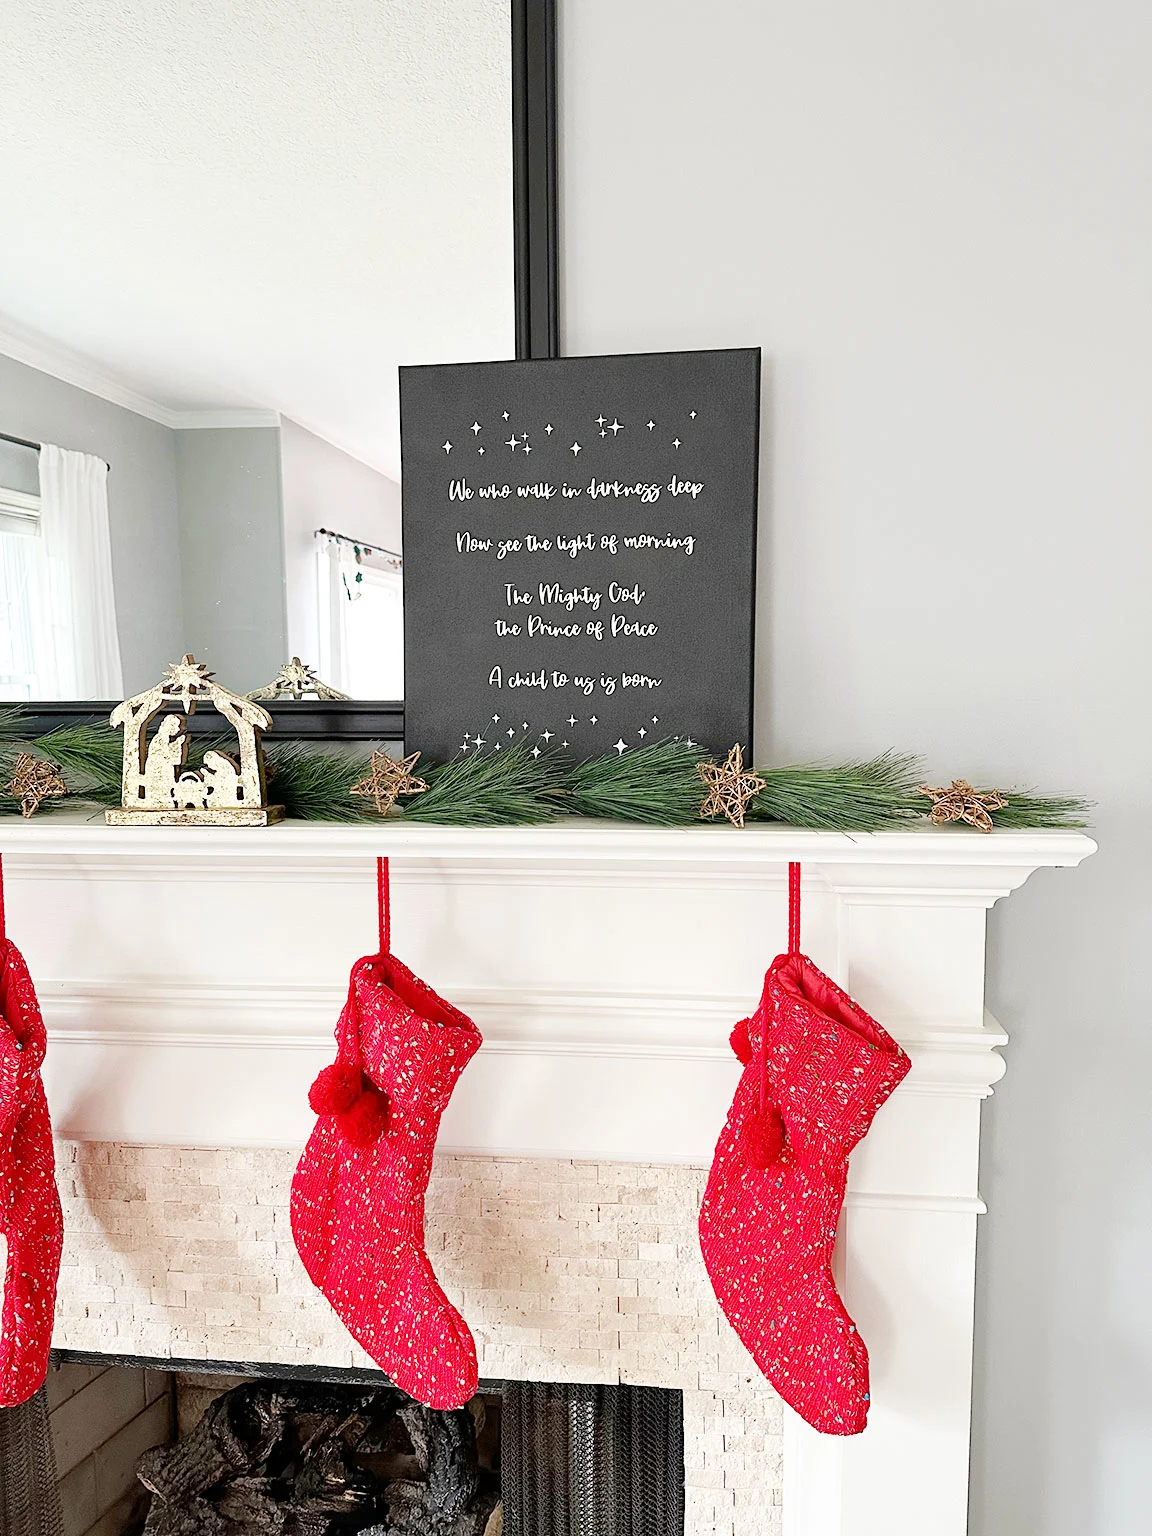
We moved into our new house about a year and a half ago and one of the more exciting features of this house for me is the fireplace mantle that I can decorate! Last year we had a lot going on and I did not really do anything with it honestly however this year I was super excited to turn my attention to the mantle. I made some DIY Christmas Wall Art with the lyrics of a favorite Christmas song and I’m sharing the full tutorial with you all today.


You can take the process that I’m going to show you in the tutorial and use it to make a canvas with whatever song lyrics, saying, or poem you like. I chose to make a canvas with some of the lyrics of a favorite Christmas song of ours called “Behold the Lamb of God” by Andrew Peterson. It’s actually part of an entire album that tells the story of Christmas in such a lovely way and I highly recommend checking it out if you’ve never heard it.

Supplies Needed for DIY Christmas Wall Art
- canvas (I opted for a 16X20 inch one but choose whatever size you like)
- Cricut Maker 3
- Smart stencil vinyl
- transfer tape
- weeding tools
- paint
- thumbtacks (optional, but helpful)
Tutorial
Design
First pick your song that you would like to use. Then type it into Design Space and adjust the font and size to what you need for your canvas. To go along with mine I added some stars around the lyrics. Cricut Design Space has a ton of image options that you can choose from to add to your design. Once you have your design the way you want it you will click Make it.
Cut
Then Design Space will show you your design as it will be cut out on the mat. For stencil vinyl you do NOT need to mirror. Click Continue once you’ve made sure everything is good.


Now Design Space will walk you through the steps of making sure you have the correct blade, selecting your material, and loading it.


Follow the steps and then press go on your machine.


Weed
Once cutting is finished you will need to weed the stencil vinyl. That just means that you need to remove the vinyl that is not part of your design. Now normally when you use a stencil you want to remove the letters of the words and parts of your design and paint. I did this one the opposite way because I wanted that look. So I removed all the negative space and left the letters and stars on the backing paper.


Doing it this way I then painted everything but the words and design.
Apply
Once I weeded out all the vinyl pieces that I did not want I then used transfer tape to apply the design to my canvas. You remove the transfer tape from its backing and press it on the front of your design on the stencil vinyl. Then peel away the backing from the stencil vinyl.
I lightly applied the stencil vinyl to the front of the canvas using the transfer tape then I flipped my canvas over and pressed and smoothed on the back side. I didn’t want to do this too strongly on the front because I was worried about stretching the canvas out.


Then I flipped over the canvas to the front and removed the transfer tape, leaving just the stencil vinyl on the front of the canvas.


Paint
I wanted to make sure that I got paint all around the sides of my canvas so I put thumbtacks into the back of the frame to prop it up a little bit while I painted it.


Then I painted the front and side of my canvas. I let it dry for an hour outside before moving into the garage. Then I let it cure and off gas for 2 days before putting it in the living room.


Remove
I then used my Cricut tweezers to remove the stencil vinyl from the canvas.


I am very happy with how it turned out and have enjoyed having it as a part of our mantle display this year.


More Christmas Crafts


