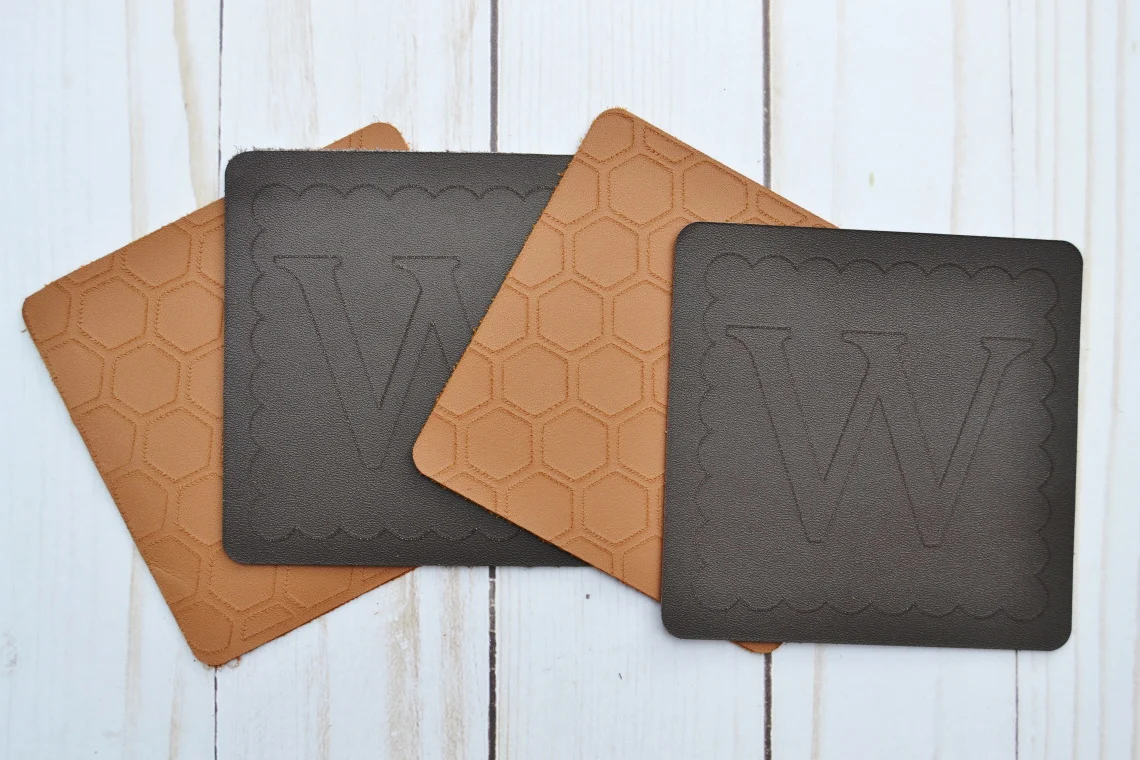
I’m always on the lookout for a way to use up my scraps and recently I used up some leather leftover from other projects to make some coasters. Today I’m going to show you how to make leather coasters.

How to Make Leather Coasters with the Cricut Maker 3
Supplies Needed
- Cricut Maker 3
- Strong Grip Mat
- Cricut Deep Point Blade or Knife Blade (depends on the leather you use- be sure to check)
- Cricut Engraving Tip & QuickSwap Housing
- Leather
Tutorial
Draw the Basic Coaster Shape
Begin a new project in Design Space. Typically a coaster is about 3.75-4 inches square or round. Pick whichever shape you like. You can find shapes by clicking the shapes or images icon.
I used the rounded corners square in the images. I then set the size to what I wanted for my coasters- 3.75 inches by 3.75 inches.

Add Engraving Design Details
To add text to my design I selected the text button. I found a font I liked and adjusted the size to fit my coaster.

When picking the font you want you will also want to change the linetype from cut to Engrave or Deboss. For this project I considered using debossing but instead chose engraving.

Next select both the text and the shape. Then on the tool bar select align and center.

Once they are centered to each other then click the attach button.

Now you can click make it.

One of the things I love about the Cricut is how it walks you through everything. Once you click make it you’ll see a screen like this where it shows you how the project will be on the mat. If you are working with a scrap you can move your project at this point so that it is cut at a different place.

Next you will select the material. If you don’t see it on the first screen then click Browse All Materials and you’ll find it there.

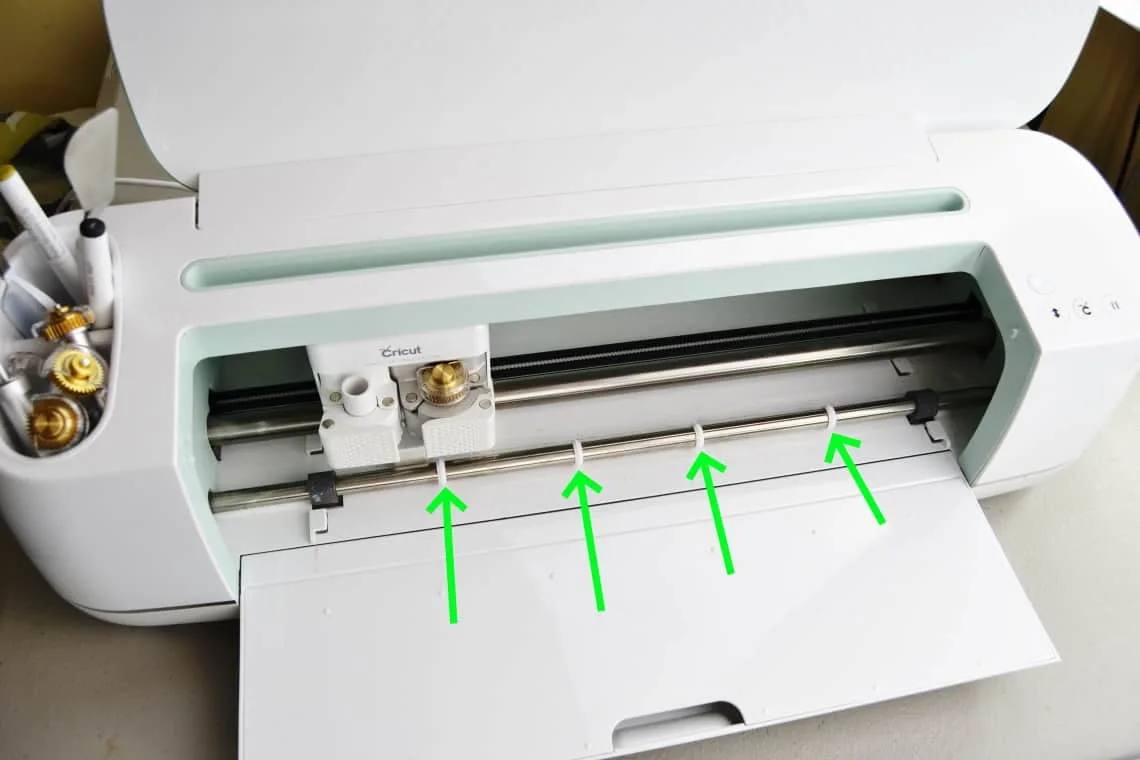
Again, the Cricut will prompt you with what you need to do and this is very important! When cutting leather you have to move the star wheels all the way to the right. This is super important! They will ruin your leather if you don’t so just slide those guys to the side!


Prepare the Leather
Lay your leather down on the Strong Grip mat. Smooth it out nice and flat. I also recommend taking some Painter’s tape and taping along the top edge to hold things down.

Cut the Leather
Load the mat into the Maker and then press the Go button.

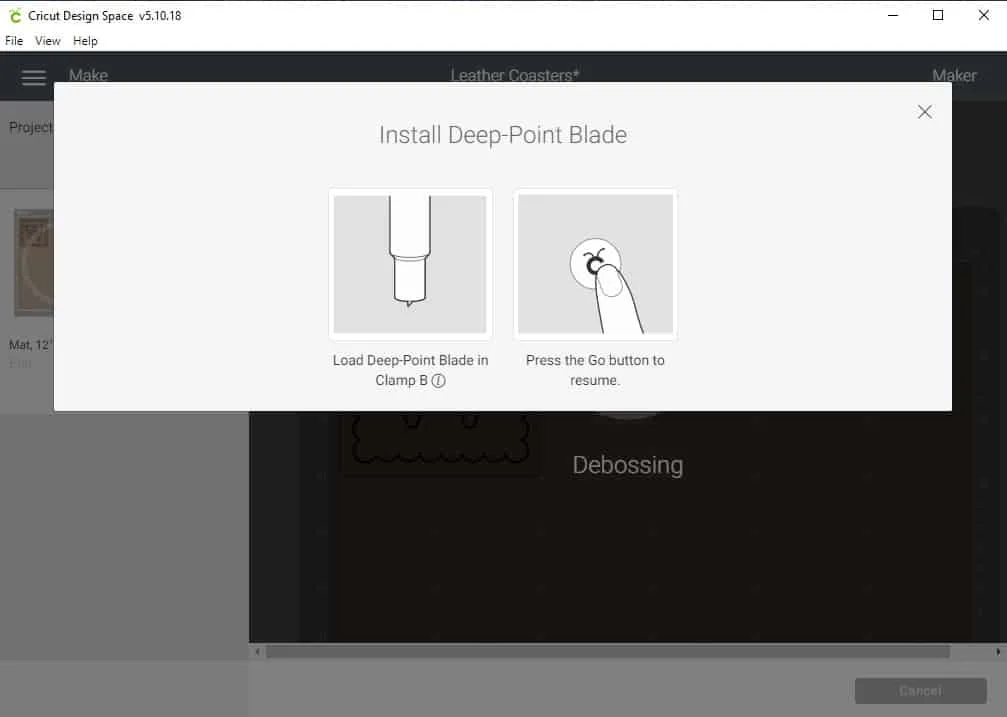
First the Maker will engrave or deboss your design then it will have you change blades so that you can cut it out.

Unload your mat, pop your coasters out and you are all done!

I made a few with a honeycomb design I found when I searched for “coaster” under images. Design Space has a bunch of fun designs for coasters that you could use to easily make up some cute coasters.


