I’m back this morning with another diy baby bib tutorial! This morning I’m sharing how to make what I call the Two Thirds Baby Bib-


When my boys were babies we went through a lot of bibs. It’s much easier to change a bib than it is to change a shirt that’s been spit up on or covered in teething drool. So while bibs are an uber practical baby item, I love to give them as gifts because they can be stylish as well.
This bib is born out of the desire to make a cute bib while also being able to use up some fabric scraps. You don’t need too big of pieces for the front- they only need to cover about a 9 in long X 12 inch high area once sewn together. So round up some cute coordinating scraps and get to making.
Here’s what you will need to make your diy baby bib:
- my Bigger & Better Bib pattern
- cotton fabric for the front of your bib
- terrycloth for the back of your bib
- velcro or snaps for your bib’s closure
- rotary cutting set or scissors
- thread, sewing machine, needles, pins
Step 1- Wash, dry, and iron your cotton fabric for the front. Then take your two pieces of fabric, square them off, and sew them together. To sew them together line them up on one side with the right sides of the fabric together. Pin and sew along that edge, sewing about 1/2 inch from edge.
I wanted my top fabric to take up about 2/3 of the bib, so I made sure to use a piece that was at least 9 inches tall to be on the safe side and I used a piece that was at least 5 inches tall for the bottom. If it matters which way your pattern goes, make sure that you orient them correctly for when you open your fabric up once it’s sewn together!


Step 2- Open your fabric up and flip it over to the back side (the wrong side of the fabrics. Press your seam open.


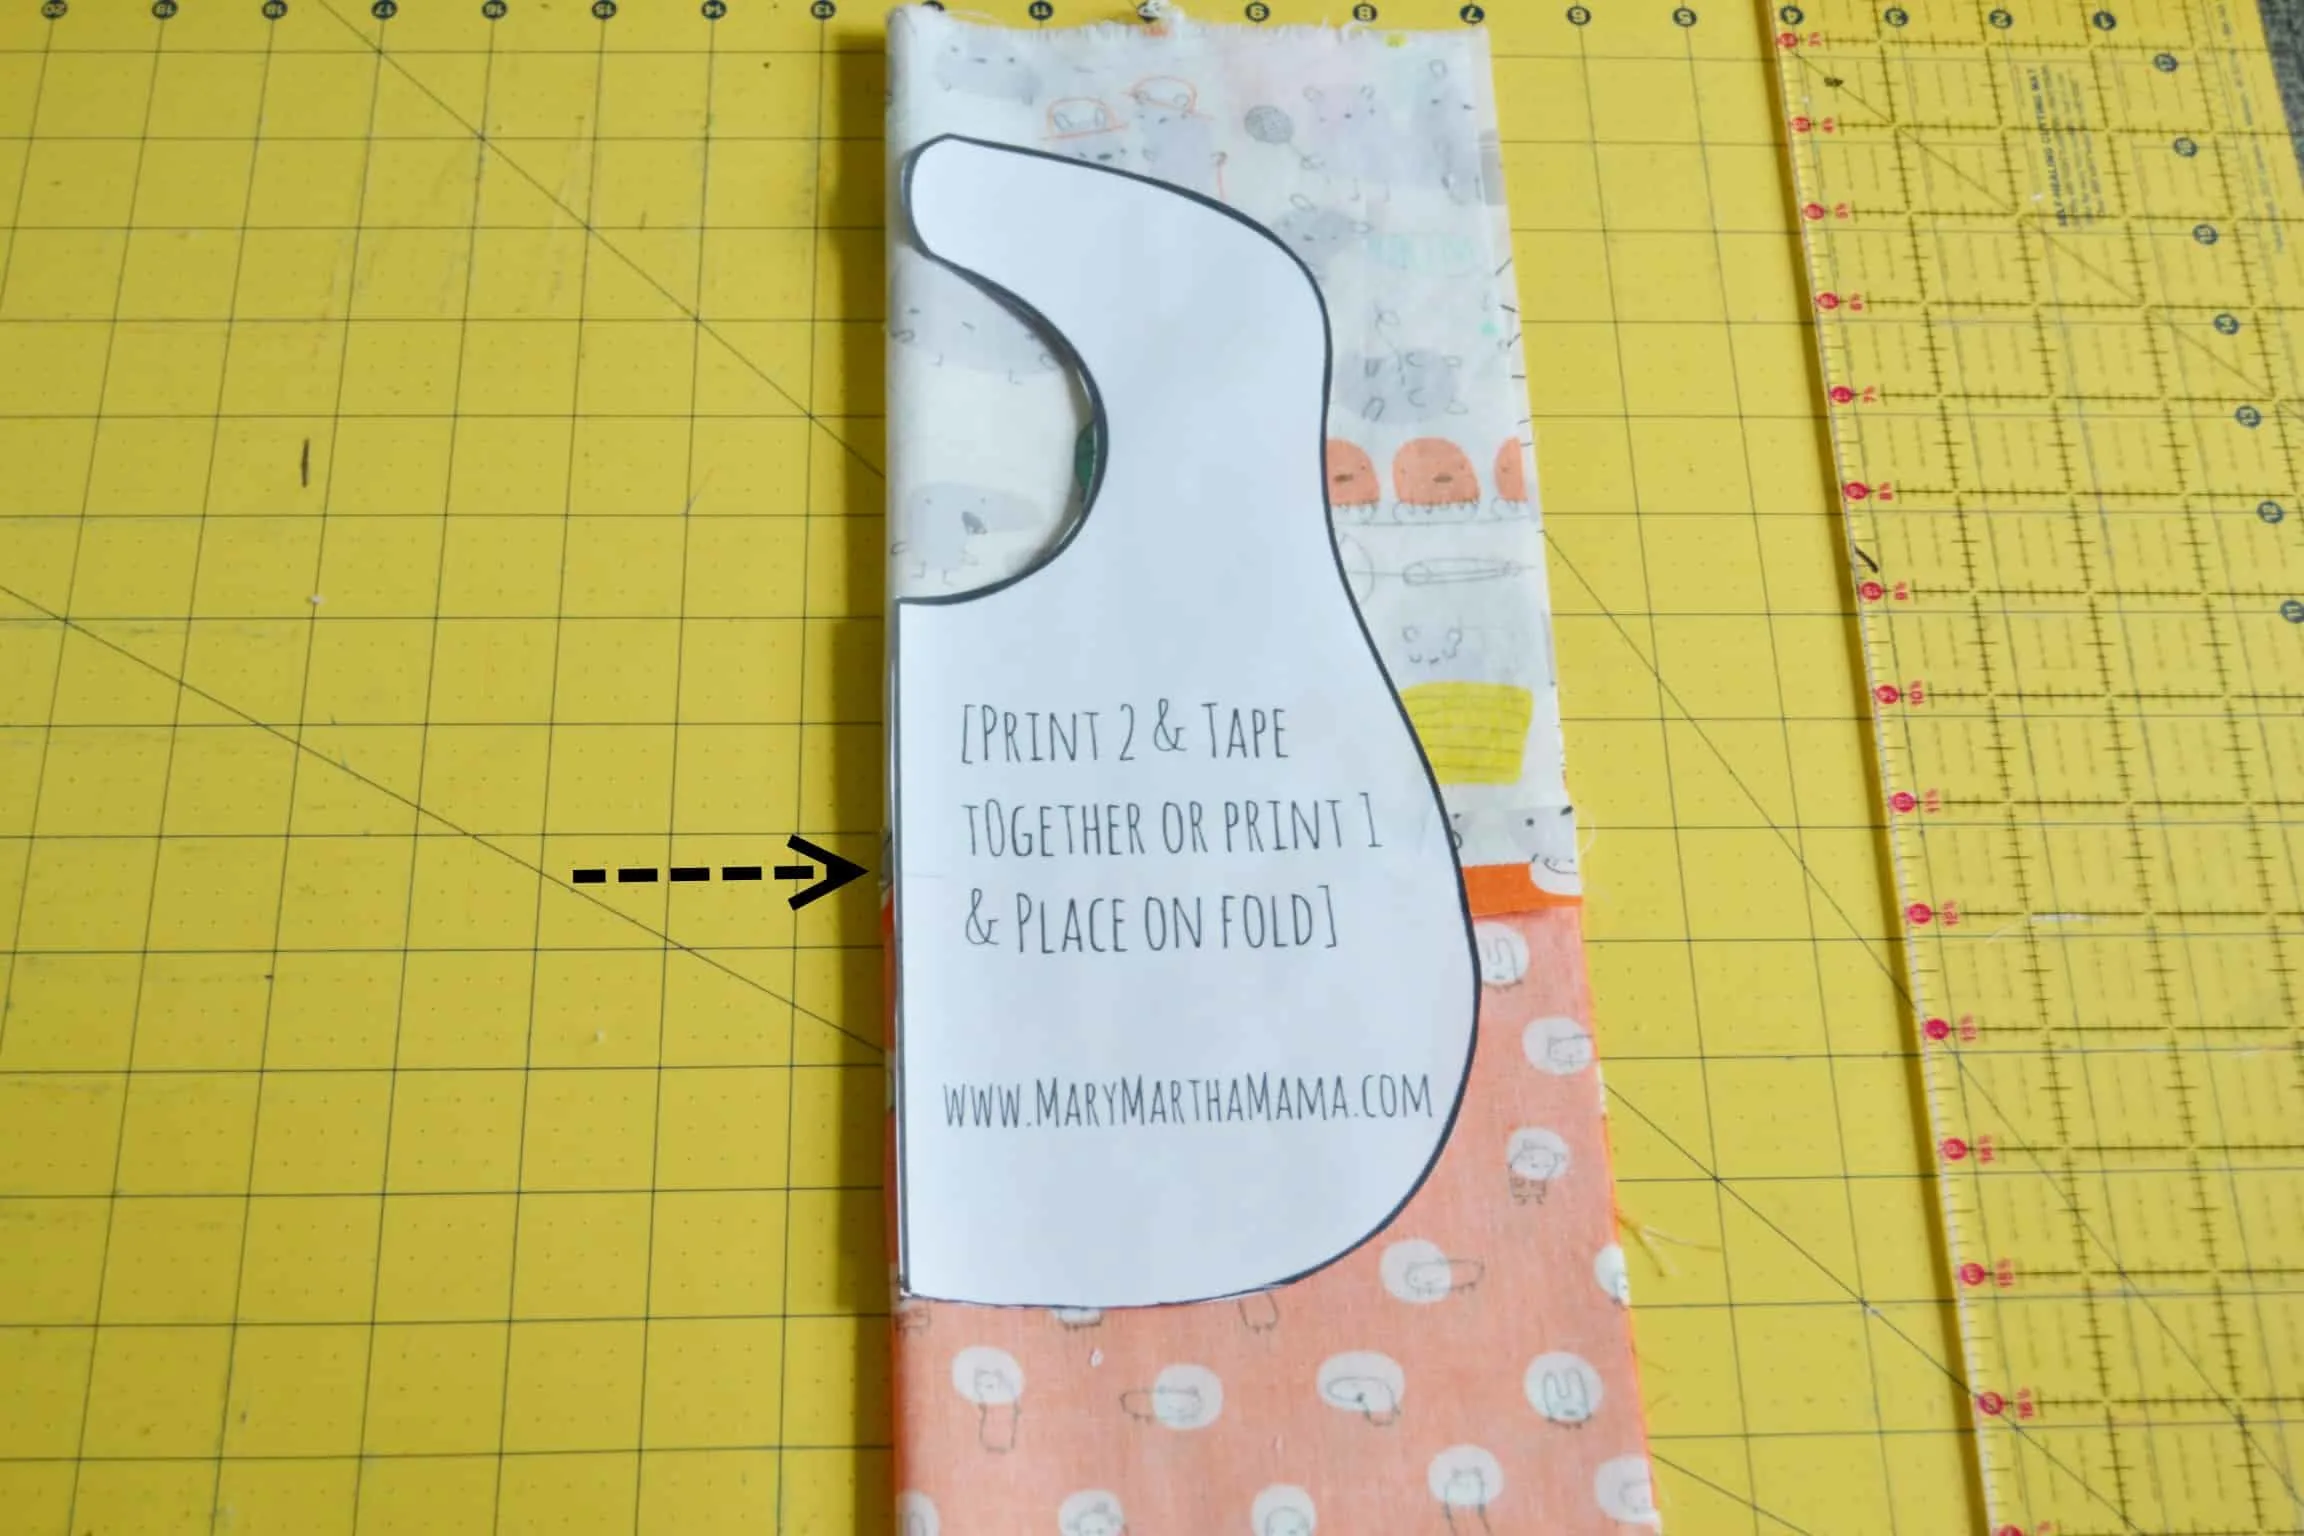
Step 3- Fold your fabric piece in half width-wise. Lay your pattern piece on top and line up the edge with the fold. I lined mine up so that about 2/3 of the bib would be the top fabric and 1/3 would be the bottom.
Line yours up wherever looks best to you. Then cut out your fabric piece.


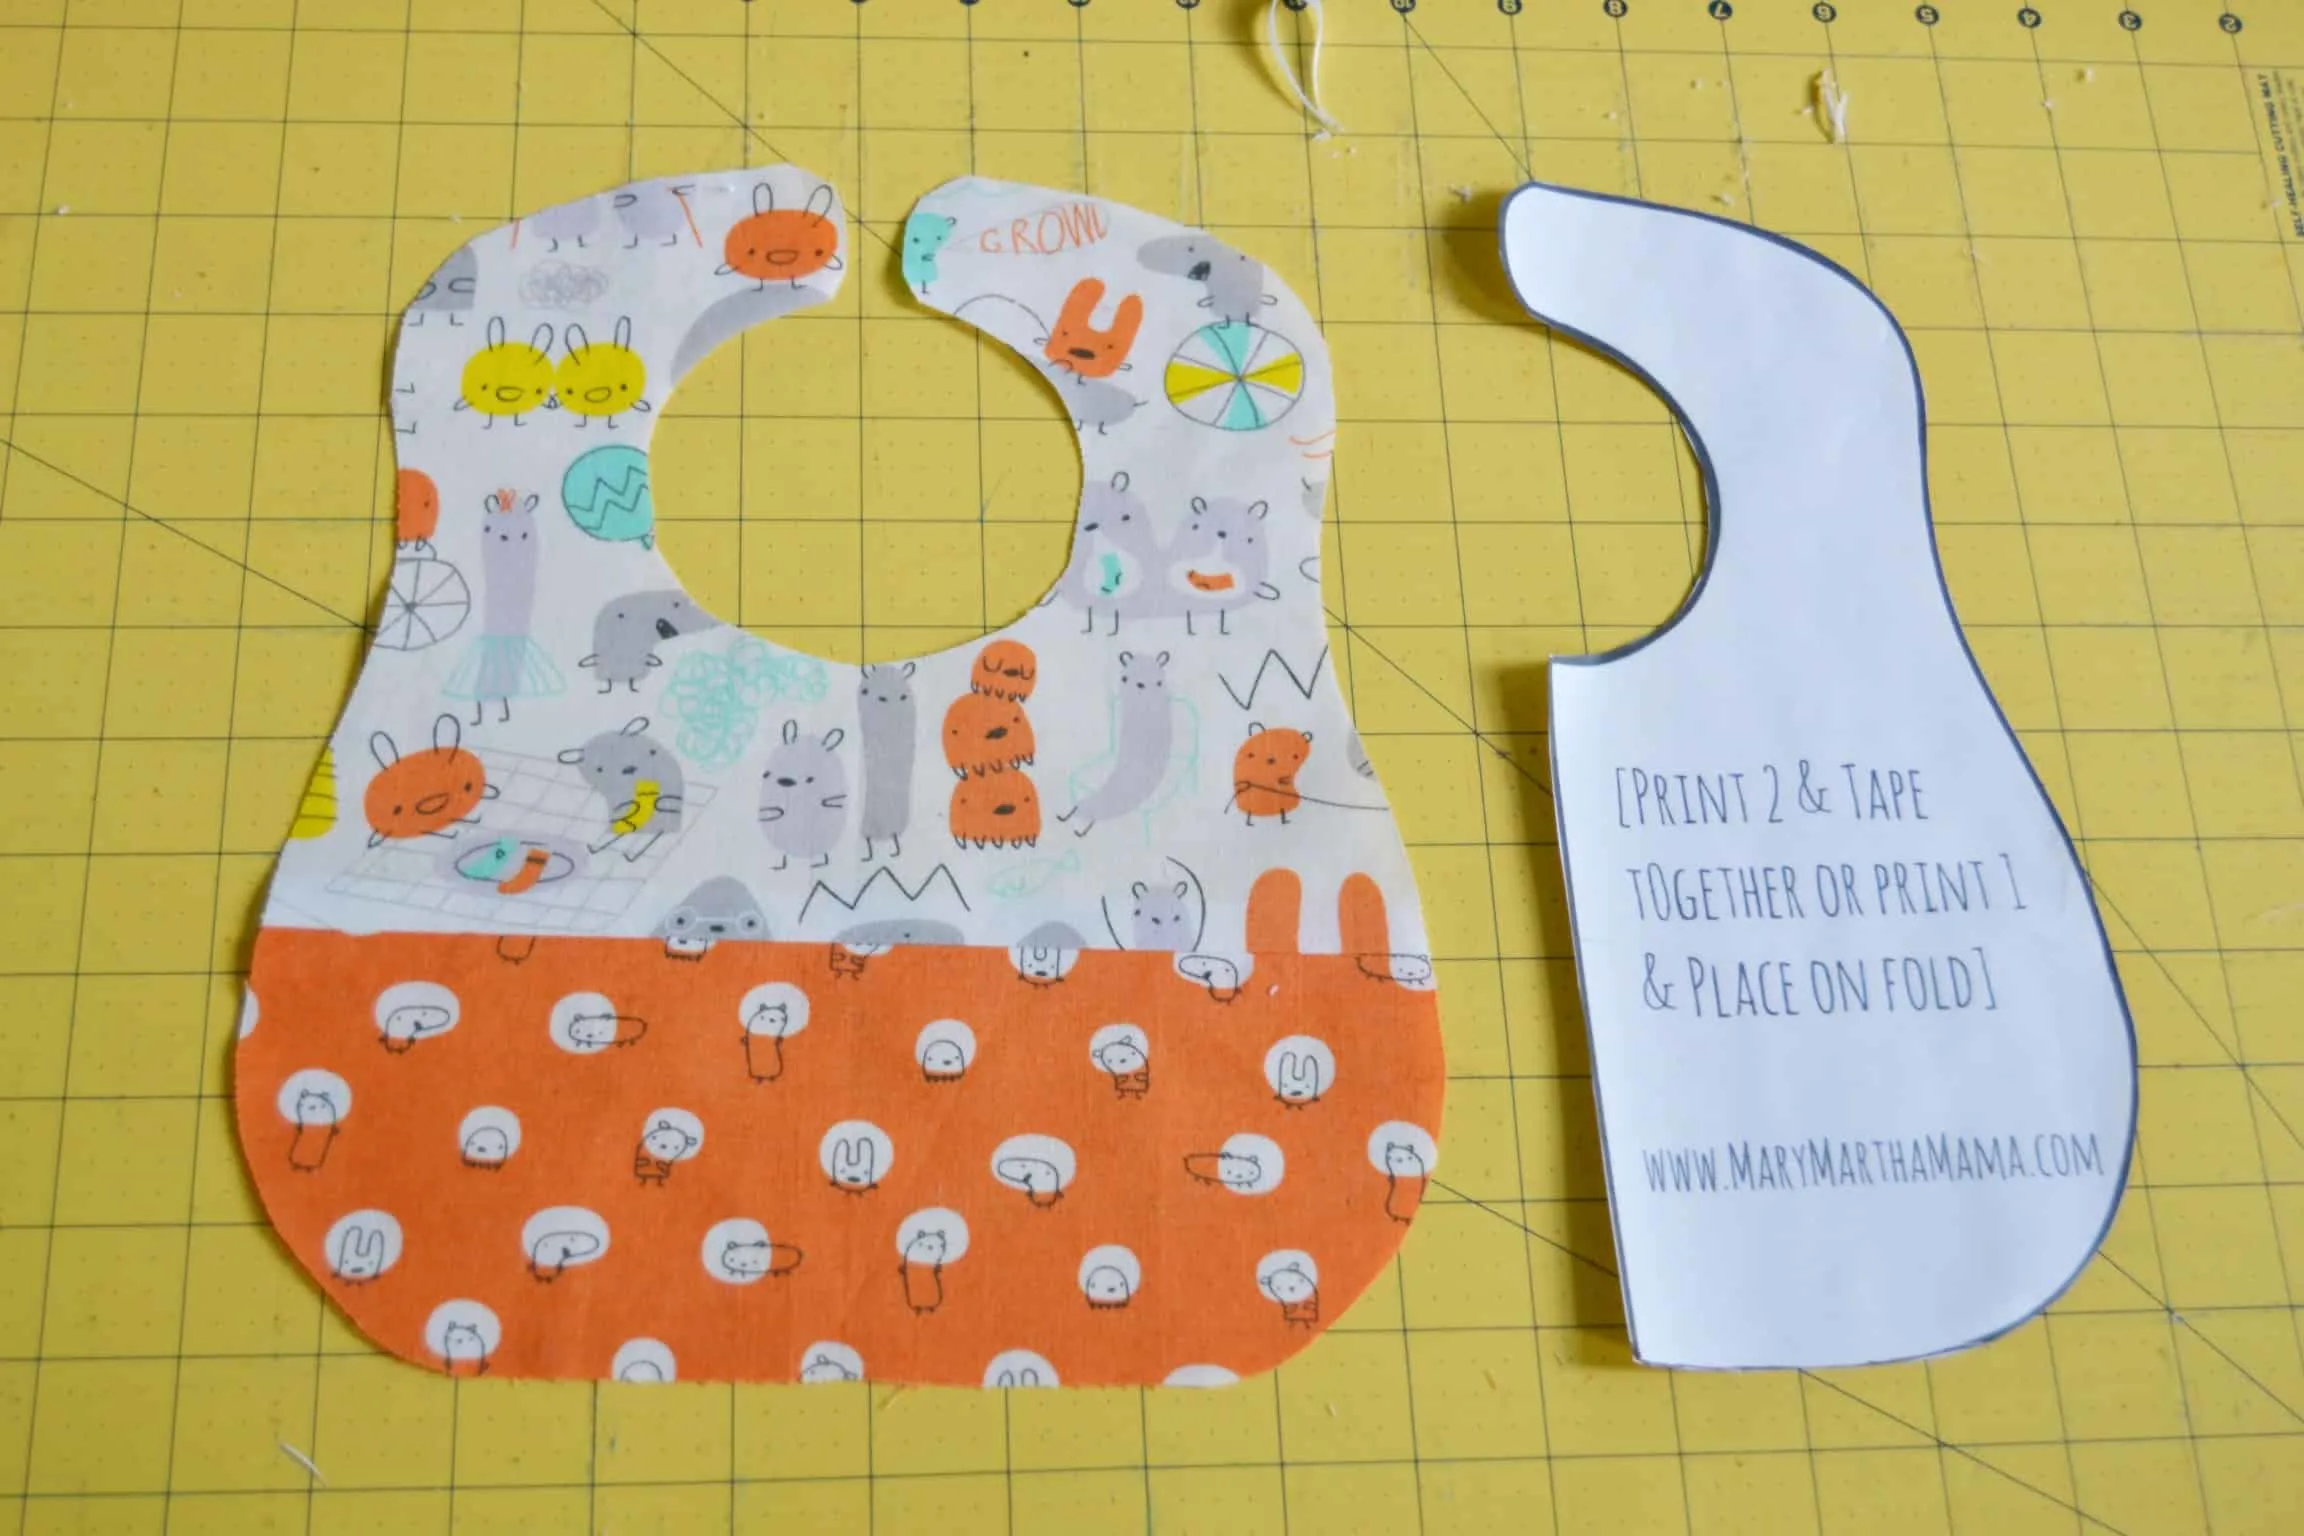
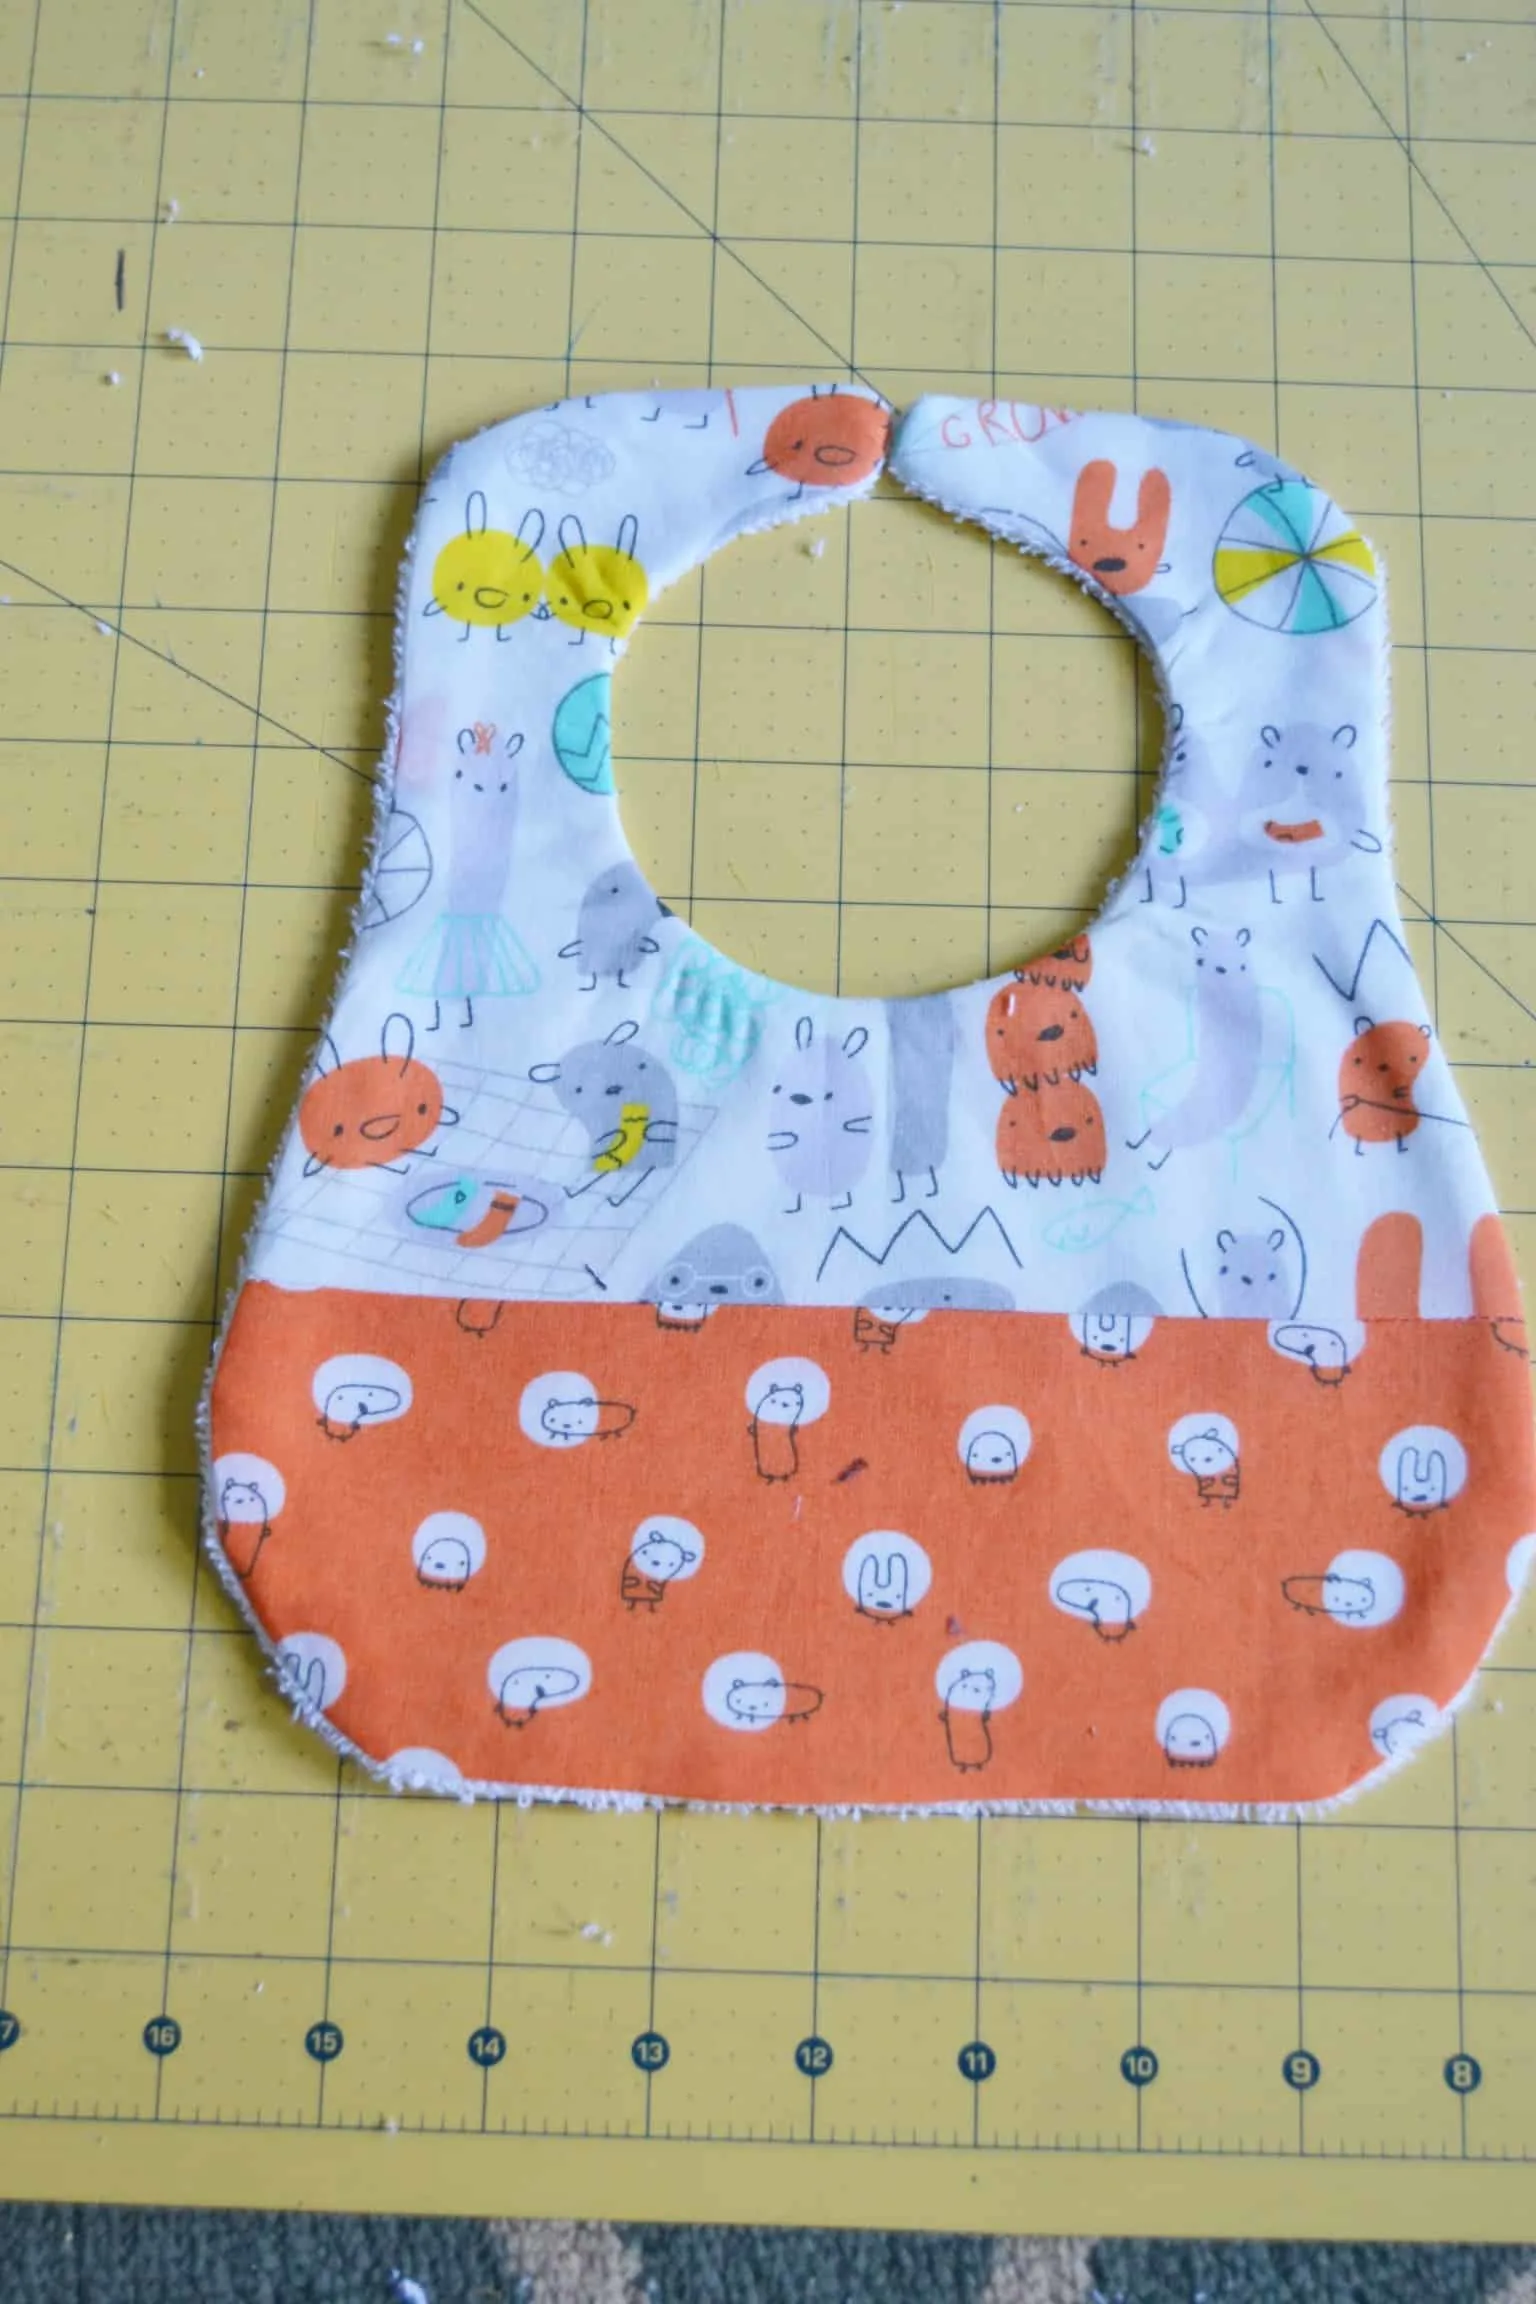
Step 4- Give the front piece of the bib a good press with the iron. Then place it right side down on the terrycloth. Pin it down.
Sew around the outside edges, sewing 1/4 inch from the edge BUT leave an opening at the bottom of about 4 inches unsewn. Backstitch when you begin and finish sewing. Trim the excess terrycloth around the edges.


Step 5- Turn the bib right side out using the opening that you left. Press the bib with your iron.

Step 6- Pin and sew around the edges, sewing 1/4 inch from the edge.
Step 7- Add your velcro or snaps onto the straps of your bib.

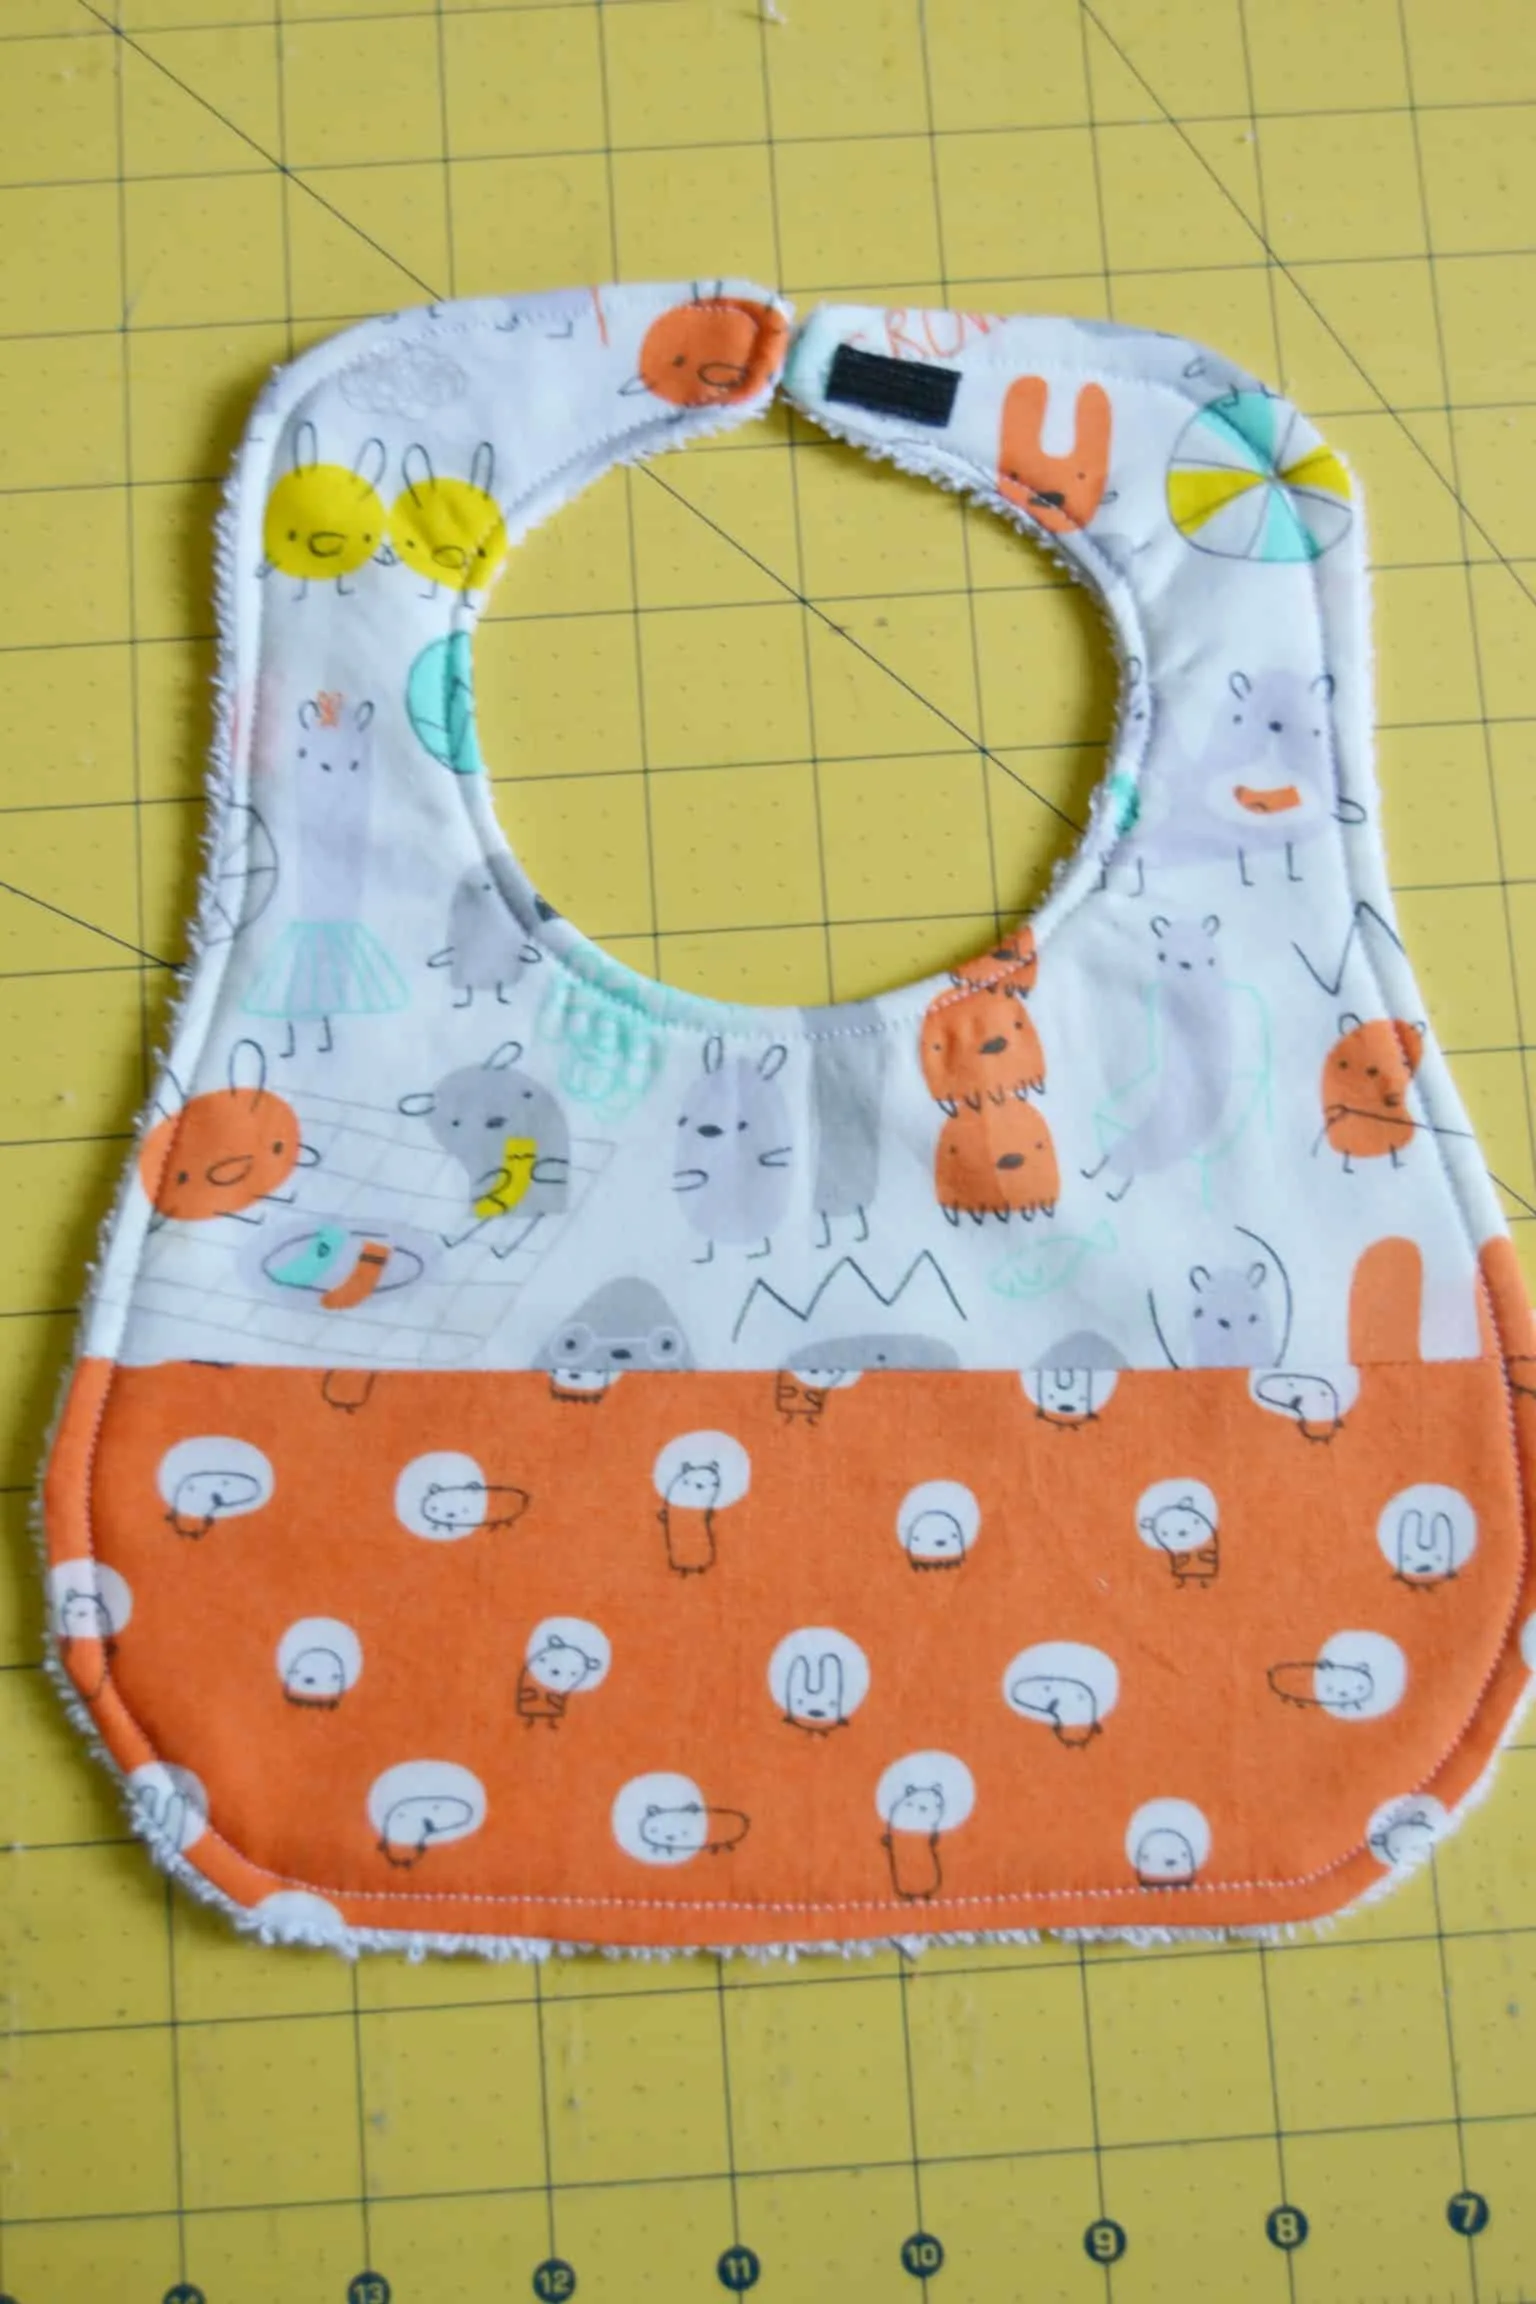
Give your diy baby bib one last ironing on the front and you’re all done!
Don’t forget, September is National Sewing Month so I’ll be doing a bunch of sewing this month and sharing it all here with you all.
Let me know in the comments below what sort of projects you’d like to see! And be sure to let me know what you’ve been sewing lately. I’d love to hear it!


Kathy
Thursday 2nd of November 2017
I just finished making your original pattern bib, In fact six of them. I love the style but am concerned that the neck opening is only appropriate on the old pattern to fit a newborn.
Cat
Thursday 2nd of November 2017
I'm so glad you like the pattern. This bib is intended for younger babies but babies come in all different sizes so take that into consideration. My boys were big babies (my oldest was almost 11 pounds) but one of my best friends has tiny babies (6 pounds). You can always adjust the pattern if you are concerned that it will be too small. You can blow it up on your copy machine to make it a larger bib overall, which would give you a larger neck opening. Hope this helps!
Patty
Monday 16th of October 2017
Ok..thank you..I will try those things ?
Cat
Monday 16th of October 2017
No problem! I hope it works!
Patty
Sunday 15th of October 2017
I love the little bib but I have tried to print the template but no matter what adjustment I try to make it shows up and prints horizontally which is of course way to small....any idea what I can do to change it from horizontal to vertical?
Cat
Sunday 15th of October 2017
I will try to help you as best I can but it’s difficult to do over the computer. Try checking your printer settings and do a print preview before trying to print again. I'm thinking maybe if you adjust from portrait to landscape that might solve the problem? Try adjusting that first to see if that helps. If not then try adjusting the other settings like the zoom or print to fit type settings, etc. I hope that helps!
Lesley Gilbert
Saturday 14th of October 2017
Thanks for a great tutorial and the pdf template - I love when there is a template :) I've shared your tut on Pinterest.
Cat
Saturday 14th of October 2017
You’re welcome! And thanks for pinning.
Lorene
Friday 13th of October 2017
Do you have a pattern for a bib with a pocket at the bottom front to catch pieces of food? That would be great. Thanks.
Cat
Friday 13th of October 2017
I'm sorry, I don't have one. I will add it to my list of things to make. In the meantime I'm sure if you search on Pinterest you'll be able to find some great patterns.