We are going on a Disney cruise soon and I decided it would be fun to participate in a Fish Extender exchange on our cruise so I made a DIY Fish Extender. Basically this is just a little gift exchange between people that sign up to do it. You deliver the little surprise gifts to the rooms in your group and you receive little gifts from them in turn. Everyone puts the gifts in what’s called a “fish extender”, which is basically like a little mail box. The name fish extender comes from the fact that on the first four Disney ships there was a fish clip next to each stateroom door that people would all hang something from for people to put the gifts into.


I wanted to share a DIY Fish Extender project that anyone could make so I decided to show how I made one that’s no sew and super simple. I used my Cricut to personalize it but if you don’t have one you could paint something on yours. I found out the hard way that you cannot iron on this particular fish extender that I bought. My initial plan was to iron on vinyl but it started to melt because the canvas is coated with something and so I wouldn’t recommend it! So I pivoted to just use permanent (stick-on) vinyl.
So to start things off I bought this canvas fish extender from Amazon. I checked a couple of stores in person to see if I could find some similar type of organizer for less but I couldn’t find anything that I felt would work.
DIY Fish Extender Tutorial
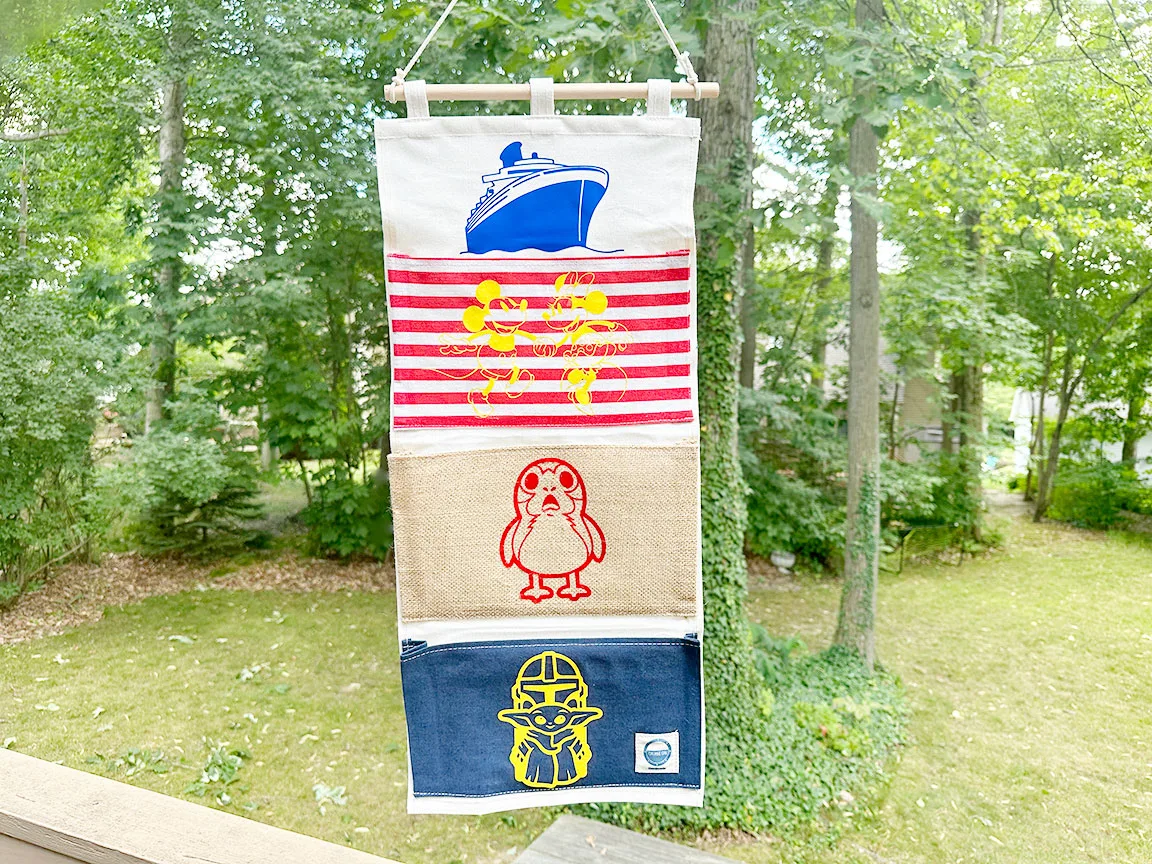
Then I decided on some designs for the fish extender. Cricut has a ton of Disney, Star Wars, Marvel, and of course cruise themed images to choose from. Since the fish extender that I got has 3 pockets I decided to make the top one kind of cruise themed for my husband and I and then I themed the other two pockets after each of my sons.
You can choose from so many of the awesome designs or if you want to see exactly which images I used then you can use my project file.
So then I cut the images out of the vinyl using my Cricut Maker 3.

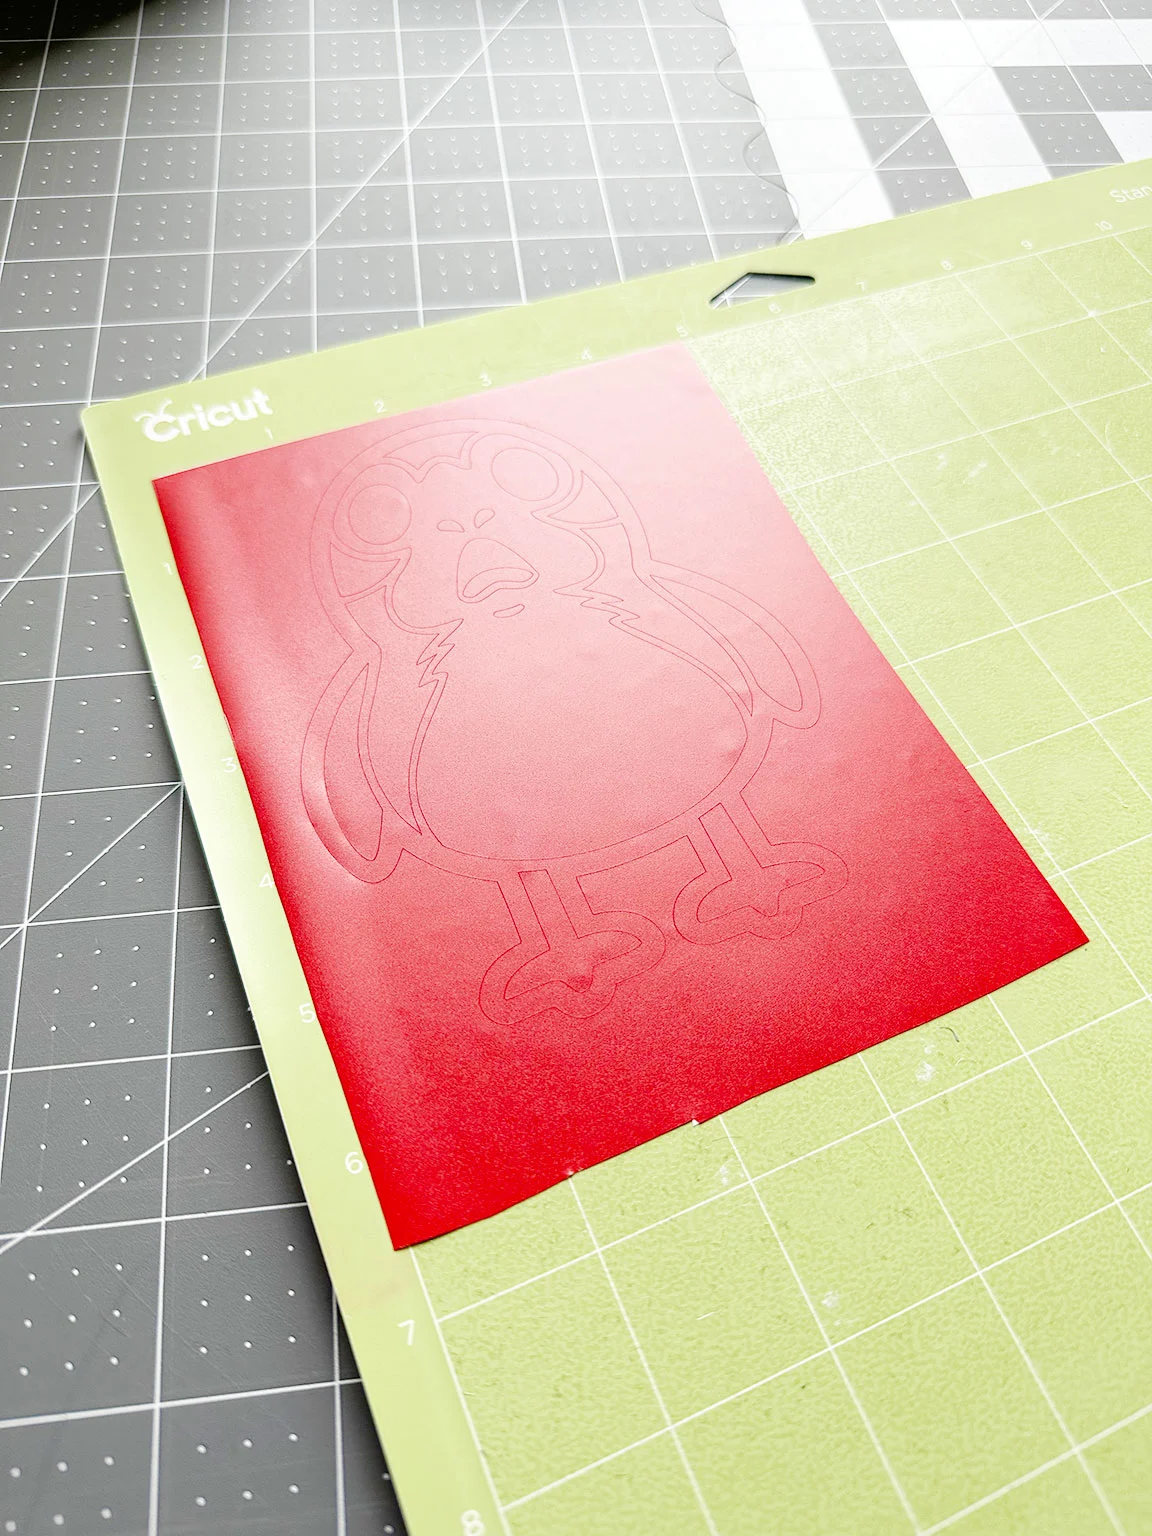
Next I weeded out the parts of the vinyl that were not part of my design.


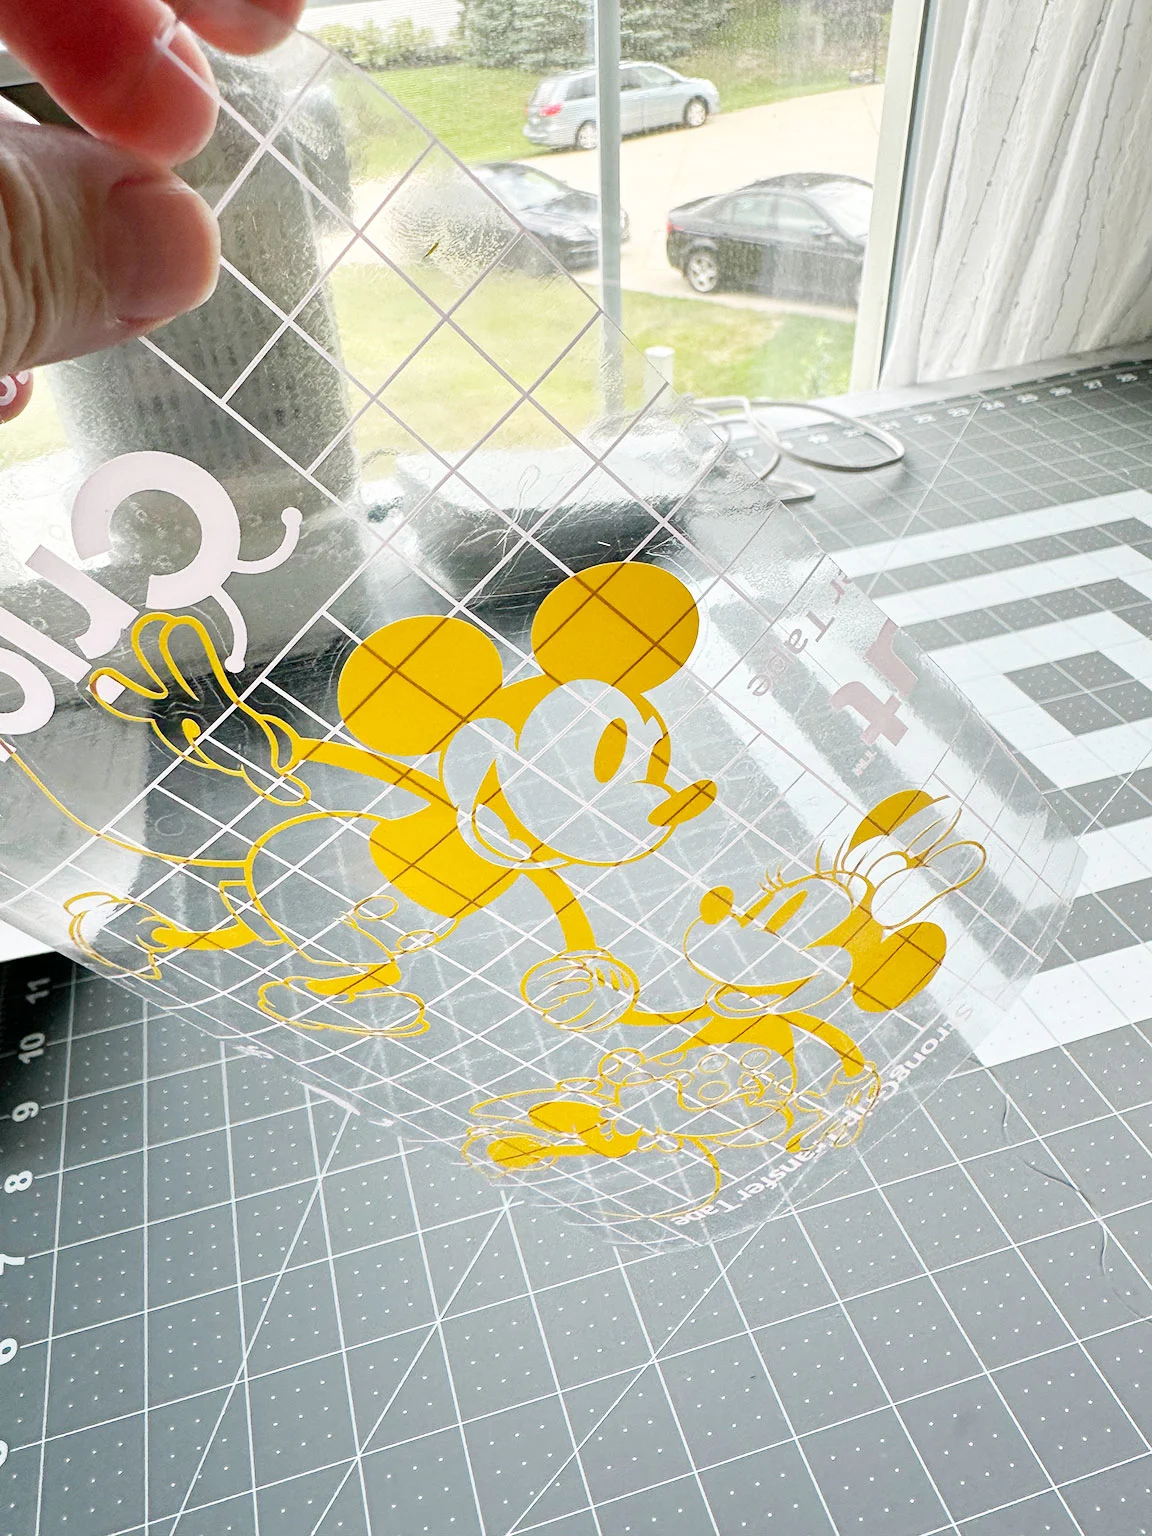
Then I applied transfer tape to the front of the vinyl and smoothed it down.


Then I peeled off the backing from the vinyl so that it’s just on the transfer tape.

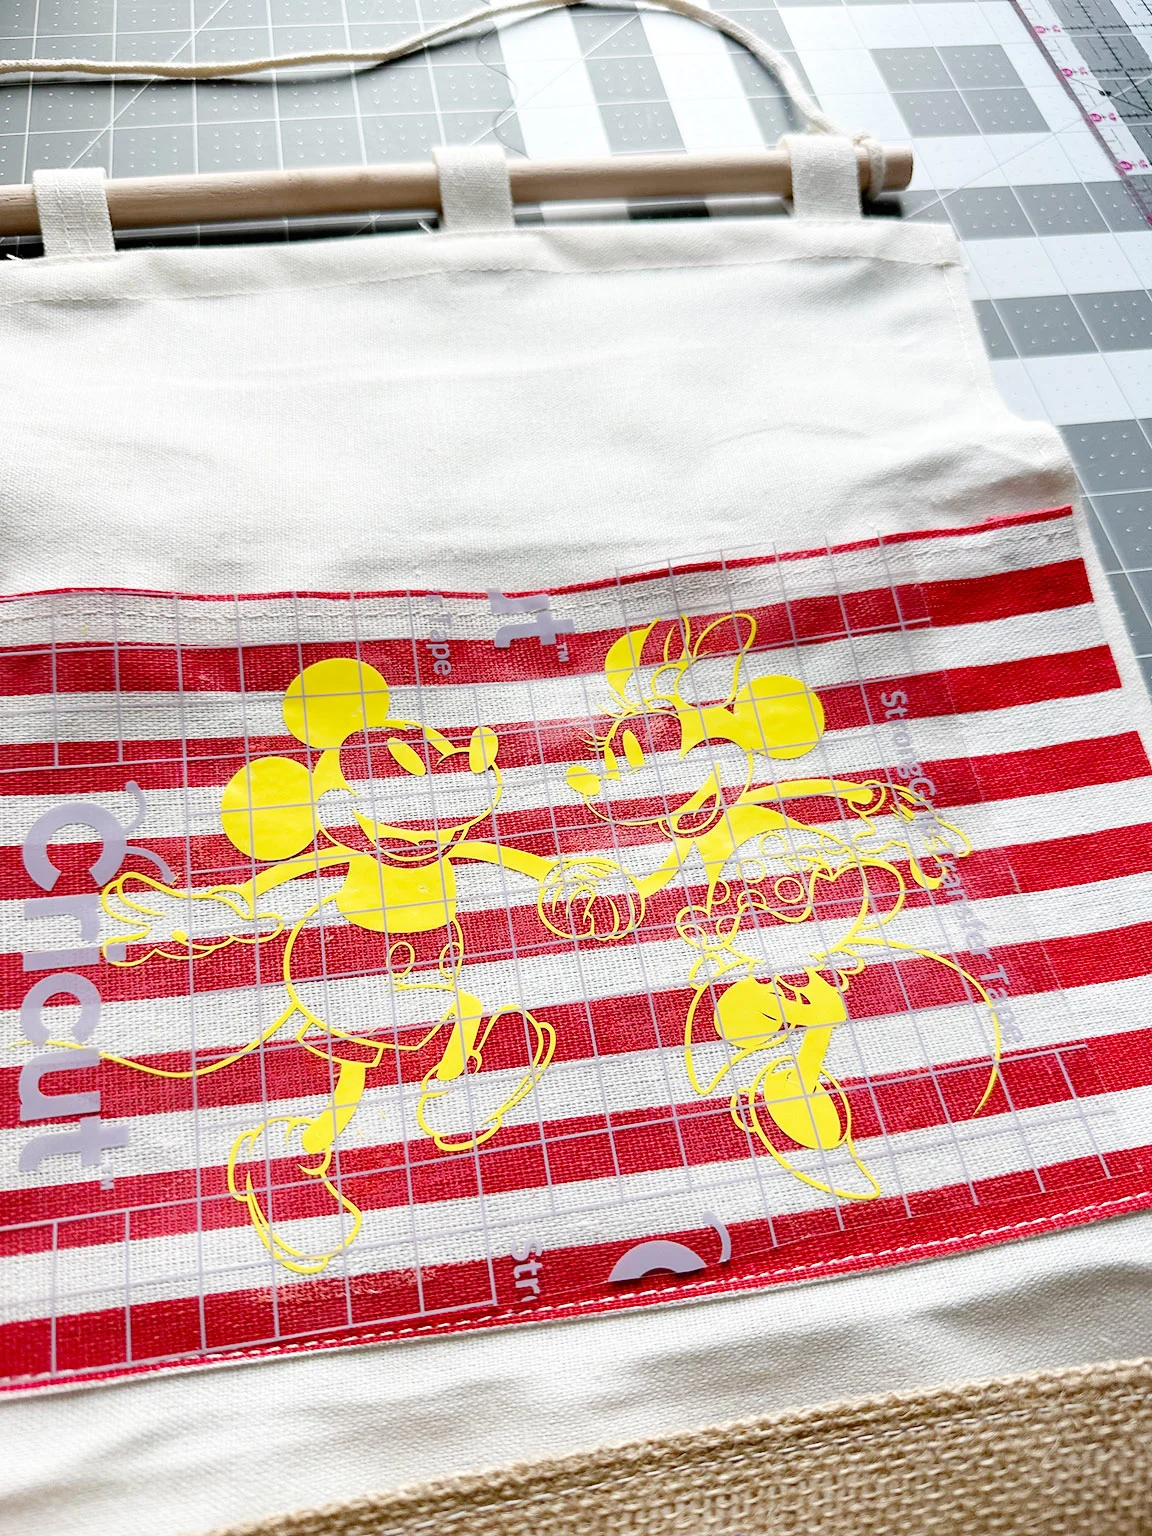
Then I used the transfer tape to apply the vinyl to the Fish Extender. I really had to smooth it down a lot, then I was able to peel the transfer tape off and leave the vinyl on the Fish Extender. If you start to peel the tape off and the vinyl doesn’t stick then try to smooth it down more before continuing to peel.

Once I applied all the vinyl then my DIY Fish Extender was all done! Tomorrow I’m going to try to share some of the items I grabbed for fish extender gifts to give to others.

More Disney Fun


Lisa P
Thursday 13th of July 2023
Great tutorial!!! We are going on a Disney cruise July 23rd, but I decided not to participate in the fish extenders - maybe next time!!
Cat
Thursday 13th of July 2023
Thank you! I totally understand! I think it will be fun for my kids to deliver our little gifts and receive some surprises but it's definitely taken me some time to figure it all out. Have a great cruise!!!